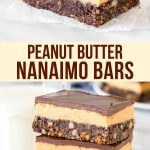
Peanut Butter Nanaimo Bars
I may receive compensation in the form of payment or products to supplement my posts, but all opinions remain my own. Read our disclosure policy.
A twist on classic, Canadian Nanaimo bars – these peanut butter Nanaimo bars are perfect for anyone who loves peanut butter or finds the traditional version a little too sweet. I love to make these over the holidays, but they’re delicious any time of year.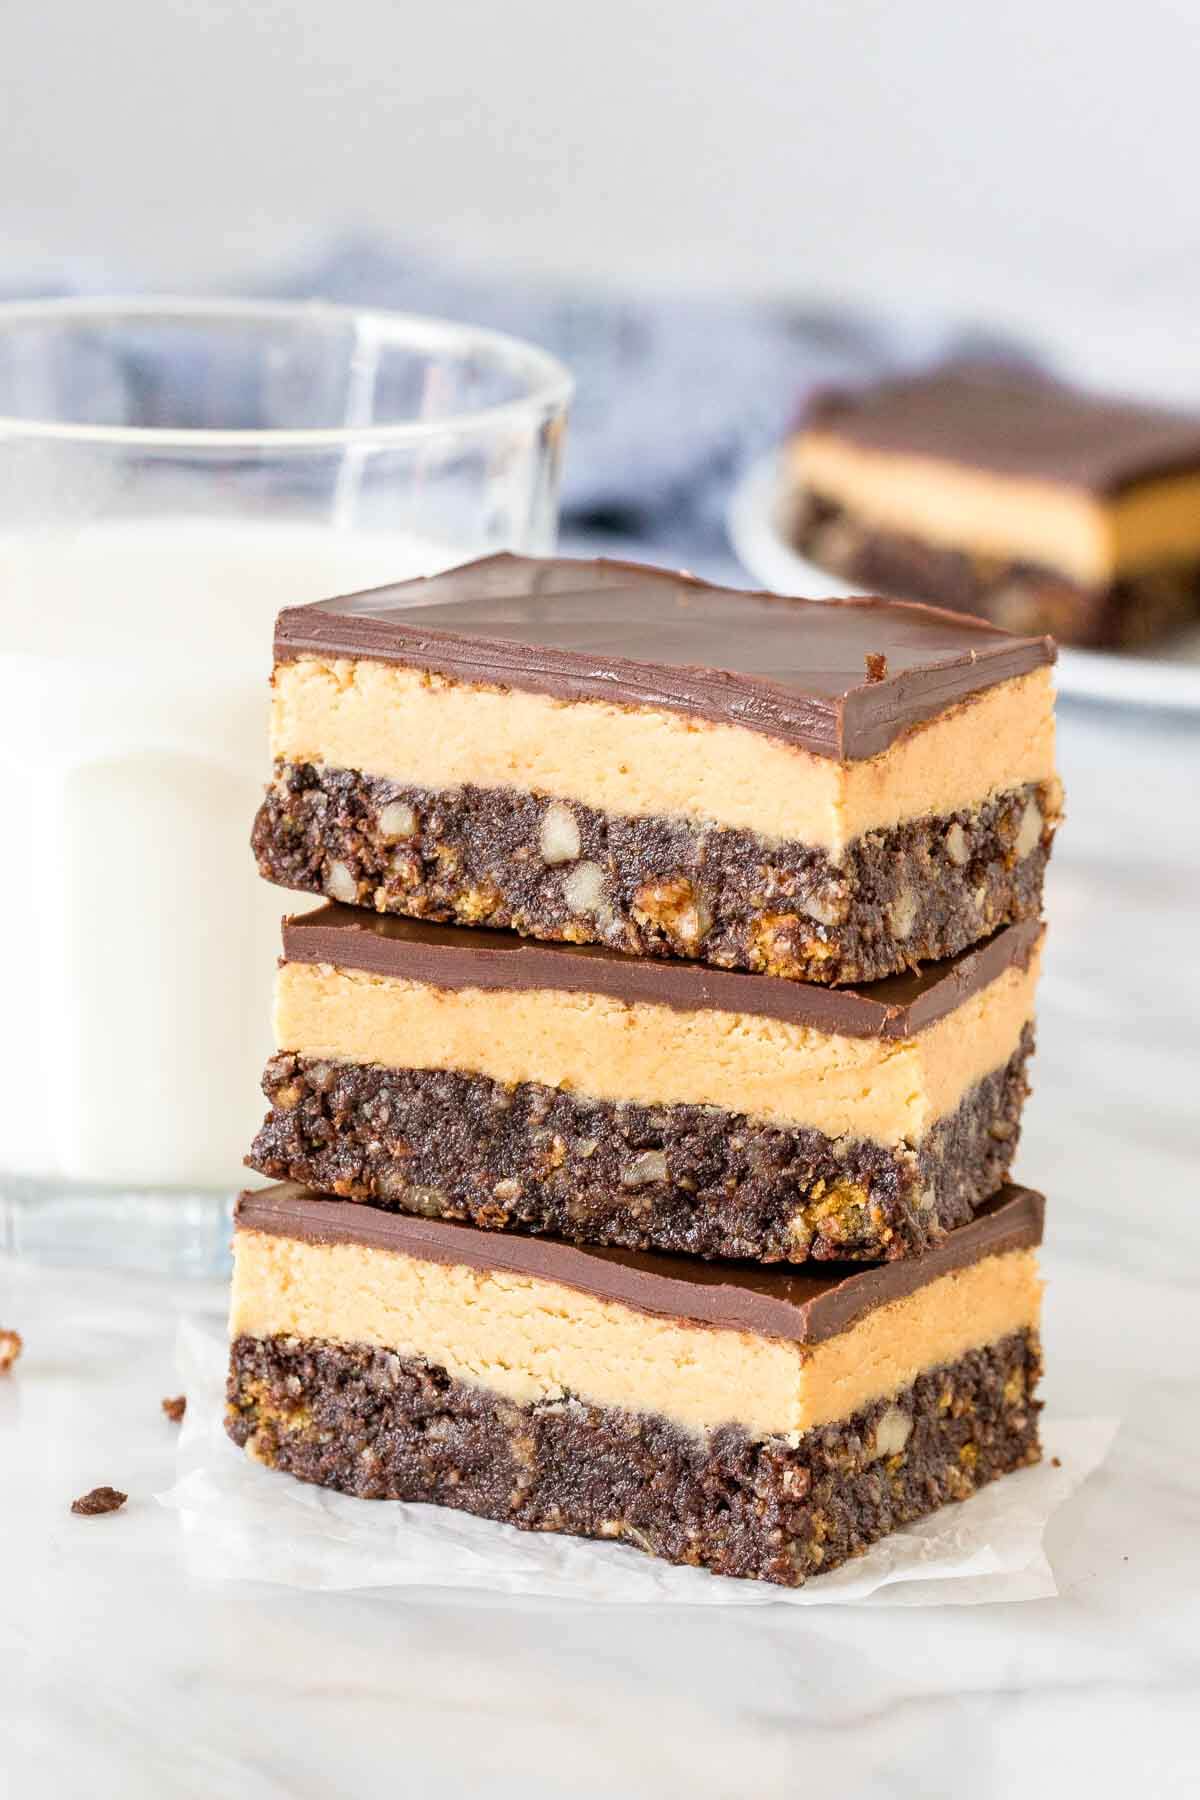
These peanut butter Nanaimo bars are the perfect combination of no-bake peanut butter bars and classic Nanaimo bars. Named after Nanaimo, British Columbia, they start with the same chocolate base layer as classic Nanaimo bars. It’s chewy, chocolatey and filled with crushed graham crackers, chopped nuts and coconut. But instead of custard buttercream in the middle, we’re making a delicious peanut butter filling – like the middle of a peanut butter cup. Then a layer of milk chocolate goes on top for a sort of chocolate – peanut butter- chocolate type of sandwich.
They definitely aren’t as sweet as the traditional version, but they have a rich peanut butter flavor and addictive chewy, chocolate base.
Recipe Tips & Things to Watch For

The Base Layer
The most challenging part about making these bars is the base layer. (Don’t worry – it’s not hard). You’ll make a double boiler first by adding a little water (maybe 1/2 inch) to a saucepan and placing a glass bowl over top. It’s important that the bottom of the glass bowl does not touch the water. Then turn the boiler to a low-medium heat so that the water is gently boiling.
From there – you’ll melt together the butter, sugar and cocoa powder in the glass bowl over the simmering water. Once melted – whisk 1 egg into the mixture. It’s imperative that you whisk constantly, otherwise you’ll get scrambled eggs. This process of whisking the egg into the chocolate over the simmering water cooks the egg so it’s safe to eat. The mixture will get glossy and thick after about 5 minutes of whisking which is how you know it’s done.
Then stir the chocolate mixture into the crushed graham crackers, nuts and coconut. Typically, I use chopped walnuts in my Nanaimo bars. but for this peanut butter version, you could also use chopped peanuts. The mixture then gets pressed into the bottom of the pan, and you’ll pop it in the fridge as you make the middle. 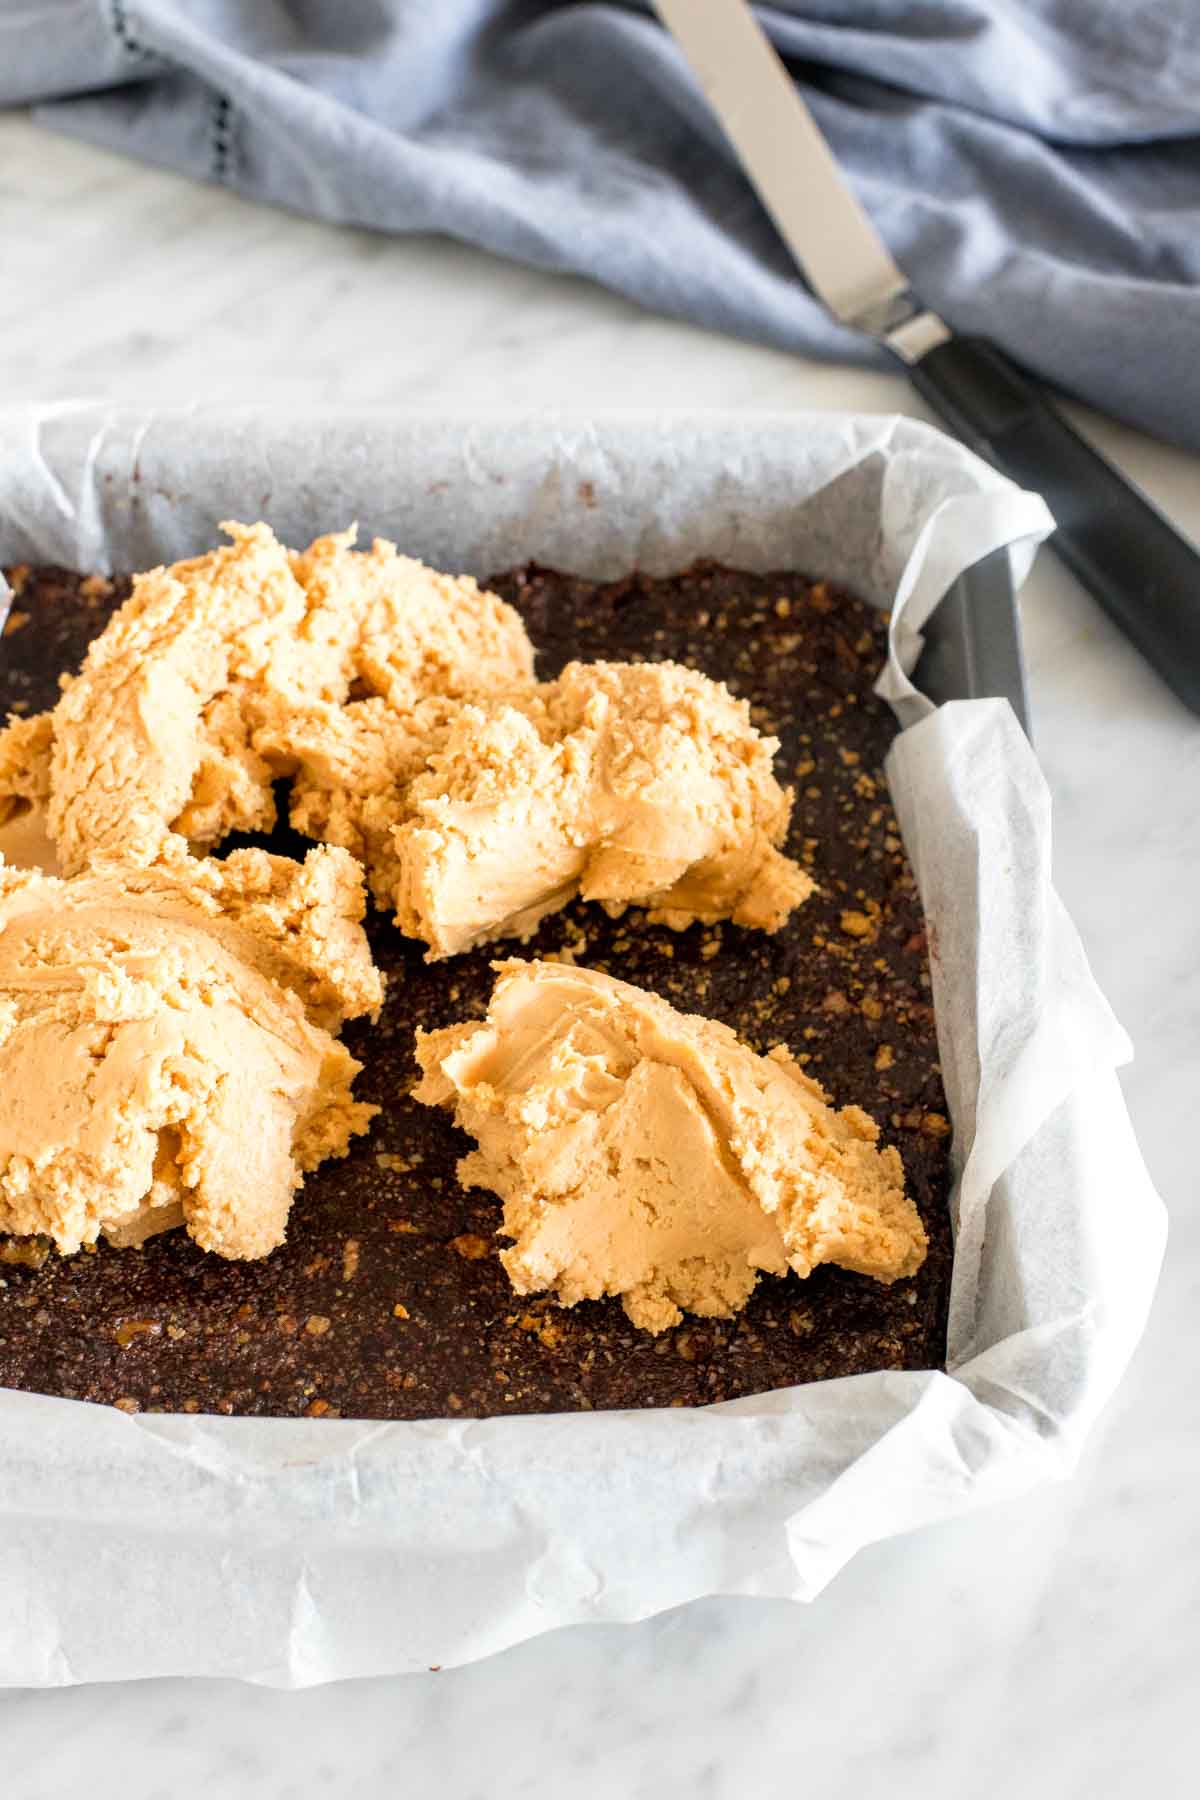
The Peanut Butter Layer
Essentially, it tastes like the middle of a peanut butter cup. It’s a little thicker than peanut butter frosting and not quite as sweet. The most important tip here is to use smooth peanut butter and to ensure that you don’t use natural or homemade. These kinds of peanut butter can separate – which we definitely don’t want.
The Chocolate Topping
Typically in Nanaimo bars, I use semi-sweet chocolate for the topping. However, in this recipe I typically use milk chocolate or a combination of milk chocolate and dark chocolate because I find it’s more reminiscent of a peanut butter cup. So feel free to use your favorite variety of chocolate. Whenever melting chocolate in the microwave, know that:
- Baking chocolate melts much better than chocolate chips (chocolate chips have stabilizers in them so that they keep their shape)
- Always, always, always microwave on low-medium power, and not high power (which is the default on many machines). High power can burn or bake the chocolate instead of melting it.
I always add a tiny bit of oil to the chocolate so that it’s glossy and slices more easily. When slicing Nanaimo bars, or any dessert bar with chocolate topping for that matter, I always recommend scoring the top of the chocolate with a thin knife when it’s about 80% hardened. This way, when you’re ready to slice the bars you can do so without the chocolate cracking. 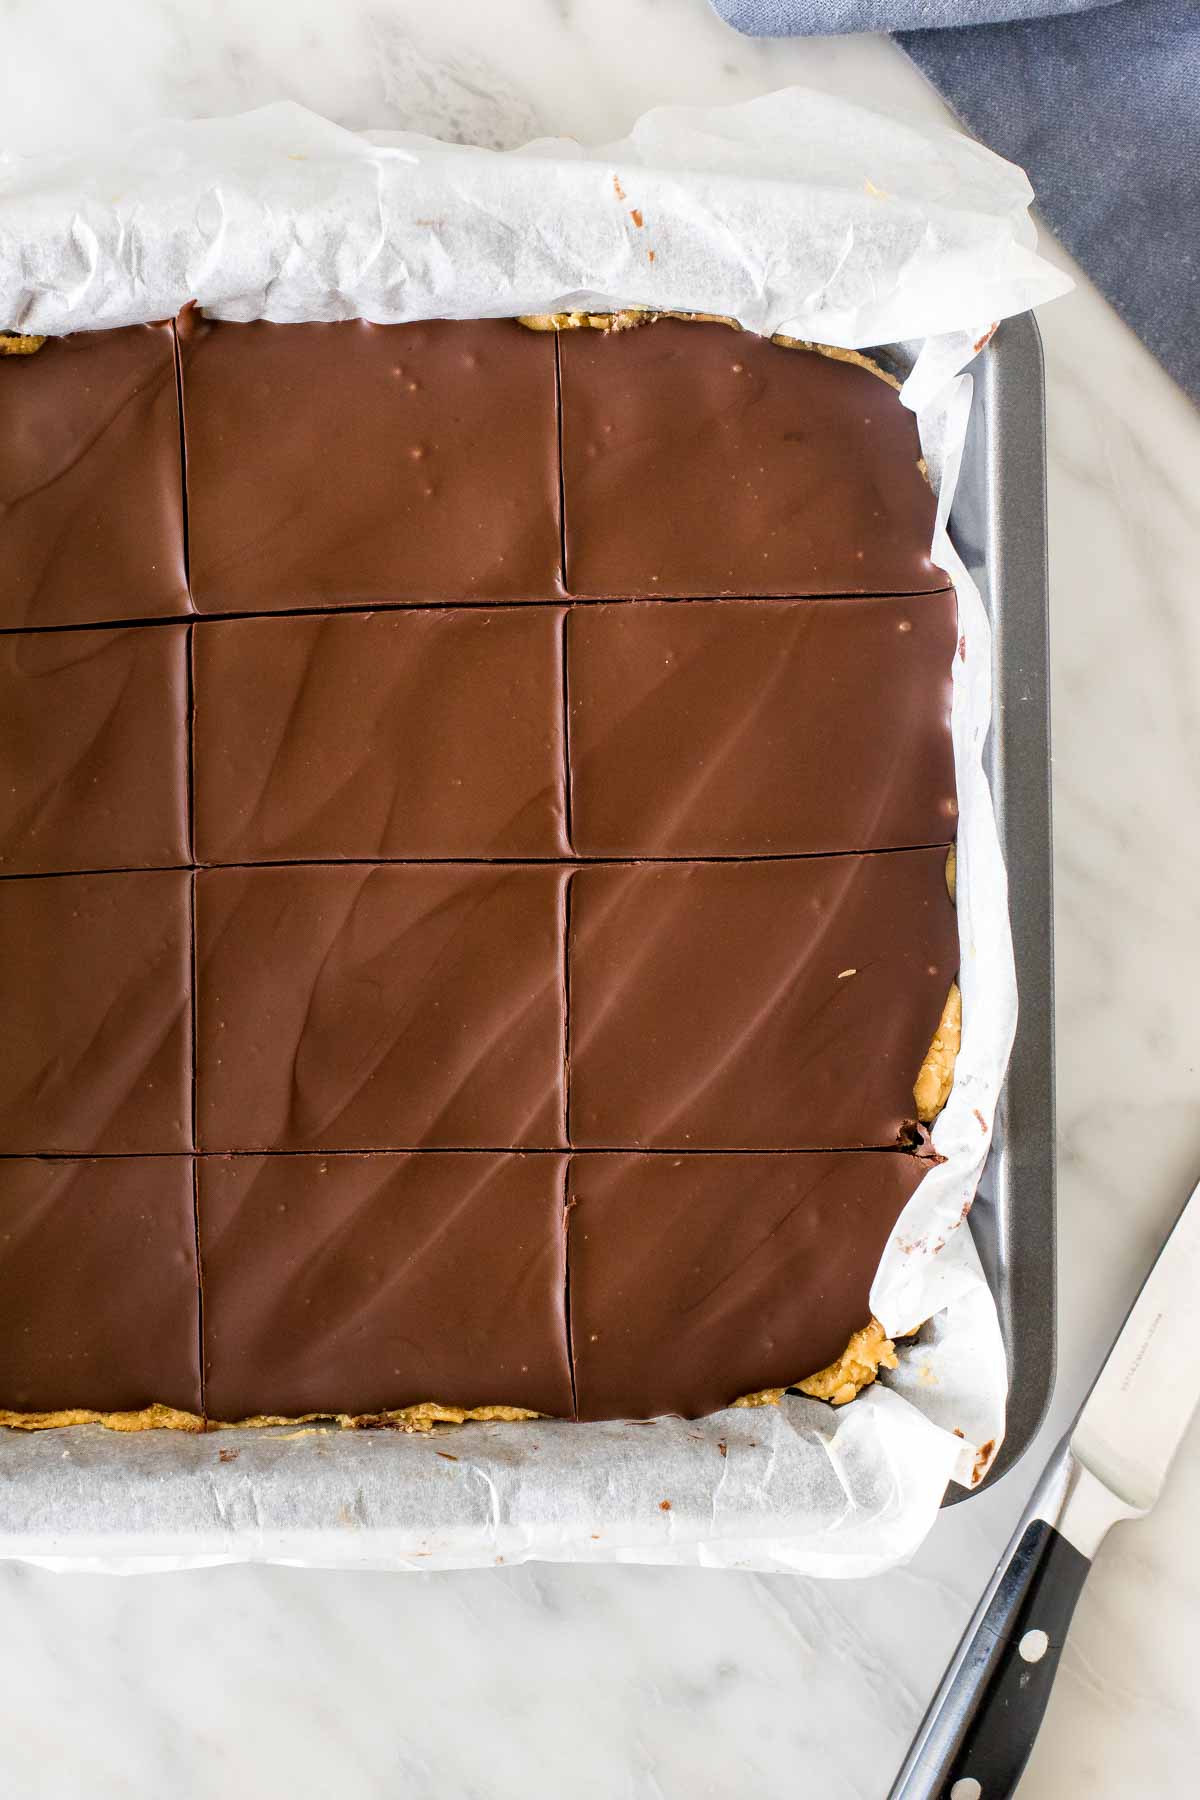
For a Double Batch
This recipe is designed for an 8×8 inch pan (a 9×9 inch pan will work too). If you’d like to double the recipe, feel free to double all the ingredients and make it in a 9×13 inch pan instead. Note that you will need a very large double boiler to melt together the ingredients for the chocolate base layer.
Chewy, chocolate base, delicious peanut butter filling, and chocolate on top – these peanut butter Nanaimo bars are right up my alley. And for even more delicious, Canadian treats – make sure to try:
- Classic Nanaimo Bars
- Confetti Squares – AKA peanut butter marshmallow squares
- Haystack Cookies
- Mint Nanaimo Bars

Peanut Butter Nanaimo Bars
Equipment
- 8x8 inch (20x20 cm) pan
Ingredients
Base Layer
- 1 3/4 cups graham crumbs, or digestive biscuits
- 1/2 cup chopped walnuts, or finely chopped peanuts
- 1/2 cup finely shredded coconut, sweetened or unsweeted
- 1/2 cup unsalted butter
- 1/3 cup cocoa powder
- 1/4 cup white sugar
- 1 large egg*
Peanut Butter Middle
- 1/4 cup unsalted butter, softened
- 1/2 cup smooth peanut butter *, do not use natural or homemade
- 1 1/2 - 2 cups powdered sugar
- 1 teaspoon vanilla extract
- 2 tablespoons milk
Chocolate Topping
- 4 ounces milk chocolate*
- 2 ounces dark chocolate*
- 1/2 teaspoon vegetable oil, canola works too
Instructions
- Line an 8x8 inch (20x20 cm) pan with parchment paper leaving an overhang around the sides.
Base Layer
- Add the graham crumbs, chopped nuts and coconut to a large bowl and gently stir together.
- Add about 1/2 - 1 inch (1-2 cm) of water to a medium saucepan and place a large glass bowl over top (or add 1/2-1 inch water to a double boiler). The bowl should sit in the saucepan, but the bottom shouldn't touch the water. Turn the burner to low-medium heat, bringing the water to a gentle boil.
- Add the butter, cocoa and sugar to the glass bowl and melt everything together until smooth and the sugar is no longer grainy.
- While whisking constantly, add the egg to the chocolate mixture (keeping the glass bowl over the saucepan). Whisk the mixture constantly for about 5 minutes until it turns thick and glossy.
- Pour the chocolate over the bowl of graham crumbs, chopped nuts and coconut and stir.
- Press the mixture into the bottom of the lined pan, and place in the fridge as you make the peanut butter layer.
Peanut Butter Layer
- In a medium bowl, beat the butter until smooth and no lumps remain. Beat in the peanut butter until smooth.
- Mix in 1 1/2 cups powdered sugar and the vanilla extract. The mixture will be very thick.
- Beat in the milk 1 tablespoon at a time, adding in a little extra powdered sugar if you prefer it sweeter.
- Spoon the peanut butter mixture over the base layer and spread/press it down over the base. If you find that it's sticking to your fingers, using a piece of wax paper between your fingers and the peanut butter layer can help.
- Place the pan back in the fridge for about 30 minutes to firm up.
Chocolate Topping
- Chop the chocolate into very small pieces and place in a heat proof bowl.
- Microwave on medium power for 45-second intervals, stirring between each interval until smooth. Do not microwave on high power (which is standard on many microwaves) - high power can burn or bake the chocolate, and make it become grainy in texture.
- Whisk in the oil.
- Pour the chocolate over the peanut butter layer and spread smooth. Place the pan in the fridge for the chocolate to set.
Slicing and Serving
- When the chocolate is about 80% hardened, gently score the chocolate layer where you plan to slice the bars using a thin, sharp knife. Return to the fridge for the chocolate to fully set.
- Once set, remove the pan from the fridge. Lift the bars out of the pan using the overhang of the parchment paper and place on a cutting board.
- Cut the bars using a large, sharp knife, going through where you scored the chocolate layer. For clean cuts, wipe off the knife after each slice.
Notes
- When you whisk the egg into the chocolate mixture over the simmering water, it will temper - and therefore you are not eating raw egg. If you are concerned about the egg - feel free to bake the base layer for 12 minutes in the oven at 350F degrees. Make sure to cool the base layer fully before adding the peanut butter layer on top.
- The oil can separate out of natural and homemade peanut butters, which is why I do not recommend using them in this recipe.
- Feel free to use 6 ounces of your favorite chocolate for the topping. I sometimes use just milk chocolate, or semi-sweet chocolate instead of the combination of milk and dark. 6 ounces is approximately 1 cup of chocolate chips. I do recommend using baking chocolate however because it melts better.
- Store bars in an airtight container at room temperature for up to 4 days, or in the fridge for up to 1 week.
- Nutrition information is an estimate only and based on 1 bar, assuming the pan is sliced into 12 large, equal-sized pieces. I often cut the bars much smaller, if I'm making a tray of treats for the holidays.
- This recipe can be doubled and made in a 9x13 inch pan.