Chocolate Blossom Cookies
I may receive compensation in the form of payment or products to supplement my posts, but all opinions remain my own. Read our disclosure policy.

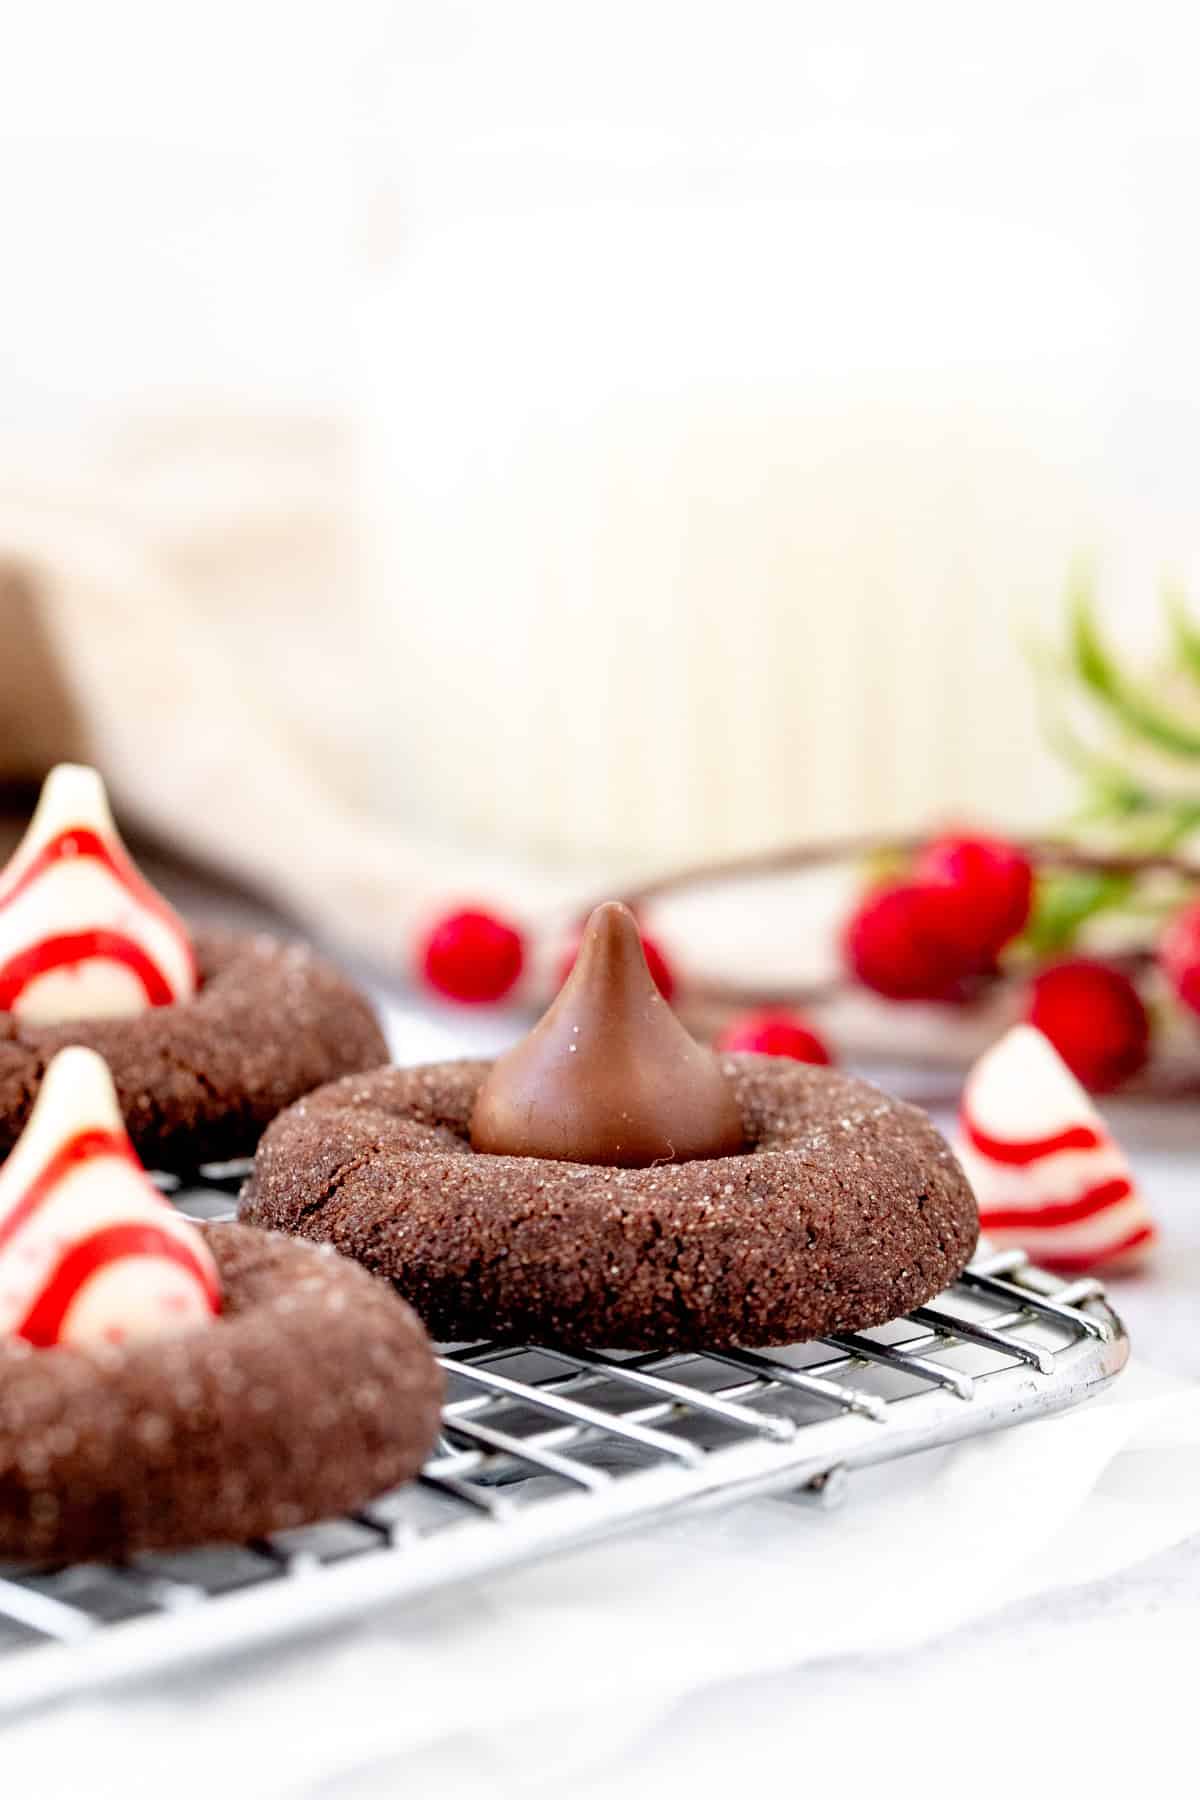
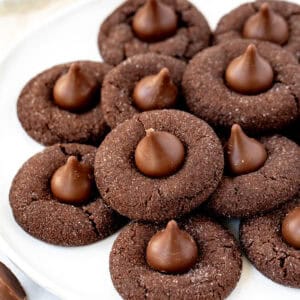
These chocolate blossom cookies are soft, chewy and fudgy with a delicious chocolate flavor, crunchy sugar coating and a chocolate Hershey’s kiss on top. Add these to your Christmas cookie baking!

Chocolate kiss cookies are the chocolate version of classic peanut butter blossoms. They’re perfectly soft and tender with a delicious chocolate flavor. Each cookie dough ball is rolled in sugar before baking, then a Hershey’s Kiss is placed on top of each warm cookie after they come out of the oven. You can also use the Candy Cane Hershey’s Kisses to make the cookies extra festive.
I love making these chocolate blossom cookies over the holidays because the recipe is so simple, there’s no decorating skills needed, and the cookies look beautiful on your Christmas cookie tray – but they’re equally delicious all year round.
Ingredients Needed
- All-Purpose Flour. Be sure to measure correctly so that the cookies don’t get dry.
- Cocoa Powder. I prefer Dutch Processed (sometimes called specialty dark) to give the cookies a richer flavor and darker color.
- Baking Soda. For the perfect rise.
- Salt. To balance out the sweetness. You can omit the salt if using salted butter.
- Unsalted Butter. It should be softened, but not starting to melt.
- Brown Sugar. Light or dark, I used dark.
- Granulated Sugar. You’ll use granulated sugar in both the dough and for rolling each cookie dough ball in.
- Egg. It should be room temperature for best results.
- Vanilla Extract. For flavor.
- Hershey’s Kisses. Feel free to use any variety. This recipe makes about 20 cookies – one 10 ounce package is more than enough.
Method – with Photos
This recipe was designed so that there’s no need to chill the dough. If you’d like to make the dough in advance, skip step 1. The dough can be stored covered in the fridge for up to 48 hours.
- Prep. Preheat the oven to 350F (180C) and line cookie sheets. Unwrap the Kisses, place in a freezer bag and freeze while you make the dough.
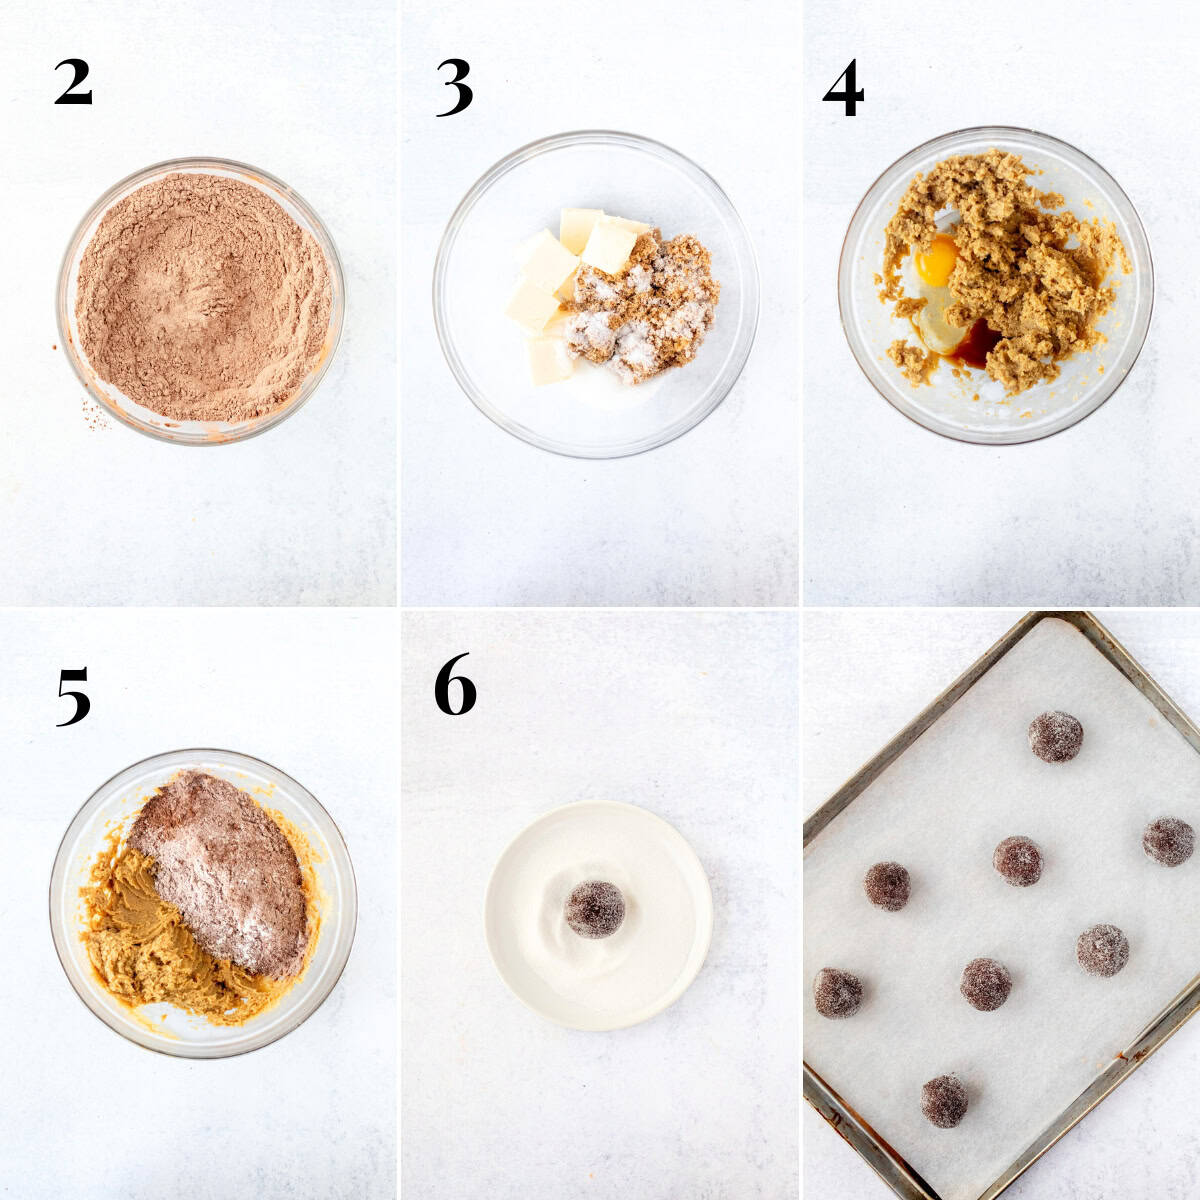
- Whisk the Dry Ingredients. Flour, cocoa, baking soda and salt. Be sure to sift the cocoa first to remove lumps.
- Cream the Butter and Sugars. There should be no lumps of butter when you’re finished – it should take about 2-3 minutes.
- Beat in the Egg and Vanilla.
- Mix the Dry Ingredients into the Butter. Start slowly so that the flour doesn’t fly everywhere.
- Form into Balls. Scoop the dough into balls – I like to use a cookie scoop. Then roll each dough ball in the granulated sugar. I pour the sugar onto a small plate first.
- Bake. The cookies will take about 9-12 minutes or until the tops look set.
- Place the Kiss on Top. Using the frozen Hershey’s Kiss, helps to prevent the Kiss from melting and lose its shape.
Recipe Tip
If you want to ensure that that the Hershey’s Kisses do not melt and lose their shape, be sure to freeze the Hershey’s Kiss fist. Then once the cookies are fresh out of the oven, pop the cookie sheet in your freezer for 5 minutes.

More Chocolate Christmas Cookies to Love
- Chocolate Thumbprint Cookies
- Chocolate Peppermint Sandwich Cookies
- Chocolate Shortbread
- Chocolate Sugar Cookies
Chocolate Blossom Cookies
Equipment
- Cookie Sheets
Ingredients
- 32 chocolate Kisses
- 1 cup all-purpose flour (125 grams) , measure carefully, otherwise the cookies can get dry
- ½ cup cocoa powder (45 grams)
- ½ teaspoon baking soda
- ¼ teaspoon salt
- ½ cup unsalted butter (112 grams), softened, but not starting to melt
- ½ cup brown sugar (105 grams), I used dark
- ½ cup granulated sugar (100 grams), goes into the dough
- 1 large egg
- 1 teaspoon vanilla extract
- ⅓ cup granulated sugar (67 grams), for rolling the cookies
Instructions
- Preheat the oven to 350℉ (180℃). Line cookie sheets with parchment paper or baking mats. Unwarp chocolate Kisses, place in a freezer bag and freeze.
- In a medium bowl, sift together the flour, cocoa, baking sod and salt. Then whisk. Set aside.
- In a separate large bowl, cream together the butter, brown sugar and ½ cup granulated sugar until creamed – there should be no lumps of butter.
- Mix the egg and vanilla into the butter mixture.
- Add the dry ingredients into the butter mixture and beat together, starting with the mixer on a low speed.
- Pour the ⅓ cup granulated sugar (for rolling the cookie dough balls) on a small plate. Scoop the dough into balls with about 1 to 1½ tablespoons of dough each. Roll each dough ball in the sugar and place about 2 inches apart on the lined cookie sheet.
- Bake 1 sheet at a time in the middle of the preheated oven. Each tray of cookies will bake for about 8-10 minutes or until you see the tops just set and maybe starting to form a few small cracks.
- Remove form the oven and immediately place a frozen Kiss on top of each cookie in the middle, gently pressing down. If you want to ensure that the Kisses don't melt whatsoever and lose their shape, immediately place the cookie sheet in the freezer for 10 minutes.
Notes
- Hershey’s Kisses: Feel free to use any variety. A 10 ounce bag should be enough for this recipe.
- Doubling the Recipe: You can easily double the recipe and make an extra big batch of dough.
- Sticky Dough: The dough for this recipe is slightly sticky. If you find it too frustrating to work with, cover the bowl and refrigerate for 30 minutes before forming into balls.
- Chilling the Dough: The bowl of dough can be covered and stored in the fridge for up to 48 hours.
- Freezing the Dough: Dough balls (rolled in sugar) can be placed in a freezer bag and frozen for up to 2 months. Bake from frozen, as directed in the recipe.
- Storage: Store baked and cooled cookies in an airtight container at room temperature for up to 4 days, or in the fridge for up to 1 week.
- Nutrition: Details provided are an estimate only based on 1 cookie, assuming the recipe yields 32 uniform cookies.


Can you use mint extract in place of vanilla extract?
Definitely!