Chocolate Raspberry Cake
I may receive compensation in the form of payment or products to supplement my posts, but all opinions remain my own. Read our disclosure policy.

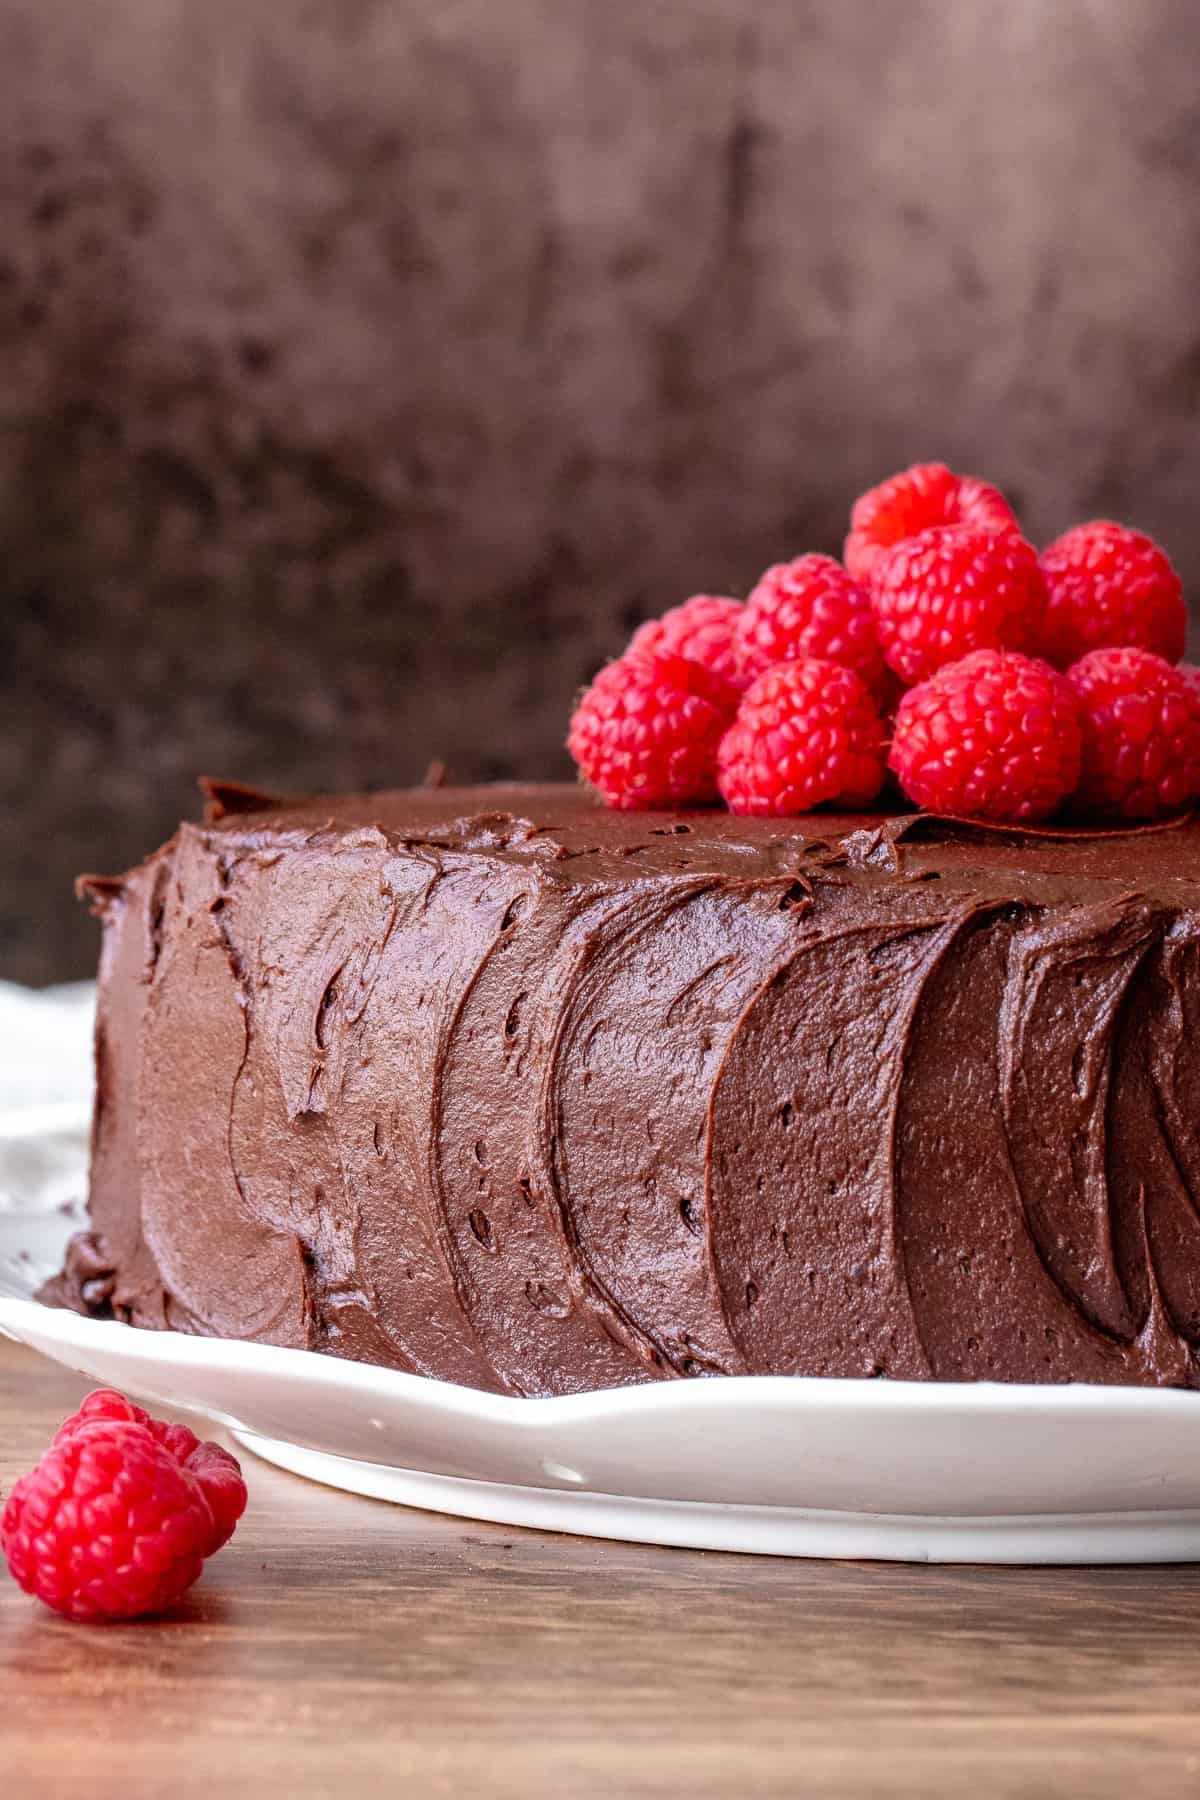
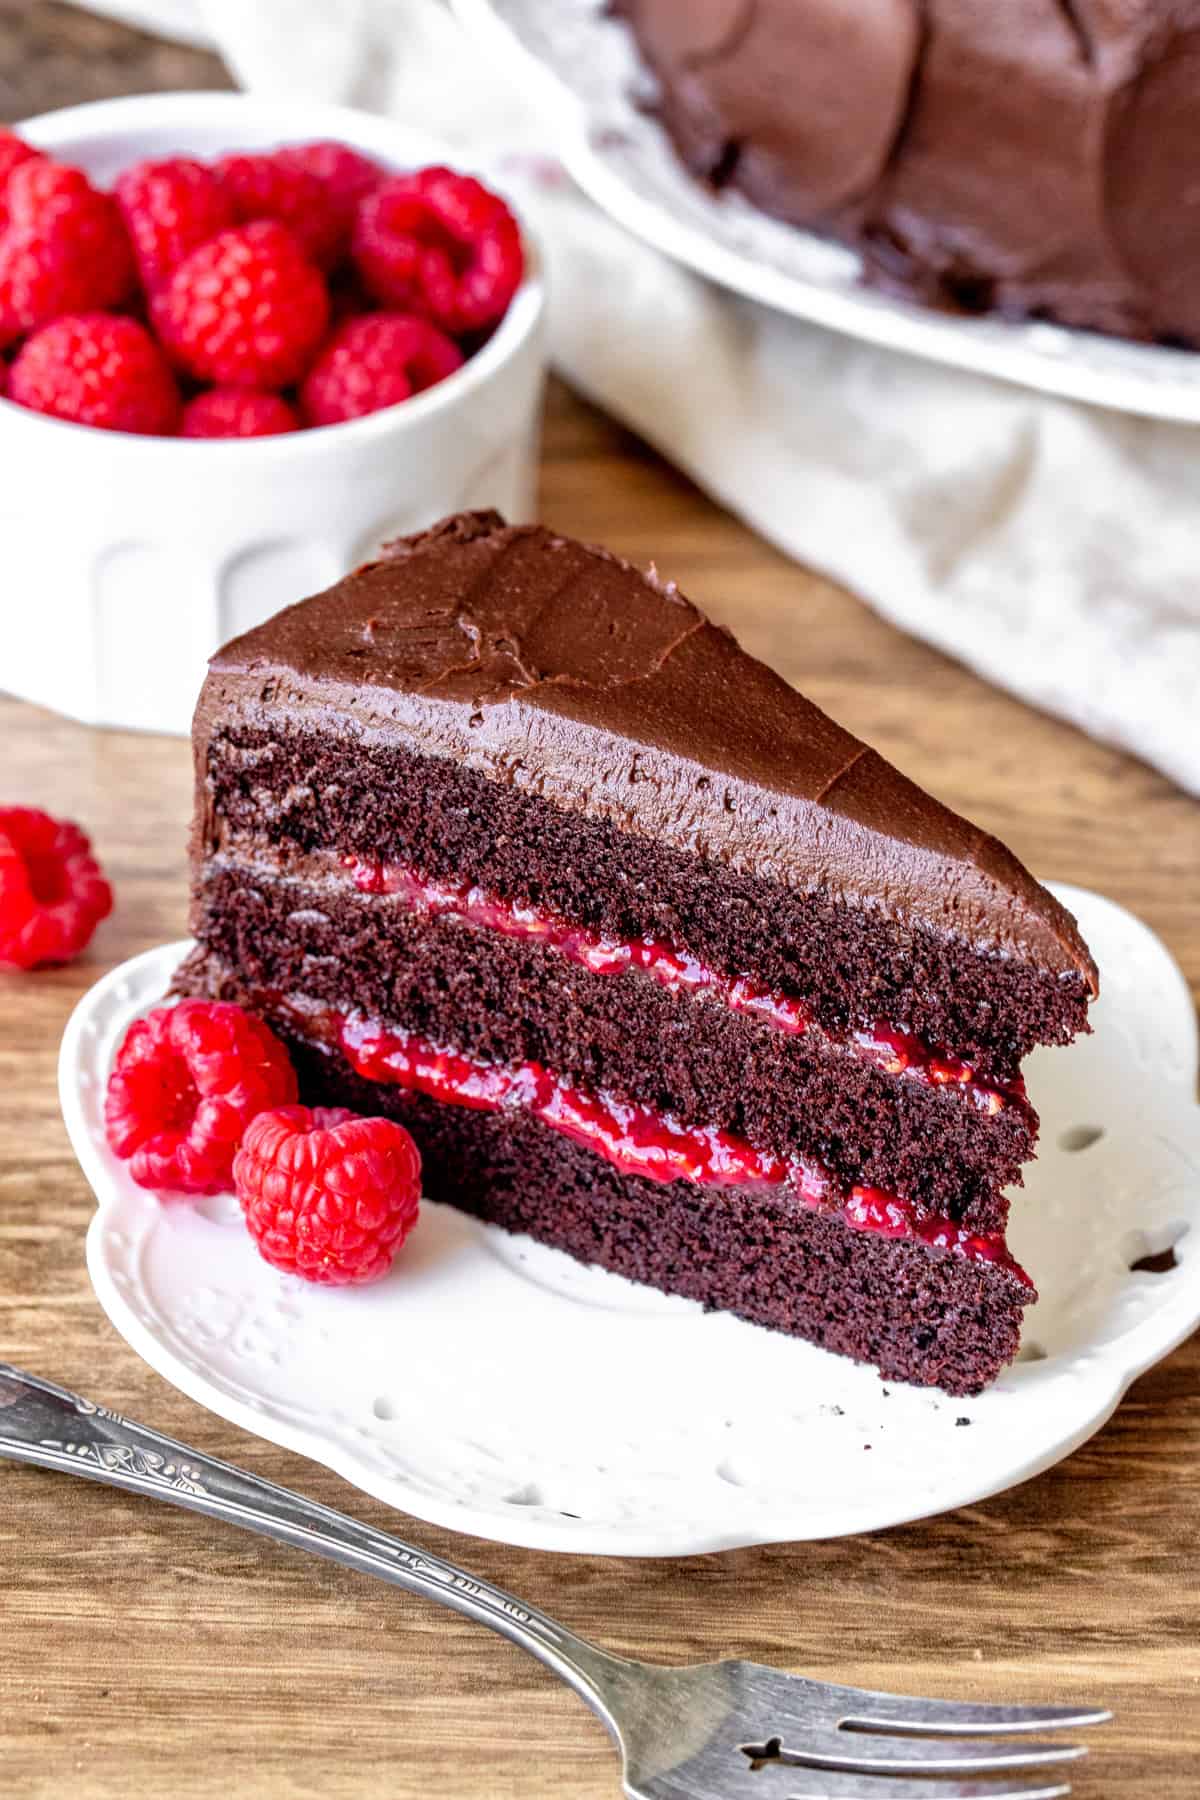
This delicious chocolate raspberry cake has layers of moist and fudgy chocolate cake sandwiched together with a sweet raspberry filling made from real berries. Then it’s frosted with creamy chocolate frosting. This cake looks elegant and tastes grown up. 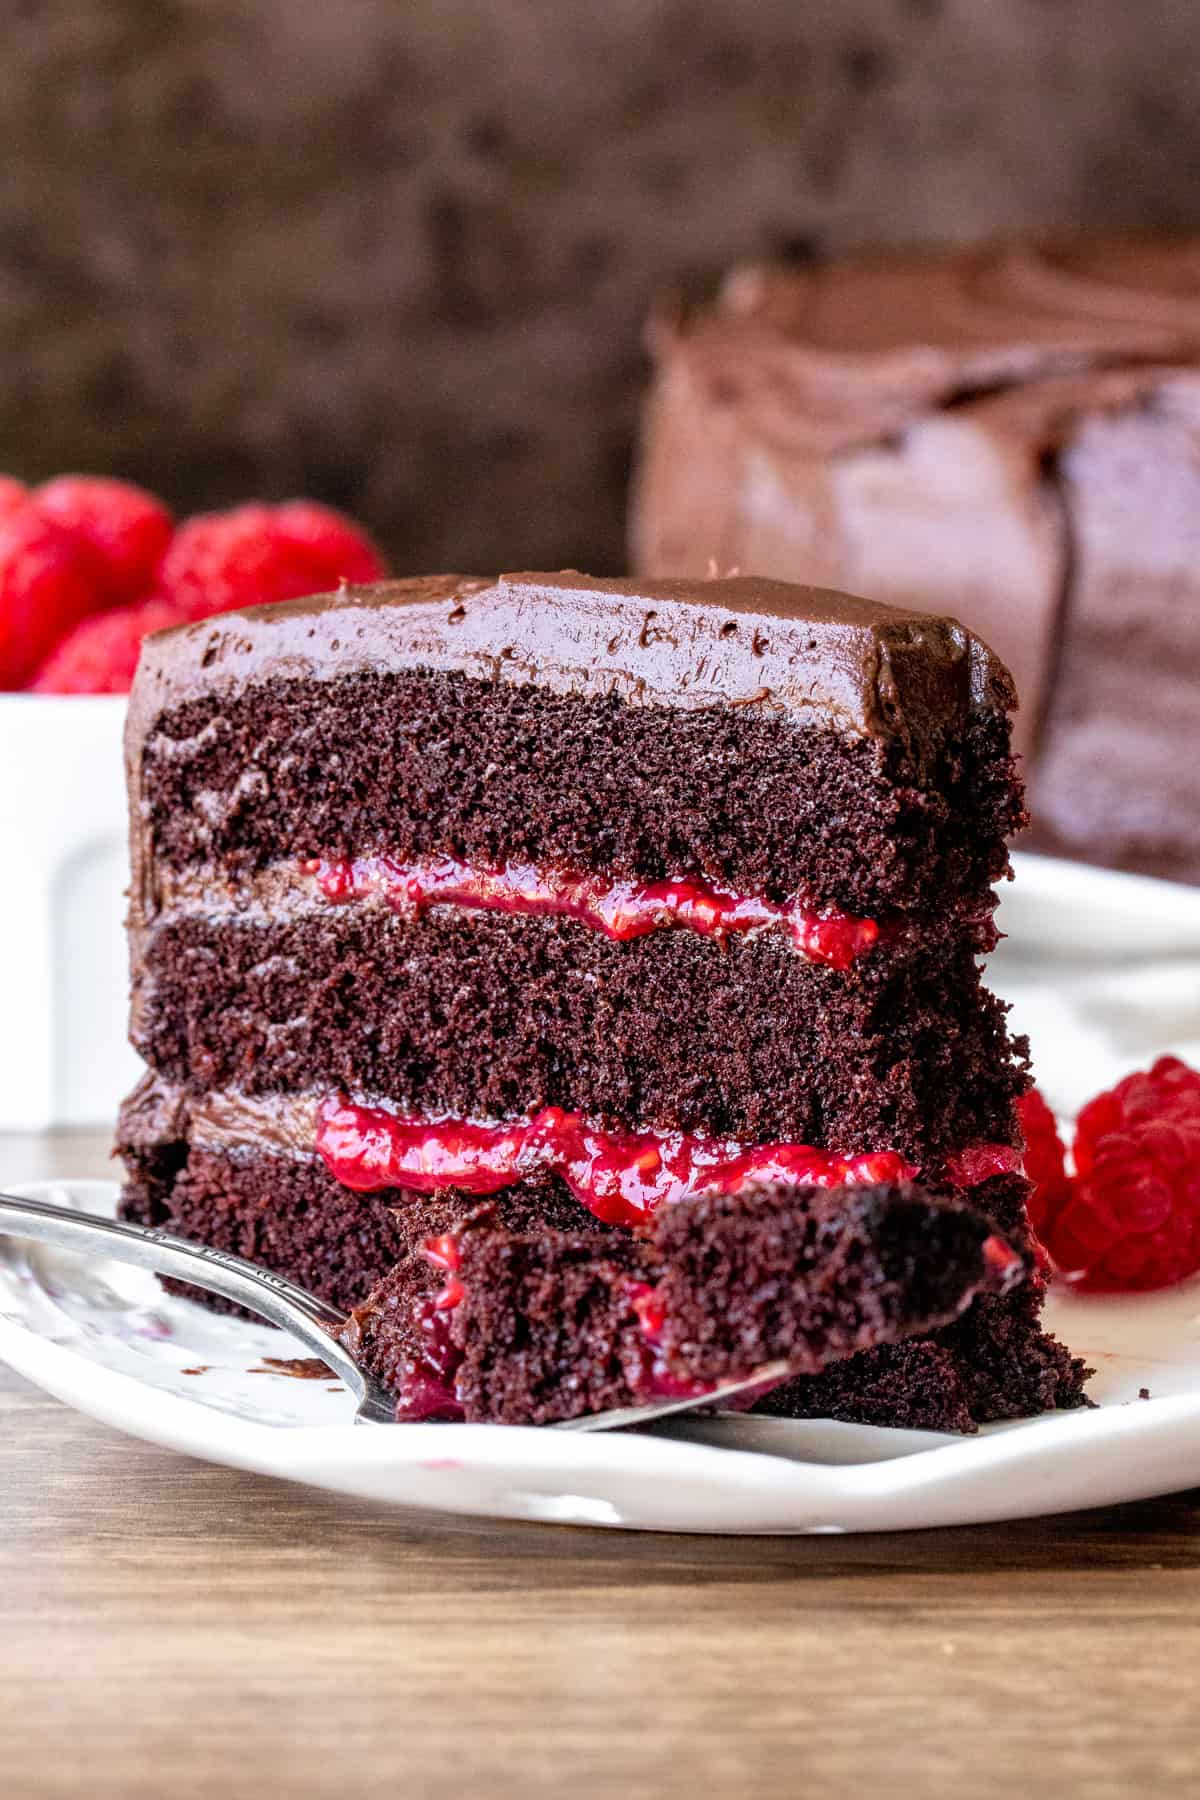
If you love a moist and fudgy chocolate cake but want something a little more elevated – then this chocolate raspberry cake is the perfect recipe. The rich chocolate pairs perfectly with the bright raspberry filling. Then the chocolate frosting brings everything together for a delicious combination of flavors and textures. This cake is definitely rich, but it’s not as sweet as a typical layer cake with frosting because the frosting between cake layers is replaced with the raspberry filling.
For the Chocolate Cake
The chocolate cake layers are my classic recipe that’s adapted from the Hershey’s tin. It uses oil so the cake stays soft and moist for days (don’t worry – you won’t taste it at all). Then the addition of buttermilk really provides the most incredibly tender crumb. While I highly recommend using the real thing, I’ve included a substitution in the recipe notes if need be. The addition of hot coffee, or boiling water, helps the cocoa powder to bloom – meaning that the flavor improves.
For this cake, it’s important that:
- the ingredients are measured accurately
- you sift the cocoa powder first to get rid of any lumps
- the eggs and buttermilk are room temperature before getting started
For the Raspberry Filling
We’re making a homemade raspberry compote to fill the cake layers. It’s made from berries, a little lemon juice, sugar and cornstarch. You’ll first dissolve the cornstarch in the lemon juice, then gently boil everything together while occasionally stirring. The berries will start to soften and release their juices, then the mixture will thicken. You want to boil it down until the raspberry mixture is thick and would be very slow to pour. It doesn’t need to be as thick as peanut butter, but it should be much thicker than cream when you take it off the burner. It will then continue to thicken as it cools.
Frosting & Assembly the Cake
This recipe uses a classic chocolate frosting made with cocoa powder for creamy chocolate flavor. It’s simple and tastes delicious. You could also frost this cake with raspberry frosting too if you prefer.
To assemble the cake I first recommend sawing off the rounded tops of your cake layers if your cakes are domed. This step makes it so much easier because the layers will sit flat on top of each other. Always do this after the cake layers are completely cooled. You can also use cake strips (these can be purchased at a baking or kitchen store, or online) when baking the cake layers to avoid them baking with domed tops).
You’ll place one cake layer, top side down on the plate you plan to serve it on. Then make a border around the edge of the layer with chocolate frosting. I used a piping bag with a round tip for this, but a thick layer of chocolate frosting would work too. Then fill the middle with half of the cooled compote. Making the border with the chocolate frosting ensures that the raspberry filling doesn’t ooze out. Don’t forget this step! Then place the second cake layer on top (bottom side up) and repeat the process. 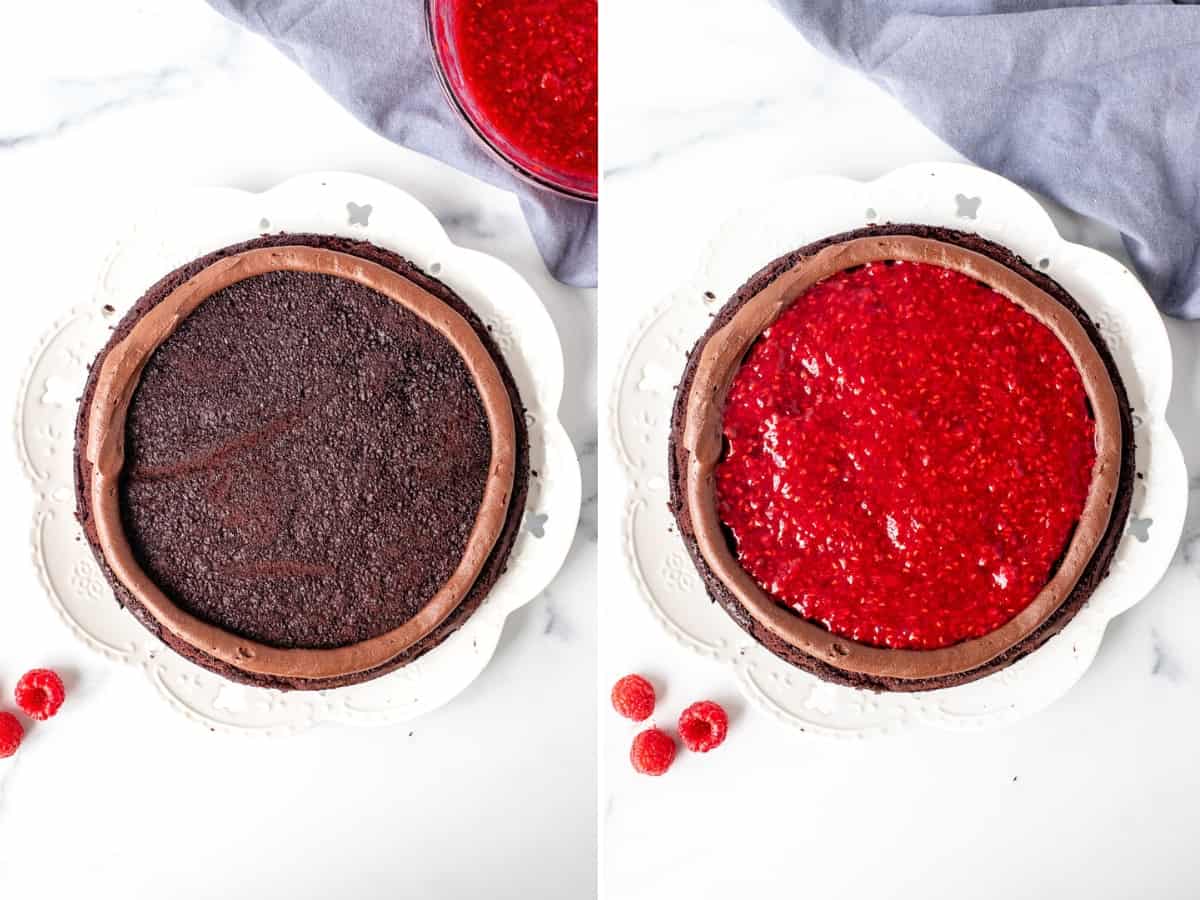
After the last cake layer is placed on top, it’s time to frost the sides and top of the cake with layers of swirly chocolate frosting. If you notice that the crumbs of the cake are getting into the frosting, then I recommend doing a crumb coat around the sides. This is simply a very thin layer of frosting to seal in the crumbs. Then you’ll do a second coat with swirls of frosting.
Pan Sizes
As pictured, I used three 8-inch sandwich tins. They baked for around 22 minutes at 350F (180C). You could also use:
- Two 8-inch round tins with high sides (at least 2 inches/5 cm). They will bake for about 25-30 minutes.
- Two 9-inch round tins. They will bake for about 25 minutes.
If using two tins, you can choose to either make a two layer cake or slice the cooled cakes in half for a 4 layer cake. I likely wouldn’t do a 4 layer cake with the 9-inch round tins, as the layers will be very thin and harder to work with.
Make Ahead Tips
I always make the cake layers and raspberry filling the day before I plan to serve. Wrap the cooled cake layers tightly and store at room temperature. Place the raspberry filling in an airtight container and store in the fridge. Then I make the frosting and assemble the cake the day I plan to serve it.
If you love chocolate and raspberries, then be sure to try:
- Raspberry Cream Cheese Brownies
- Chocolate Sandwich Cookies with Raspberry Frosting
- Chocolate Cake with Raspberry Frosting

Chocolate Raspberry Cake
Equipment
- 3 8-inch round cake pans
Ingredients
Chocolate Cake
- 1 3/4 cup all-purpose flour (219 grams)
- 1 cup cocoa powder (90 grams)
- 1 1/2 teaspoon baking soda
- 1 teaspoon baking powder
- 1/2 teaspoon salt
- 2 cups granulated sugar (400 grams)
- 1/2 cup canola oil (120 ml) , or vegetable oil
- 2 large eggs
- 2 teaspoons vanilla extract
- 1 cup buttermilk (240 ml) , see notes for substitution
- 2/3 cup hot coffee (160 ml) , or boiling water
Raspberry Filling
- 1 tablespoon cornstarch, AKA cornflour in Australia and the UK
- 1 tablespoon lemon juice (15 ml) , freshly squeezed
- 3 cup raspberries (375 grams) , fresh or frozen
- 1/4 cup granulated sugar (50 grams)
Chocolate Frosting
- 1 cup unsalted butter (226 grams) , softened, but not starting to melt
- 3-4 cups powdered sugar (330-440 grams)
- 2/3 cup cocoa powder (60 grams)
- 1 teaspoon vanilla extract
- 1/4 teaspoon salt, to taste
- 3-4 tablespoons whipping cream (45-60 ml) , milk will work too
Instructions
Chocolate Cake
- Preheat the oven to 350F (180C). Line the bottom of the cake pans with parchment paper and lightly grease the sides.
- In a very large bowl whisk together the flour, cocoa, baking soda, baking powder, salt and sugar. *If the cocoa is very lumpy, be sure to sift it first.
- In a separate bowl whisk together the oil, vanilla and eggs until you no longer see pieces of egg. Then whisk in the buttermilk.
- Whisk the wet ingredients into the flour mixture. You can also do this with an electric mixer on a low speed.
- Very carefully mix the hot coffee/boiling water into the batter. It will be thin.
- Pour/spoon the batter into the prepared pans, ensuring that the batter is evenly distributed between the pans.
- Bake in the middle of the oven for about 22-25 minutes, or until an inserted toothpick comes out clean.
- Cool the cakes in the pans for at least 15 minutes, then carefully invert and continue cooling on a cooling rack.
Raspberry Compote
- Add the cornstarch and lemon juice to a small bowl or measuring cup and whisk to dissolve.
- Add the berries, sugar and dissolved cornstarch to a small-medium saucepan over low-medium heat and bring to a gentle boil. The berries will soften and then the mixture will thicken.
- Gently boil the berries while occasionally stirring until the mixture is about 1/2 of the original volume and have thickened. Remove from the heat and cool fully.
- Place in an airtight container and store in the fridge until ready to use.
Chocolate Frosting
- Beat the butter until creamy.
- Add in 2 cups powdered sugar. Start with the mixer on a low speed an dbeat until combined.
- Turn off the mixer. Sift in the cocoa and add in the salt and vanilla. Beat until incorporated.
- Mix in the rest of the powdered sugar about 1/2 cup at a time, alternating with 1-2 tablespoon so cream until the desired thickness and sweetness is reached. It should be a little thinner than peanut butter in consistency.
Assembling the Cake
- Ensure that the cake layers and raspberry filling are completely cooled before getting started.
- If the cake layers are domed, gently saw off the rounded tops using a serrated knife.
- Place one cake layer on the plate that you plan to serve it, with the bottom side up.
- Pipe or spread a border with the chocolate frosting around the edges of the cake layer. Then fill the middle with half of the raspberry filling.
- Place the second cake layer on top, with the bottom side up. Repeat the process, making a border around the edges with chocolate frosting then filling the middle with the rest of the raspberry filling.
- Place the last cake layer on top (again with the bottom side down). Frost the sides and top of the cake with the chocolate frosting using a flat-edge knife.
Notes
- Pan Sizes:
- three 8-inch (20 cm) round pans - bake for 22-25 minutes
- two 8-inch (20 cm) round pans with 2.5 inch (5 cm) sides - bake for 25-30 minutes
- two 9-inch (23 cm) round pans - bake for 22-26 minutes
- Buttermilk: You can make your own by adding 1 tablespoon of freshly squeezed lemon juice to a liquid measuring cup. Then fill to the 1 cup line with 1% or 2% milk. Stir and let sit for 5 minutes before using.
- Hot Coffee/Water: Use freshly brewed coffee, boiling water or 2 teaspoons instant espresso powder dissolved in boiling water.
- Raspberries: Feel free to use fresh or frozen berries. If using frozen berries I recommend using 2 tablespoons of cornstarch dissolved in 2 tablespoons of lemon juice (or water) to help thicken the mixture.
- Make Ahead Tips: The cake layers and raspberry filling can be made the day before you plan to serve. Wrap cooled cake layers and store at room temperature. Place the cooled raspberry filling in an airtight container and store in the fridge. Make the frosting and assemble the cake the day you plan to serve it.
- Nutrition: Details provided are an estimate only and based on 1 slice of cake, assuming the cake is sliced into 12 equal pieces and that all the frosting is used.
Nutrition