Fantasy Fudge
I may receive compensation in the form of payment or products to supplement my posts, but all opinions remain my own. Read our disclosure policy.

Creamy, delicious chocolate fudge – what’s not to love? This fantasy fudge recipe is made with marshmallow creme. It’s decadent without being too rich, and turns out perfectly with very little effort.
What’s Fantasy Fudge?
Fantasy fudge is an easy chocolate fudge recipe that’s made with marshmallow creme as the “secret” ingredient. It appears on the back of the marshmallow fluff jar – and you’ll find multiple variations of the recipe all over the internet. I find that it’s creamier and has a better flavor than fudge made with sweetened condensed milk and chocolate chips, but it does require a few more steps. I’ve also seen this recipe called no-fail fudge. But I’m not a huge fan of that name because I don’t like to tempt fate.
Why Make Fudge with Marshmallow Creme?
Fantasty fudge is creamy, thick and easy to make. The marshmallow creme helps to ensure that the fudge sets properly and doesn’t end up with grains of sugar. Using a candy thermometer definitely makes the recipe easier, but it’s not as essential as other fudge recipes.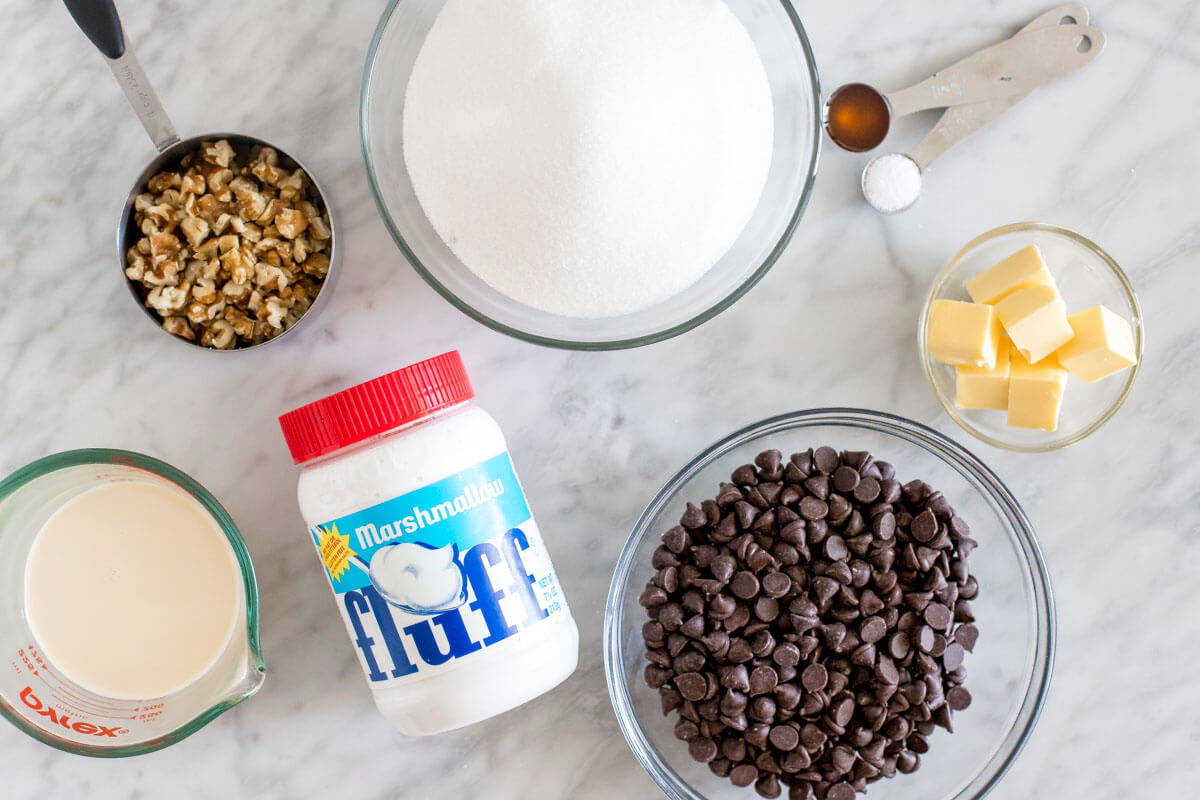
Making the Fudge
This recipe starts by melting together evaporated milk, sugar, butter and a jar of marshmallow creme. At this stage, it’s really important that the burner is on a low heat and that you gently stir the mixture so everything melts together slowly. Otherwise, the sugar can burn and get stuck to the bottom of the pan. If this happens, unfortunately, you’ll have to start again.
Once everything is melted, bring the mixture to a gentle boil while stirring. With a candy thermometer clamped to your pot, you’ll boil the mixture until it reaches the “soft ball” stage, which is 240F (116 C) degrees – about 5 minutes.
Then remove the pan from the heat and immediately stir in the chocolate chips, vanilla extract, salt, and optional nuts. Once everything is smooth, pour the mixture into your prepared pan, smooth the top, and let it set to harden at room temperature.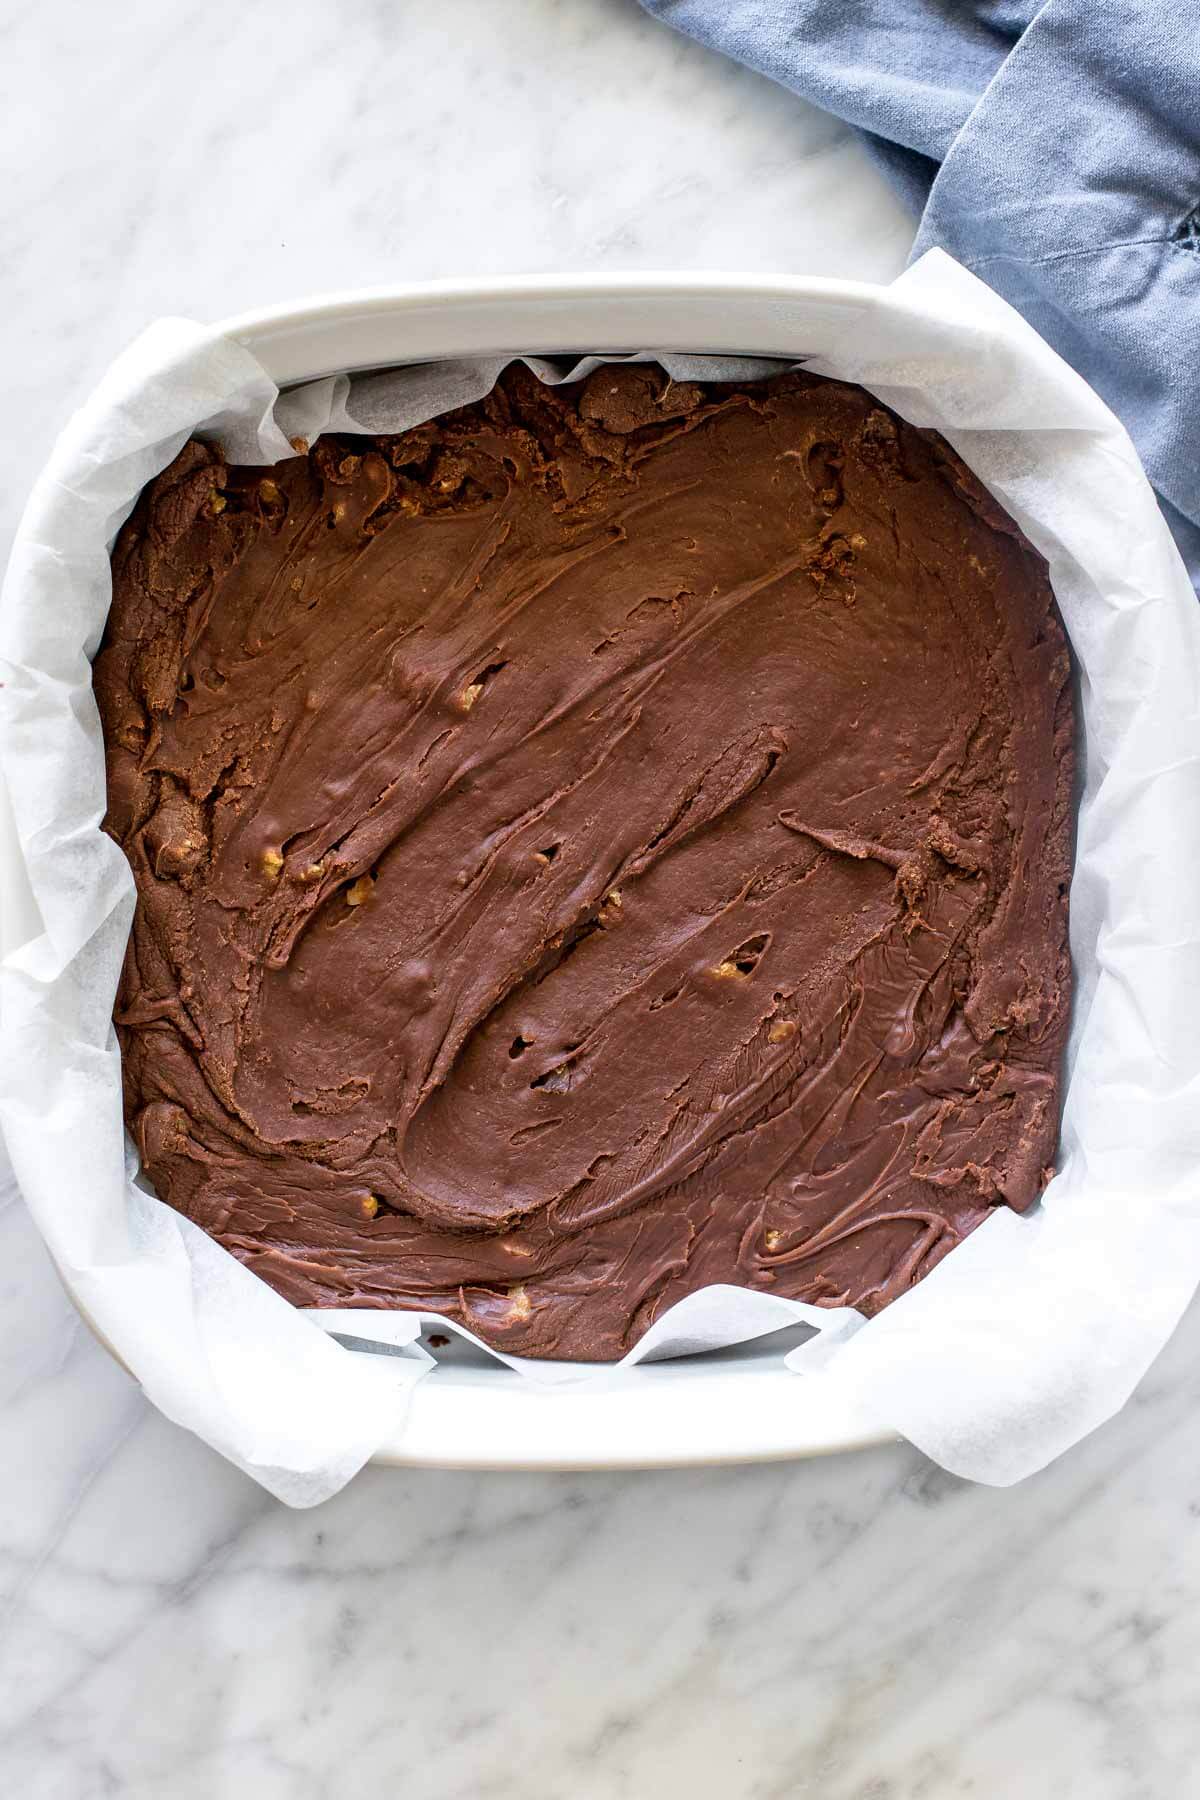
Tips for Making Fudge
- Make sure to have all your ingredients measured out before getting started. This way, once the sugar is done boiling, you can immediately stir in the remaining ingredients.
- Use a larger pot than you think you may need. The mixture will boil up – so this way you’ll ensure that it doesn’t overflow.
- It’s very, very, very important to have the burner on a low heat and continuously stir the mixture as you’re melting everything together. If you end up with burnt sugar – you’ll see little brown crystals in the mixture – and your fudge won’t turn out.
- Evaporated milk can be substituted with heavy cream as well in this recipe.
- Work quickly when you stir in the chocolate – this helps it to melt perfectly.
- Note – the recipe on the back of the jar uses 12 ounces of chocolate chips. I find using 12 ounces of finely chopped baking chocolate works even better because baking chocolate (either the squares or bars) is designed to melt, whereas chocolate chips have stabilizers in them so that they keep their shape.
Fudge Without A Candy Thermometer
When making fudge, the boiling sugar mixture needs to reach the “soft-ball” stage. Essentially, the “soft ball” stage means that if you drop a spoonful of the mixture in a glass of cold water, you can form it into a ball that you can squeeze/press between your fingers. The “soft-ball” stage is when the mixture reaches 240F (116C) degrees – or in this fantasy fudge recipe when the sugar and marshmallow creme mixture has boiled for 5 minutes.
And for more delicious fudge recipes, be sure to try:

Fantasy Fudge
Equipment
- 9x9 inch or 8x8 inch (23x23 cm or 20x20 cm) pan
- large saucepan
- candy thermometer (optional)
Ingredients
- 2 1/4 cups sugar
- 1/4 cup unsalted butter
- 5 ounces evaporated milk*, one small can
- 1 7.5 ounce jar marshmallow creme
- 12 ounces semi-sweet chocolate chips, or chopped baking chocolate*
- 1 teaspoon vanilla extract
- 1/2 teaspoon salt
- 1 cup chopped walnuts , optional
Instructions
- Lightly grease a 9x9 inch (or 8x8 inch) pan with non-stick cooking spray and line with parchment paper.*
- Add the sugar, butter, evaporated milk, and marshmallow creme to a large saucepan over low heat.
- Gently stir the mixture constantly as everything melts together.
- Once melted together, bring the mixture to a gentle boil for 5 minutes while constantly stirring.
- After 5 minutes gently boiling, or once the mixture reaches 240F degrees (116C degrees) on a candy thermometer remove the pan from the heat and immediately stir in the chocolate, salt and vanilla extract until smooth.
- Stir in the chopped nuts.
- Pour/spoon the mixture into the prepared pan and smooth the top.
- Let the fudge sit at room temperature until it's cooled and hardened - about 3 hours.
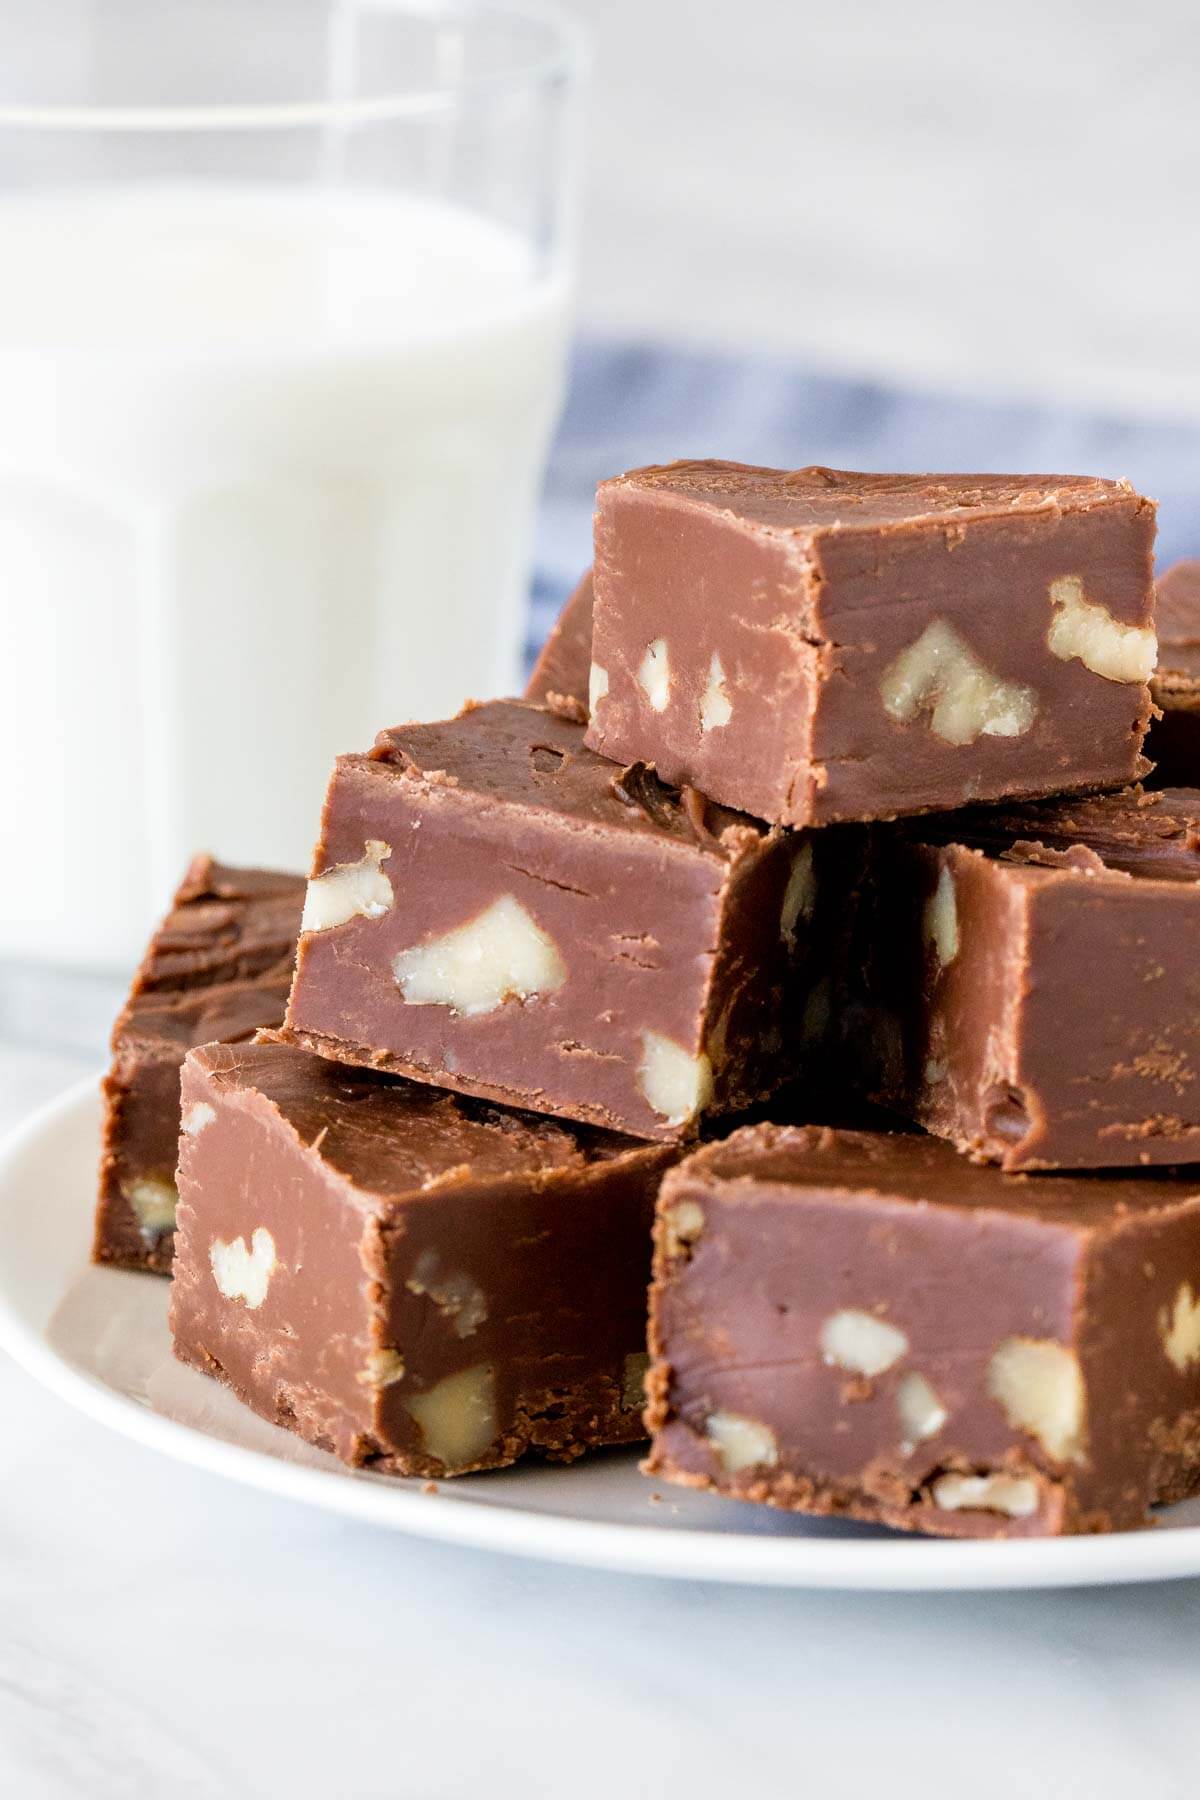
- To slice the fudge, lift it out of the pan using the overhang of the parchment paper and place on a cutting board. Cut into small squares using a sharp knife (not a table knife).
Notes
- Evaporated milk can be substituted with whipping cream.
- The original recipe uses chocolate chips. I often prefer to use chopped baking chocolate, however, because I find it melts better.
- Spraying the pan first, and then lining it with parchment paper allows the parchment paper to stick to the pan instead of sliding around. If you prefer to use aluminum foil - line the pan with aluminum foil leaving an overhang around the edges, then lightly grease.
- Store fudge in an airtight container at room temperature for up to 1 week, or in the fridge. Fudge can be wrapped tightly and frozen for up to 2 months. Thaw in the fridge overnight.
- Nutrition information is an estimate only and based on 1 piece, assuming the pan is sliced into 36 equal pieces.
- Recipe adapted from the Marshmallow Fluff jar.


