Red Velvet Blossoms
I may receive compensation in the form of payment or products to supplement my posts, but all opinions remain my own. Read our disclosure policy.

These red velvet blossom cookies are so pretty and perfect for anyone who loves red velvet. They’re soft and chewy with a delicious hint of cocoa and beautiful red color. The cookie dough balls are rolled in sugar before they go into the oven and a Hershey’s Kiss is placed on top when they come out. Perfect for Valentine’s Day!

Red velvet blossoms are the sister recipe to peanut butter blossoms or chocolate blossoms. Sometimes called Hershey’s Kiss red velvet cookies, these are tender and chewy with a delicious red velvet flavor, crunchy sugar coating and a chocolate kiss on top. The red color makes them perfect for Valentine’s Day or Christmas, and the red velvet flavor has the perfect touch of cocoa.
This recipe does require chilling, so be sure to allocate enough time.
Table of Contents

Ingredients Needed
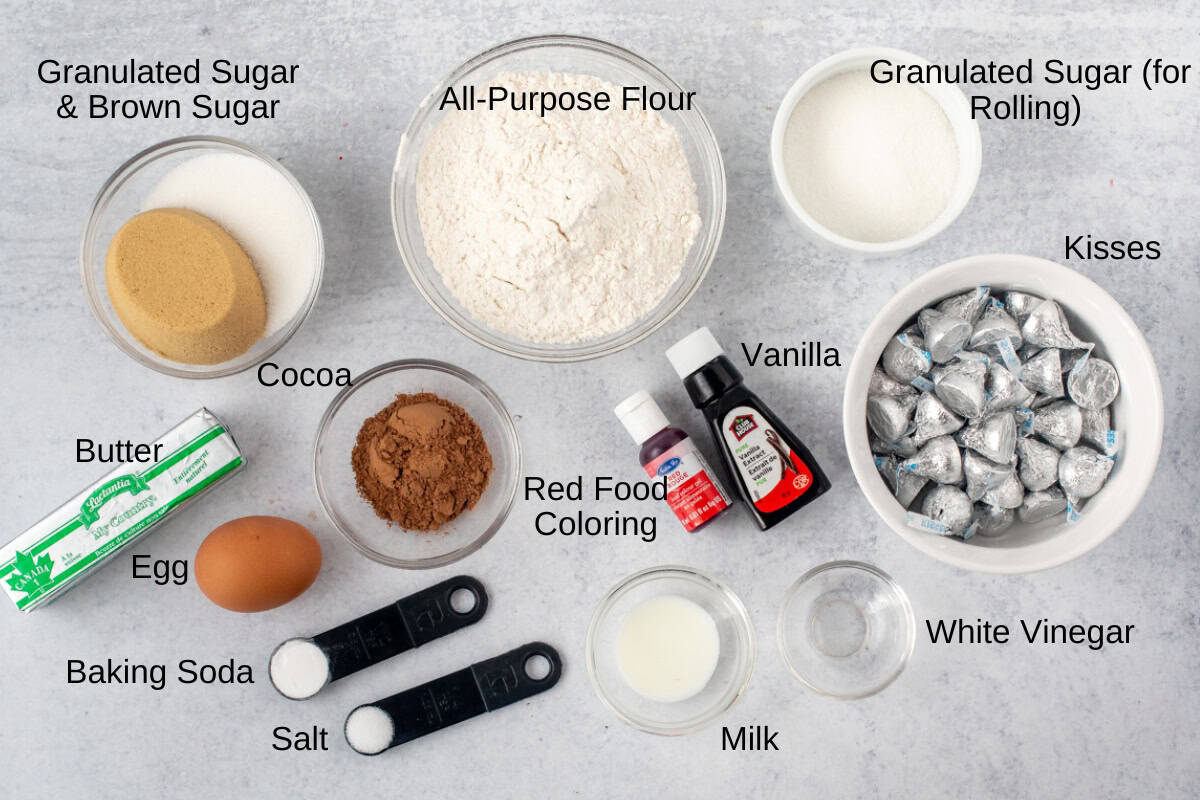
- All-Purpose Flour: Be sure to measure correctly (whisk first, then spoon into dry measuring cups or use a kitchen scale). Otherwise the cookies can become dry.
- Cocoa Powder: Just a hint of cocoa gives these cookies the classic red velvet flavor. I use natural cocoa instead of Dutch processed in red velvet so that the color isn’t too dark.
- Baking Soda & Salt: Baking soda is key in red velvet (as opposed to baking powder) for the distinctively tangy flavor.
- Butter: For this recipe, it should be softened but not starting to melt.
- Granulated Sugar & Brown Sugar: For the cookie dough. The brown sugar makes the cookies chewier.
- Large Egg: For binding and tenderness.
- Red Food Coloring: I always use gel because it is more concentrated, but liquid works too.
- Vanilla Extract: For the perfect flavor.
- Milk: Just a touch so that the cookies aren’t too thick. I used 2%.
- White Vinegar: Distilled vinegar works too. Vinegar is quintessential in red velvet recipes for that slight tanginess.
- Granulated Sugar: For rolling the cookies.
- Hershey’s Kisses: I always use the regular milk chocolate, but Hugs work really well too.
Method – with Photos
For this recipe, the dough will need to chill for at least 2 hours or up to 48 hours before forming into balls. This is it’s less sticky to work with.
Make the Dough
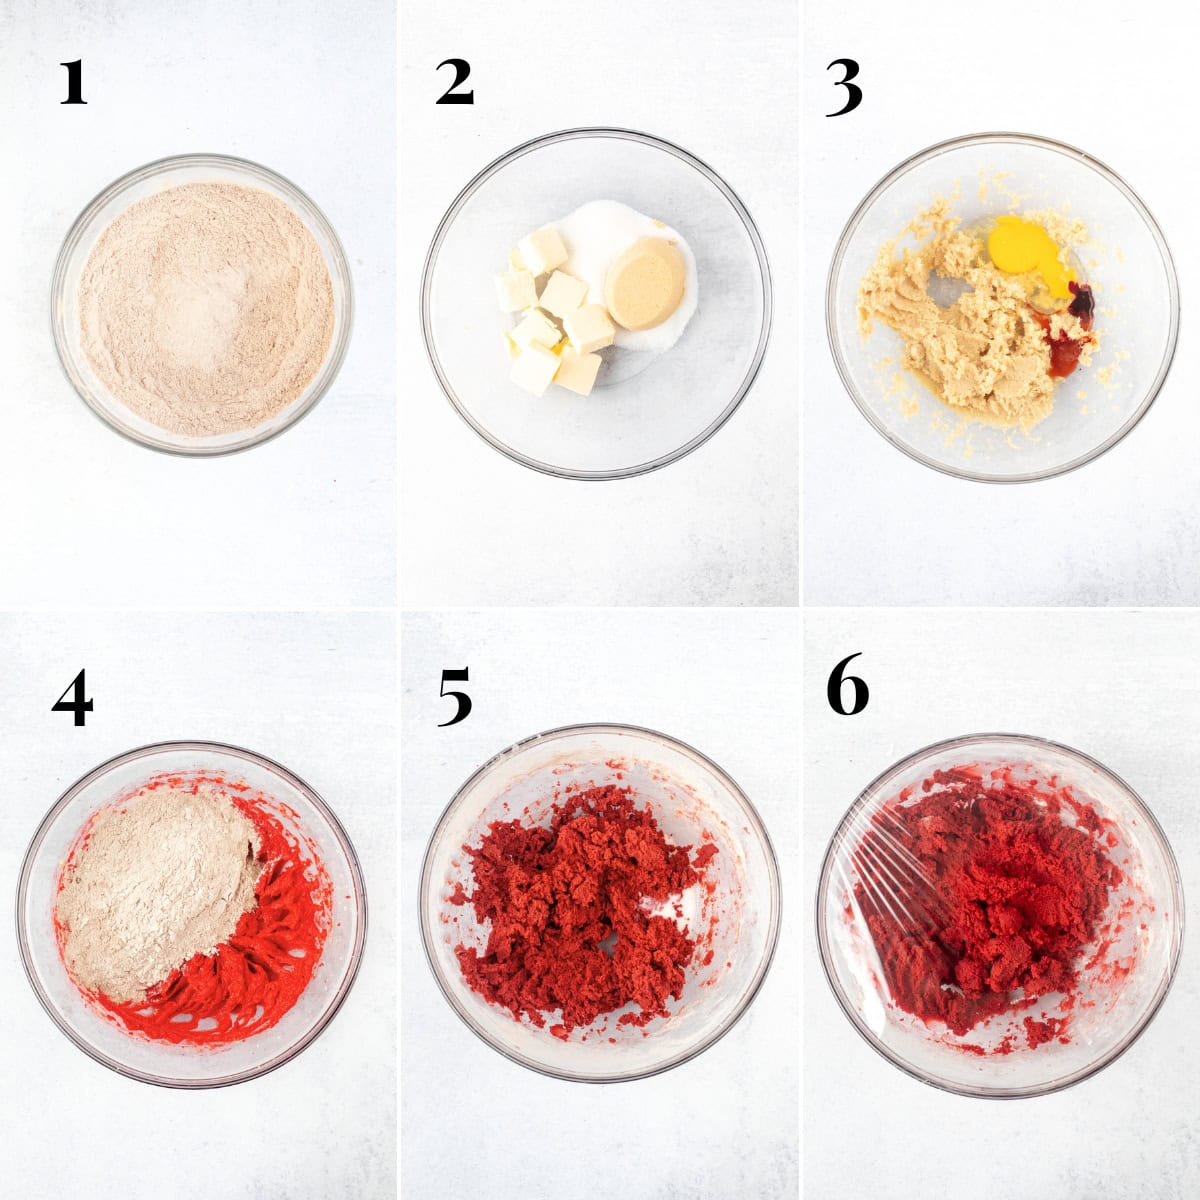
- Sift together the dry ingredients: flour, cocoa, baking soda and salt. This is to ensure there are no lumps. Give the bowl a whisk. Set aside.
- Beat together the butter and sugars. They should be well creamed and you shouldn’t see lumps of butter or brown sugar.
- Beat in the Egg, Vanilla, Red Food Coloring & Vinegar. The mixture will look quite neon after this step, but the color will soften and mellow after the dry ingredients are added.
- Mix the Dry Ingredients into the Butter Mixture. The dough will be quite thick – which is expected. Always start with the mixer on a low speed to avoid the flour flying everywhere.
- Mix in the Milk.
- Cover & Chill. The dough will chill for at least 2 hours or up to 48 hours. This is so that it’s less sticky to work with and so that the cookies don’t spread too thin.
Assemble & Bake
- Freeze the Kisses. About 30 minutes before you want to bake the cookies, unwrap the Kisses, place in a freezer bag and pop in the freezer. While this step isn’t 100% necessary, if you want to ensure that the Kisses don’t melt and lose their shape, be sure to freeze them first.
- Prep. Preheat the oven to 350F (180C) and line your cookie sheets.
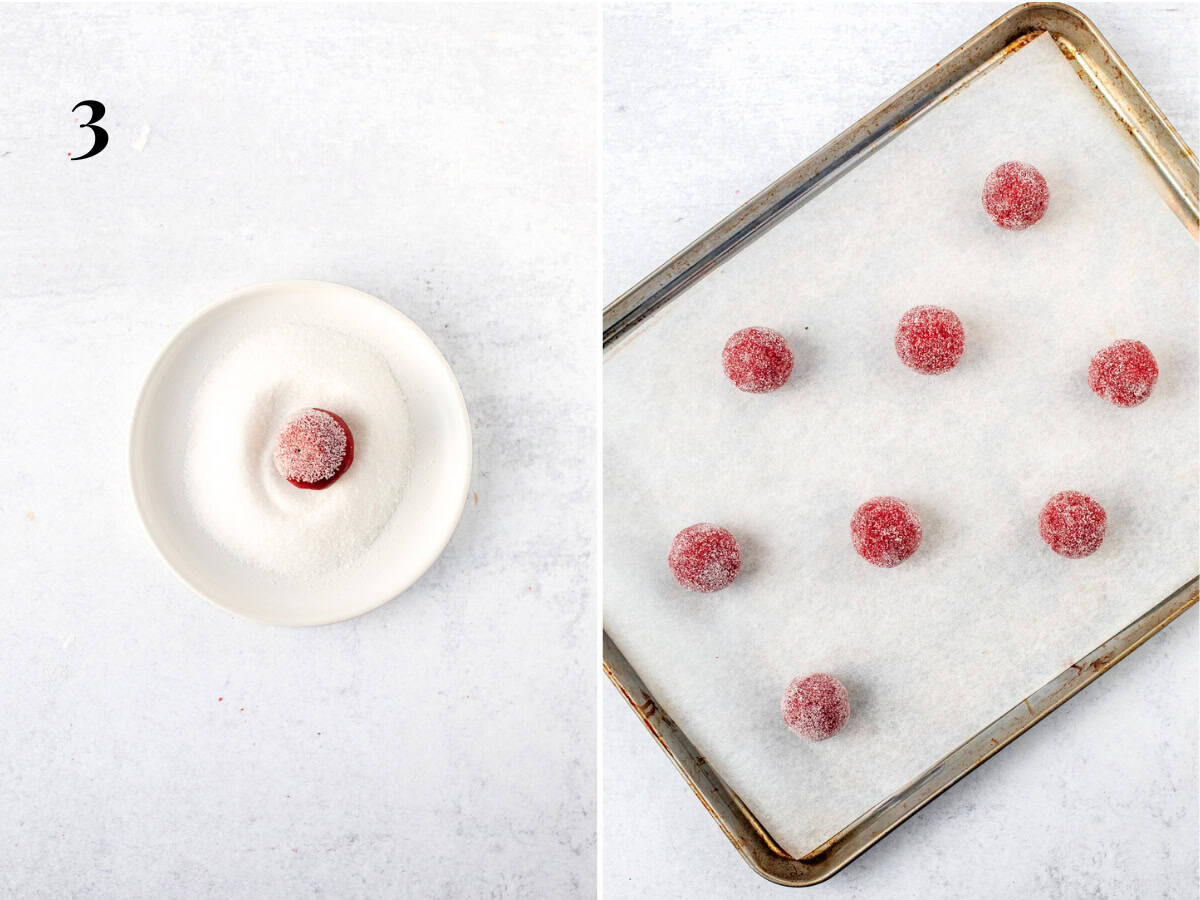
- Form the Cookie Dough Balls & Roll in Sugar. I always make mine with about 1 to 1 1/2 tablespoons of dough each. Pour the granulated sugar for rolling onto a small plate and roll each dough ball in sugar.
- Bake. Place the cookie dough balls on the lined cookie sheets about 2 inches apart. The cookies will bake for about 8-10 minutes, or until the tops look just set.
- Top with a Kiss. When the cookie come out of the oven, let them cool for 5 minutes, then place a frozen Hershey’s Kiss on top, pressing down slightly. If you want to ensure that the Kisses don’t melt whatsoever and lose their shape, place the cookie sheet in the freezer for 5-10 minutes.
Recipe Tip
Feel free to use any variety of Hershey’s Kiss – I especially love using the white chocolate swirled Hershey’s Hugs. You could also use any small chocolate. For something extra decadent, try using a milk chocolate Lindt ball!
Storage & Make Ahead Tips
These cookies will last in an airtight container at room temperature for up to 4 days, or in the fridge for up to 7 days. Baked and cooled cookies can also be frozen for up to 2 months. I always recommend thawing in the fridge, then letting the cookies sit on the counter at room temperature before enjoying.
I typically make the dough 1 day before I plan to form into balls, bake and serve. It will keep in the fridge for up to 48 hours.

FAQ – Can I Make these Cookies without Red Food Coloring?
Without red food coloring, these cookies will have a light brown color. They will taste the same, but won’t have the classic red color of red velvet. I have tried using more natural alternatives – such as beetroot powder – but have never been able to achieve the quintessential bright red color without the use of food coloring.
More Red Velvet Treats to Love
- Red Velvet Chocolate Chip Cookies
- Red Velvet Cookie Cake – this recipe is one giant cookie that’s cut into slices
- Single Serving Red Velvet Cookie
- Red Velvet Brownies – thick and chewy, these can be filled with white chocolate chips or topped with cream cheese frosting

Red Velvet Blossoms
Equipment
- Cookie Sheets
Ingredients
- 1 2/3 cup all-purpose flour (209 grams)
- 2 tablespoons natural cocoa powder
- 1/2 teaspoons baking soda
- 1/4 teaspoon salt
- 1/2 cup unsalted butter (112 grams), softened, but not starting to melt
- 1/2 cup brown sugar (105 grams), I used light, dark works too
- 1/3 cup granulated sugar (67 grams), for the dough
- 1 large egg, room temperature
- 1-2 teaspoons red food coloring, I use gel, liquid works too
- 1/2 teaspoon white vinegar, or distilled
- 1 teaspoon vanilla extract
- 2 teaspoons milk (10 ml), use 1 teaspoon for thicker cookies
- 1/3 cup granulated sugar (67 grams), for rolling
- 28-32 Hershey's Kisses
Instructions
Make the Dough
- In a medium bowl, sift together the flour, cocoa, baking soda and salt. Give the bowl a whisk. Set aside.
- In a separate large bowl, beat together the butter, 1/2 cup brown sugar and 1/3 cup granulated sugar until creamy.
- Beat the egg, red food coloring, vinegar and vanilla into the butter mixture until combined. At this point, the dough will look very bright red but the color will soften after the dry ingredients are incorporated.
- Mix the flour mixture into the butter mixture. I typically do this about 1/2 at a time, starting with the mixer on a low speed. It should be slightly difficult to incorporate all of the dry ingredients.
- Beat the milk into the dough.
- Cover the bowl and place in the fridge for at least 2 hours or up to 48 hours.
Assemble & Bake
- Unwrap the Hershey's Kisses, place in a freezer bag and pop in the freezer. This isn't 100% necessary, but if you want to ensure that the Kisses retain their shape and don't melt – be sure to freeze them first.
- Preheat the oven to 350℉ (180℃) and line cookie sheets with parchment paper or baking mats.
- Pour the 1/3 cup sugar for rolling onto a small plate or shallow bowl. Scoop the dough into balls with about 1 tablespoon of dough each. Roll into a ball, and then roll the ball in the sugar.
- Place the cookie dough balls about 2 inches (5 cm) apart on the lined cookie sheets. Bake 1 sheet at a time in the middle of the preheated oven. They'll need about 9-12 minutes to bake, or until the tops look set.
- Remove from the oven. Let the cookies cool for 5 minutes, then place a frozen Hershey's Kiss on top of each cookie. Cool the cookies on the cookie sheet. If you want to ensure that the Hershey's Kisses do not melt whatsoever, place the cookie sheet in the freezer immediately after placing a Kiss on top.
Notes
- All-Purpose Flour: Measure correctly to ensure that the cookies aren’t too dry. Whisk first, then spoon into dry measuring cups and level off the top. Using a kitchen scale and weighing will give the most accurate results.
- Cocoa: Natural cocoa – as opposed to Dutch processed – is used in red velvet so that the chocolate flavor isn’t too strong and that the cookies don’t look brown in color.
- Storage: Store in an airtight container at room temperature for up to 4 days, or in the fridge for up to 7. Ensure that the chocolate is fully set before placing in a storage container or stacking the cookies.
- Nutrition: Details provided are an estimate only, based on 1 cookie, assuming the recipe yields 30 uniform cookies.