Black Forest Cheesecake
I may receive compensation in the form of payment or products to supplement my posts, but all opinions remain my own. Read our disclosure policy.

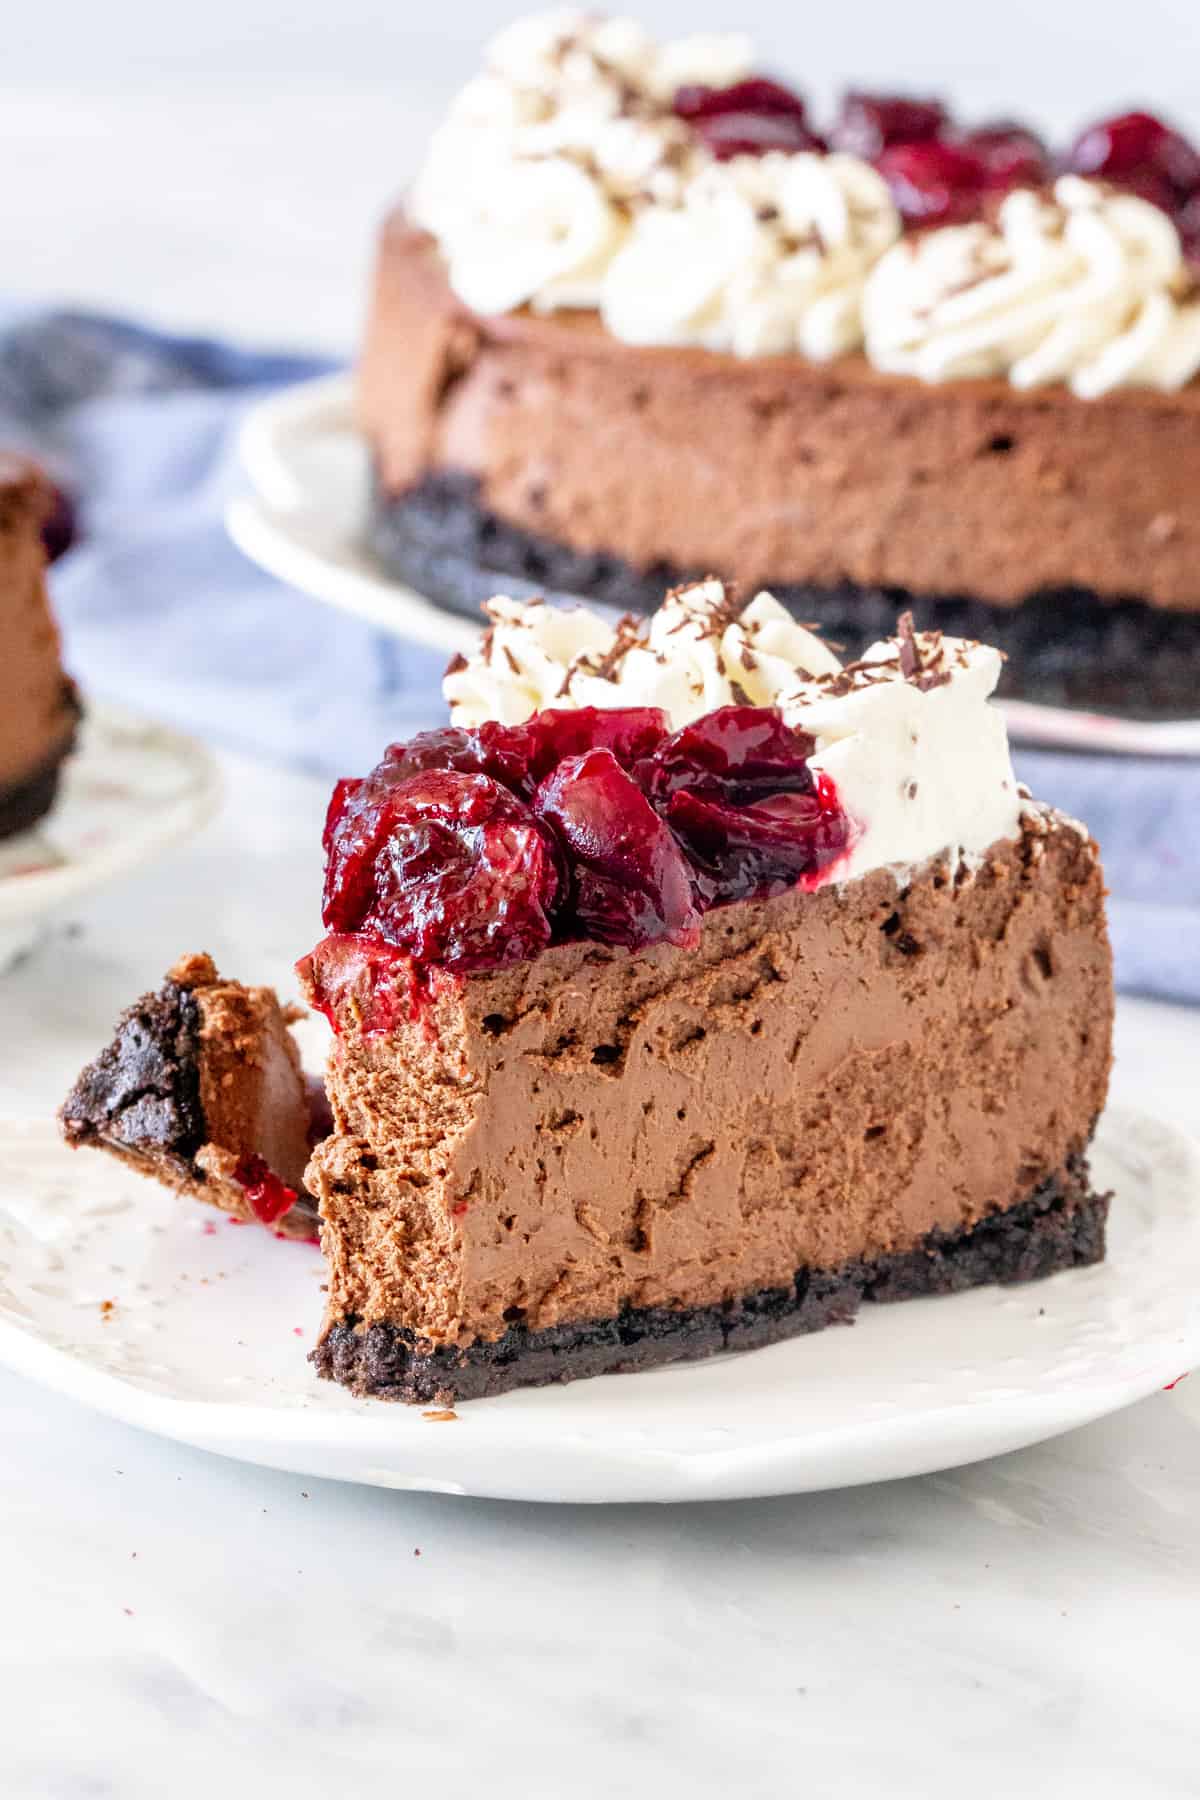
This black forest cheesecake has a thick Oreo cookie crust and creamy chocolate cheesecake with fresh cherries and whipped cream on top. It’s truly decadent and looks absolutely stunning for a dinner party or any special event.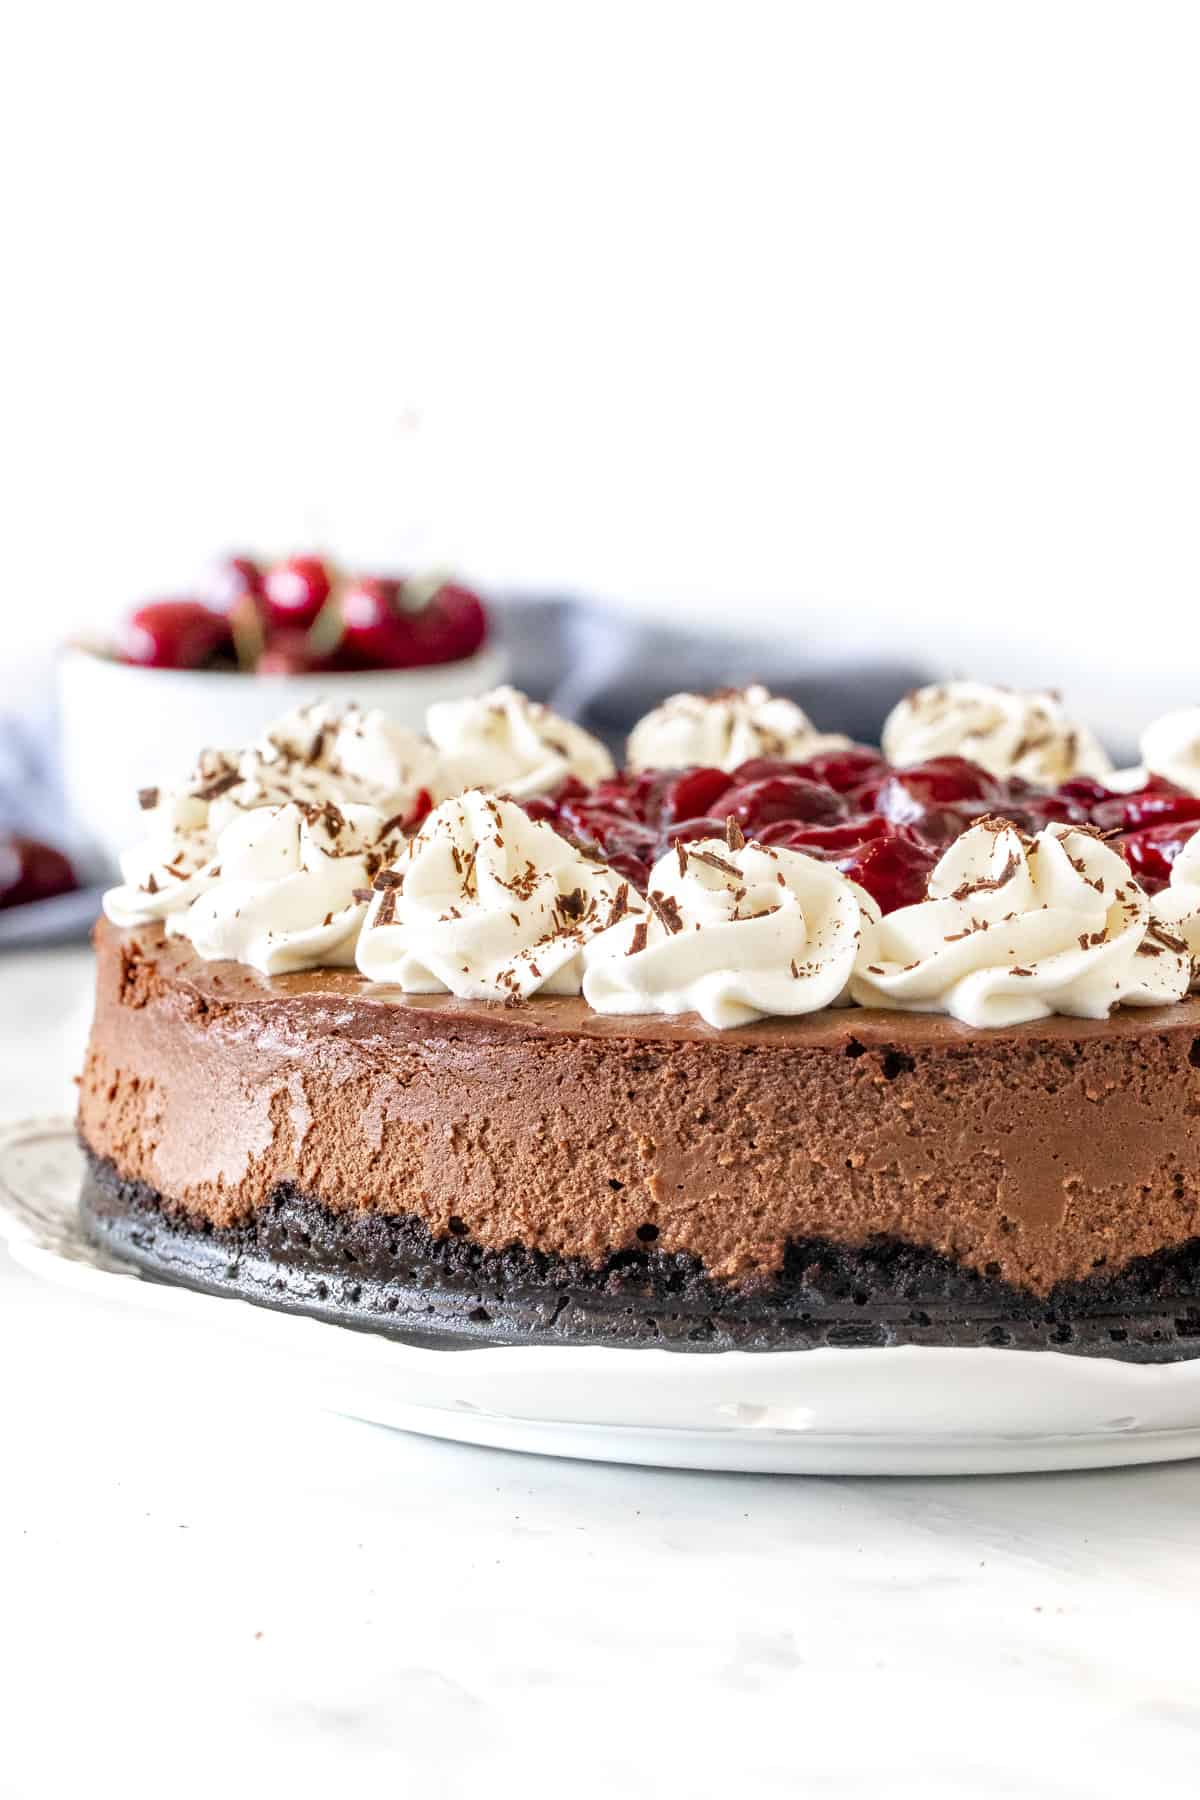
Black Forest – But Make it Cheesecake
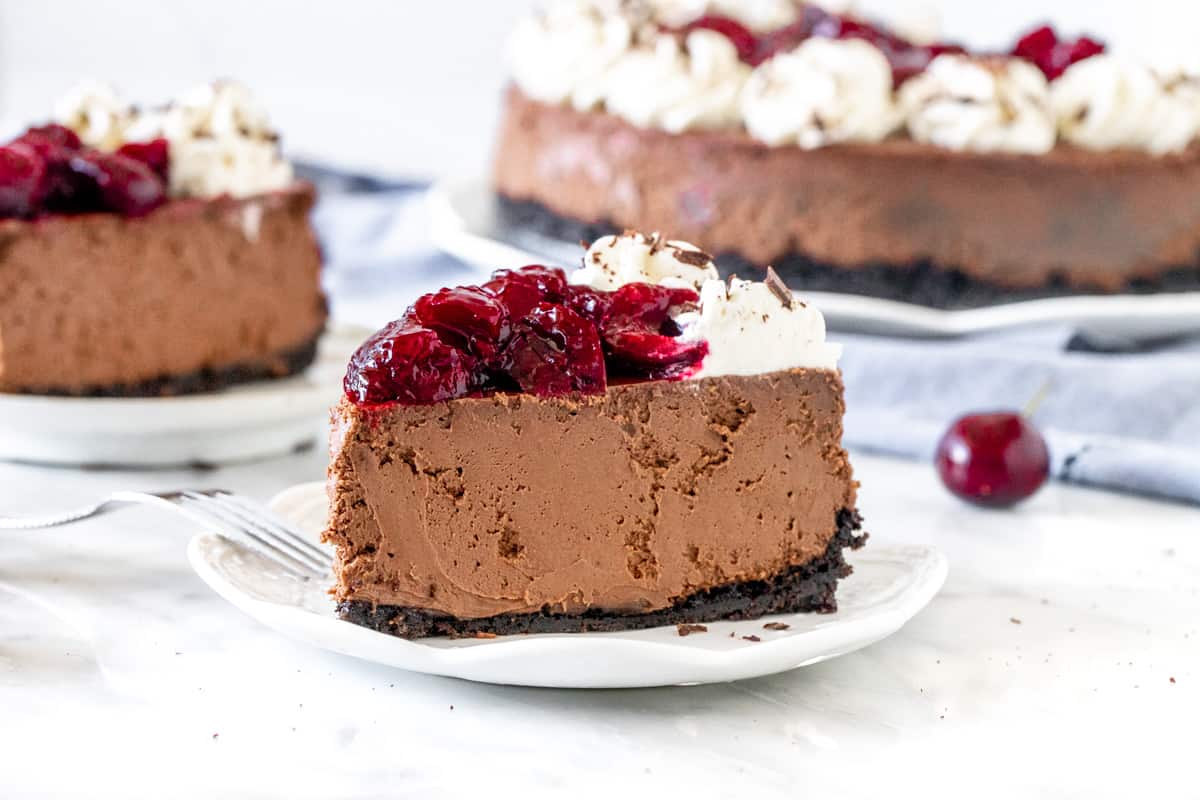
If you want to take the flavor of black forest cake to the next level – then I highly recommend this black forest cheesecake. A traditional black forest cake has layers of chocolate cake sandwiched with whipped cream and fresh cherries. But with this recipe, the chocolate cake is replaced with a creamy, tangy, luxuriously smooth chocolate cheesecake. You only need a small piece because it’s very rich. But the combination of decadent cheesecake and sweet, fresh cherries is truly perfection.
Here’s the breakdown of this recipe:
- Crunchy, Oreo cookie crust for the cheesecake base
- Ridiculously creamy chocolate cheesecake layer
- Cherry topping made with fresh, juicy, sweet cherries
- Rosettes of sweetened whipped cream with chocolate shavings
Making the Cheesecake
You’ll start off with the crust. You’ll crush chocolate wafer cookies (wafers and filling) and then mix the cookies with a little melted butter. You can either crush the cookies in a food processor, or place them in a freezer bag and crush with a rolling pin. Either works, as long as the cookies are fine crumbs. Then the mixture gets pressed into the bottom of your pan, creating a slight lip around the edge. Baking the crust on its own for 8-10 minutes helps to make the crust extra crunchy.
Making the filling for cheesecake is actually very simple. You’ll beat together cream cheese and sugar until smooth, then mix in the melted dark chocolate. In addition to the dark chocolate, we’re actually adding in a little cocoa powder dissolved in hot water for a richer chocolate flavor. Then mix in the sour cream, followed by the eggs one at a time.
This cheesecake recipe is baked in a water bath. This means that the outside of the pan is wrapped multiple times in tin foil and then placed in a large roasting pan. About 1/2 – 1 inch (1-2 cm) of water is poured into the roasting pan. The water acts as insulation to keep moisture in, and minimize changes in temperature that can cause uneven baking. The tin foil ensures that the water won’t seep in through the cracks of the springform pan. 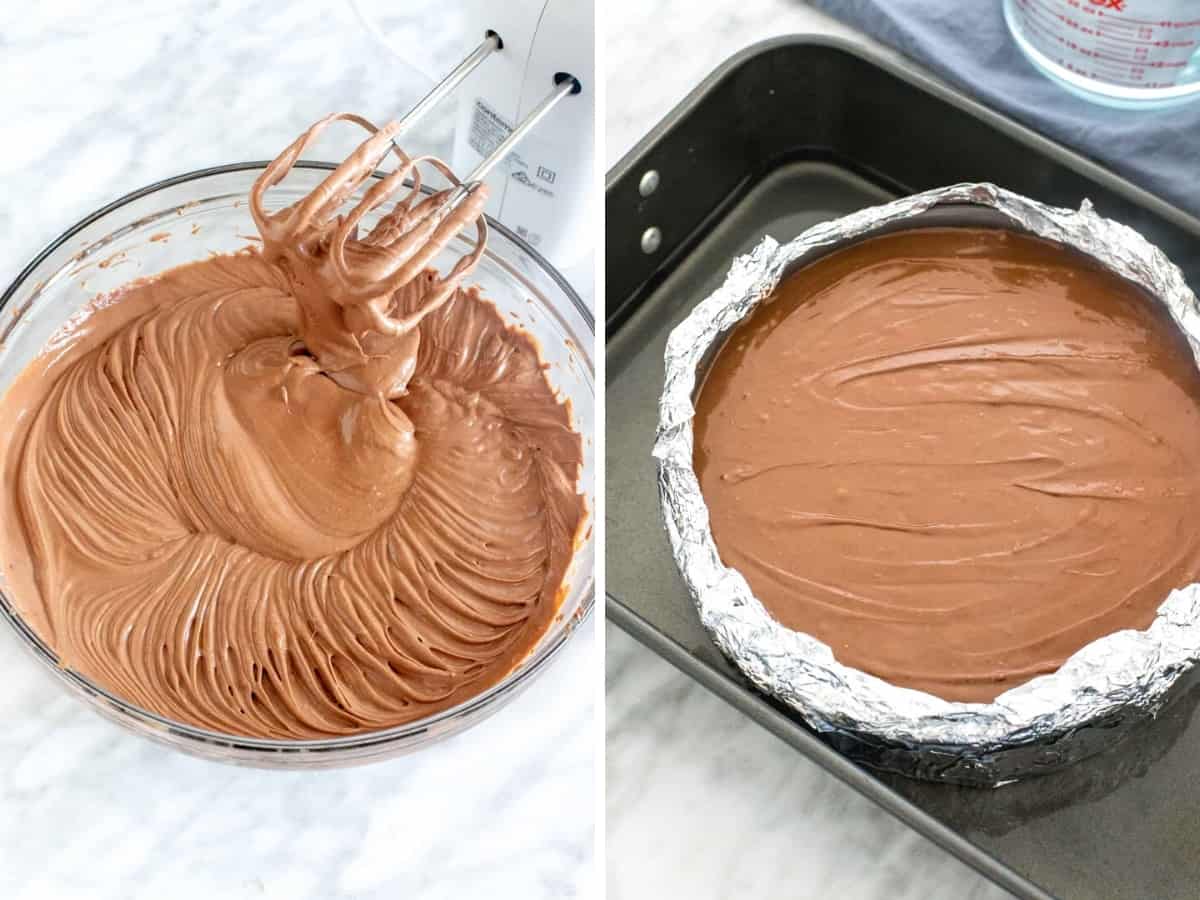
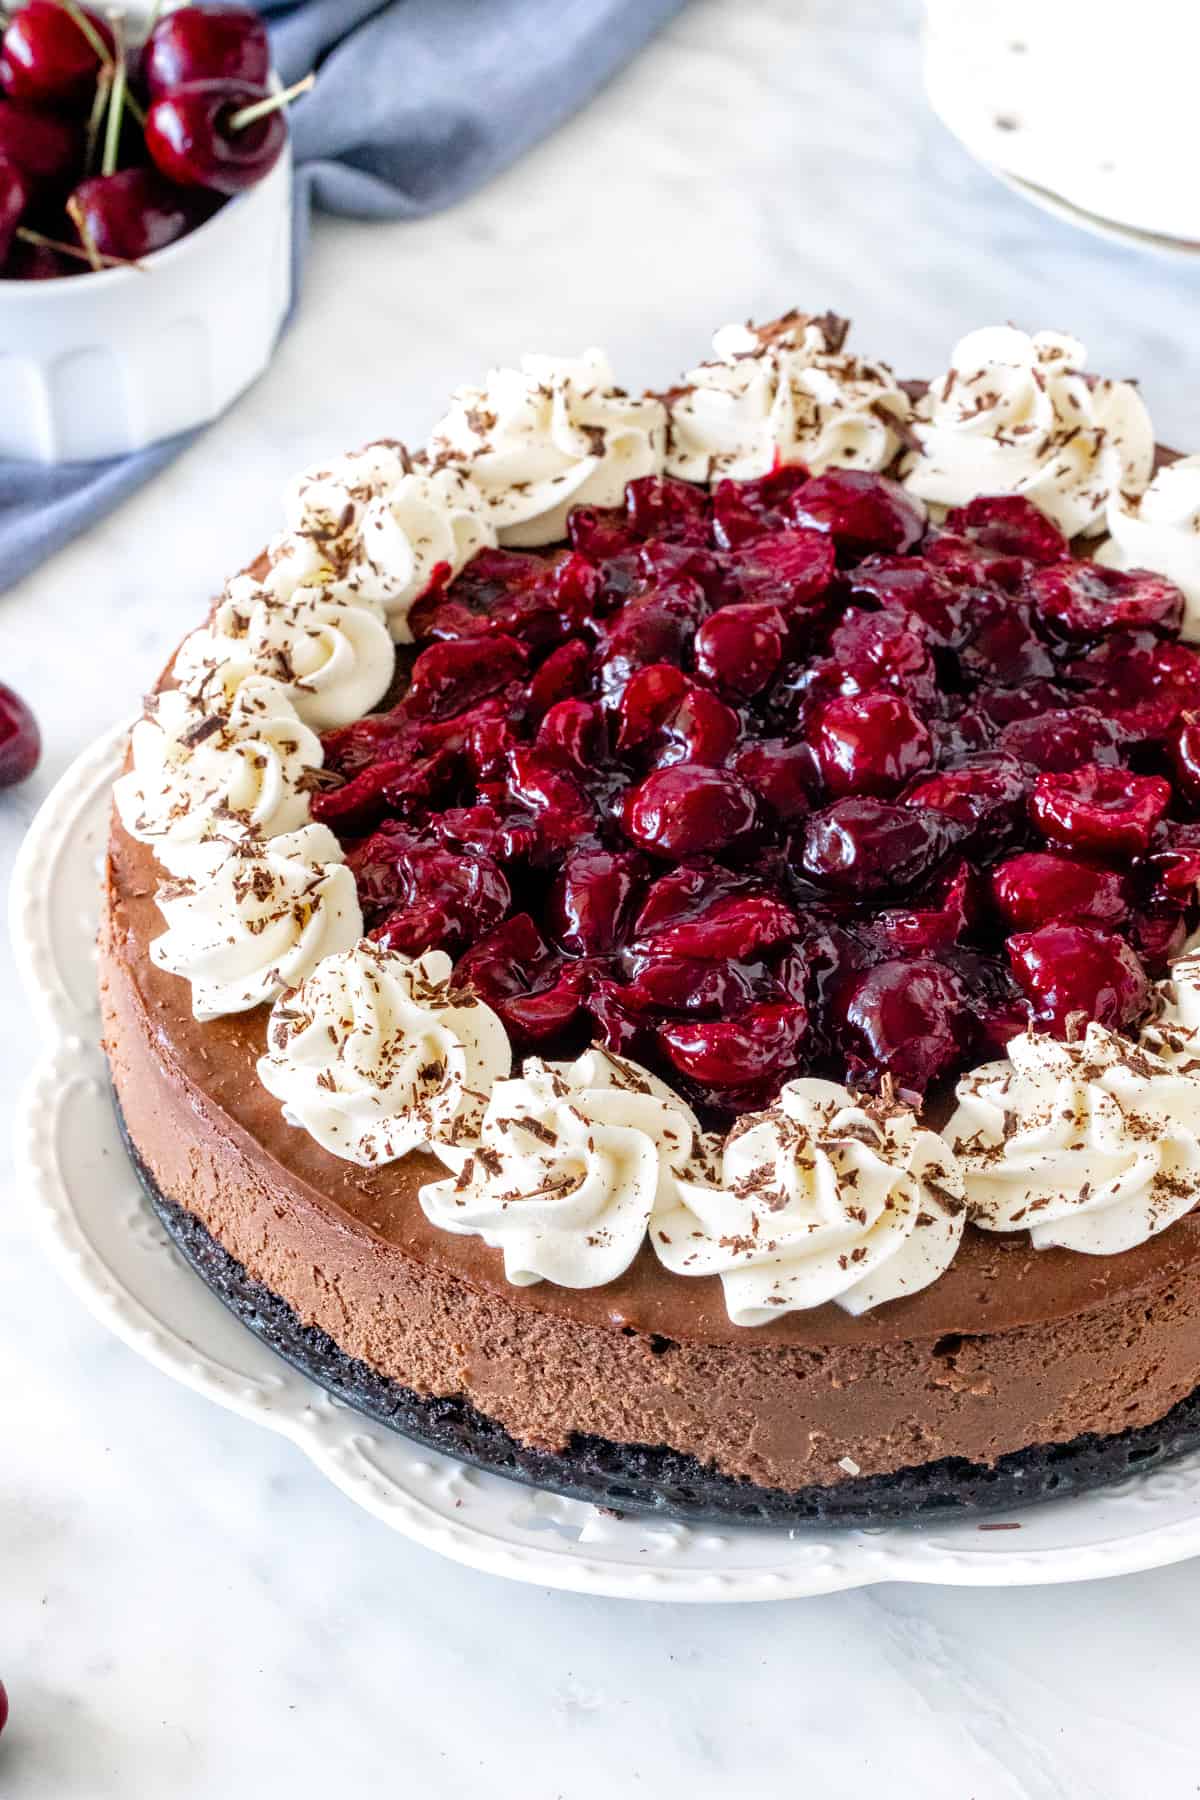
After the cheesecake is baked, cooled and chilled in the fridge for at least 6 hours – it’s time for the cherry topping. If you really, really want to save time, you could use canned cherry pie filling. But I highly recommend using fresh cherries for the best flavor. You’ll pit the cherries (I highly recommend using a cherry pitter if you have them) and slice them in half. Then the cherries get boiled down with a little sugar, lemon juice and cornstarch dissolved in water. This is to soften the cherries and create a bit of a sauce/compote.
Then you’ll pipe rosettes of whipped cream around the edges of the cheesecake and spoon the cherry topping into the middle. I used a 1M Wilton tip and piping bag to make the rosettes on top, and then sprinkled a few chocolate shavings onto the whipped cream. It’s truly a stunning cheesecake.
Baking Tips
- The cream cheese, sour cream and eggs must be room temperature before getting started. This is key so that the cheesecake mixes together properly.
- I used 70% dark chocolate for the cheesecake. Anything between 50%-70% dark chocolate will work well.
- Use a very big bowl for the cheesecake filling – there’s a lot of batter!
- When the cheesecake is done baking, it should still have a wobble in the middle.
- The cheesecake will need too cool slowly and then chill in the fridge for at least 6 hours before topping with cherries and serving. Therefore, I always make the cheesecake the day before I plan to serve it. Then chill overnight in the fridge, and make the cherry topping the next day before serving.
Love Cherries & Chocolate? Then be sure to try:
- Black Forest Brownies
- Cherry Almond Bars – for a less decadent fresh cherry recipe
- Cherry Crisp
- Maraschino Cherry Cake

Black Forest Cheesecake
Equipment
- 9-inch (23 cm) springform pan
- large roasting pan (big enough for the springform pan to fit inside)
- tin foil
Ingredients
Crust
- 24 Oreo cookies, wafers and filling
- 1/4 cup unsalted butter, melted
Chocolate Cheesecake Filling
- 10 ounces dark chocolate (285 grams), 50-70%
- 24 ounces full-fat cream cheese (680 grams), brick-style
- 1 1/4 cup granulated sugar (250 grams)
- 1 tablespoon cocoa powder
- 2 tablespoons hot water (30 ml)
- 3/4 cup sour cream (180 ml), I used 18% MF
- 4 large eggs
- boiling water, for the waterbath
Cherry Topping
- 10 ounces fresh, sweet cherries (280 grams)
- 1 tablespoon granulated sugar
- 2 tablespoons fresh lemon juice (30 ml)
- 2 teaspoons cornstarch
- 2 tablespoons water (30 ml)
Whipping Cream
- 1/2 cup whipping cream (120 ml)
- 2 teaspoons powdered sugar
- chocolate shavings, optional
Instructions
- Preheat the oven to 325 F (160 C) degrees.
- Wrap the outside of a 9-inch (23-cm) springform pan with tin foil. Wrap the pan at least 3 times to ensure that
Oreo Crust
- Crush the cookies (wafers and filling) in a food processor until fine crumbs. Or place in a freezer bag and crush with a rolling pin.
- Mix the cookie crumbs with the melted butter.
- Press the mixture into the bottom of springform pan, creating a slight lip around the edges.
- Bake in the preheated oven for 8 minutes. Remove from the oven and keep the oven turned on.
Cheesecake Filling
- Chop the chocolate into very fine pieces and place in a heatproof bowl. Microwave for 30-second intervals at medium power (not high power, which is often standard). Stir between each interval until smooth. Set aside.
- In a very large bowl beat the cream cheese and sugar until smooth.
- Beat in the melted chocolate. Turn off the mixer and scrape down the sides and bottom of the bowl.
- Whisk together the cocoa and water in a small cup.
- Beat the dissolved cocoa and sour cream into the batter.
- Mix in the eggs 1 at a time. Stop mixing as soon as the batter is smooth.
Baking and Cooling
- Place the springform pan (still wrapped in tin foil) in the middle of a large roasting pan.
- Pour the cheesecake filling over the crust and smooth the top.
- Pour hot water into the roasting pan so that there's about 1/2 - 1 inch (1-2 cm) of water in the pan.
- Place the roasting pan with the cheesecake inside in the oven. Bake for 55-65 minutes, or until the top looks just set. It should still wobble in the middle if you gently nudge the pan.
- Remove from the oven. Cool the cheesecake in the roasting pan until the water is room temperature, then remove the springform pan from the roasting pan and continue cooling on a wire rack. (Do not unclamp the outer ring of the springform pan).
- Once the pan is room temperature to the touch, cover with foil and place in the fridge to chill for at least 6 hours or overnight.
Topping & Serving
- Pit the cherries and slice in half.
- Add the cherries, sugar and lemon juice to a medium saucepan over low heat. Gently stir the mixture as the cherries soften and the juices begin to come out.
- Dissolve the cornstarch in the water, then add to the cherries and stir. The cherry mixture will start to thicken. Remove from the heat
- Beat the whipping cream and powdered sugar until peaks form.
- Transfer the whipping cream to a piping bag (I used a 1M Wilton tip).
- Remove the cheesecake from the fridge. Trace around the outer edge with a sharp knife, then unclamp the outer ring of the pan.
- Pipe rosettes around the edges of the cheesecake. Carefully spoon the cherry topping in the middle. Optionally, add a few chocolate shavings over the whipped cream.
- Slice with a thin, sharp knife. Be sure to slice all the way through the crust.
Notes
- Pan Sizes: This recipe can also be made in a 10-inch (25-cm) springform pan. There is too much batter to make it in an 8-inch (20-cm) springform pan however.
- Room Temperature Ingredients: The cream cheese, sour cream and eggs all must be room temperature before getting started. Take them out of the fridge about 30 minutes before making the crust.
- Cream Cheese: Make sure to use full fat, brick-style cream cheese. Do not use anything from a tub or that's labelled low fat, whipped or spreadable.
- Make Ahead Tips: I typically make the cheesecake the day before I plan to serve it. Cool fully, cover the pan and then place in the fridge to chill overnight. You can make the cherry topping any time during the day that you plan to serve it, or right before. Store in the fridge until ready to serve.
- Leftovers: Store leftovers covered in the fridge for up to 4 days.
- Nutrition: Nutrition information is an estimate only and based on 1 slice with cherries and whipped cream on top, assuming the cheesecake is sliced into 12 equal pieces. You could likely get up to 14 pieces out of this recipe, since it is very rich.
Nutrition


Have you ever used frozen cherries since they’re not in season right now? I was thinking of making g it for Christmas.
I have made this and think it is too sweet! I used 10oz bag of dark chocolate chips were they the wrong ones?
Hi Debby – what percentage were your dark chocolate chips? As mentioned in the recipe, I recommend using 50-70% dark chocolate. Semi-sweet chocolate will definitely be too sweet. That being said, sweetness is also a personal preference. You could also reduce the amount of sugar by 1/4 cup.
So if I decided to use raspberries instead of cherries on top do I still follow the directions?
Yup – that would definitely work. The only thing to note is that the raspberries will lose their shape – so it will be more of a thick raspberry sauce/compote