Brownie Cookies
I may receive compensation in the form of payment or products to supplement my posts, but all opinions remain my own. Read our disclosure policy.

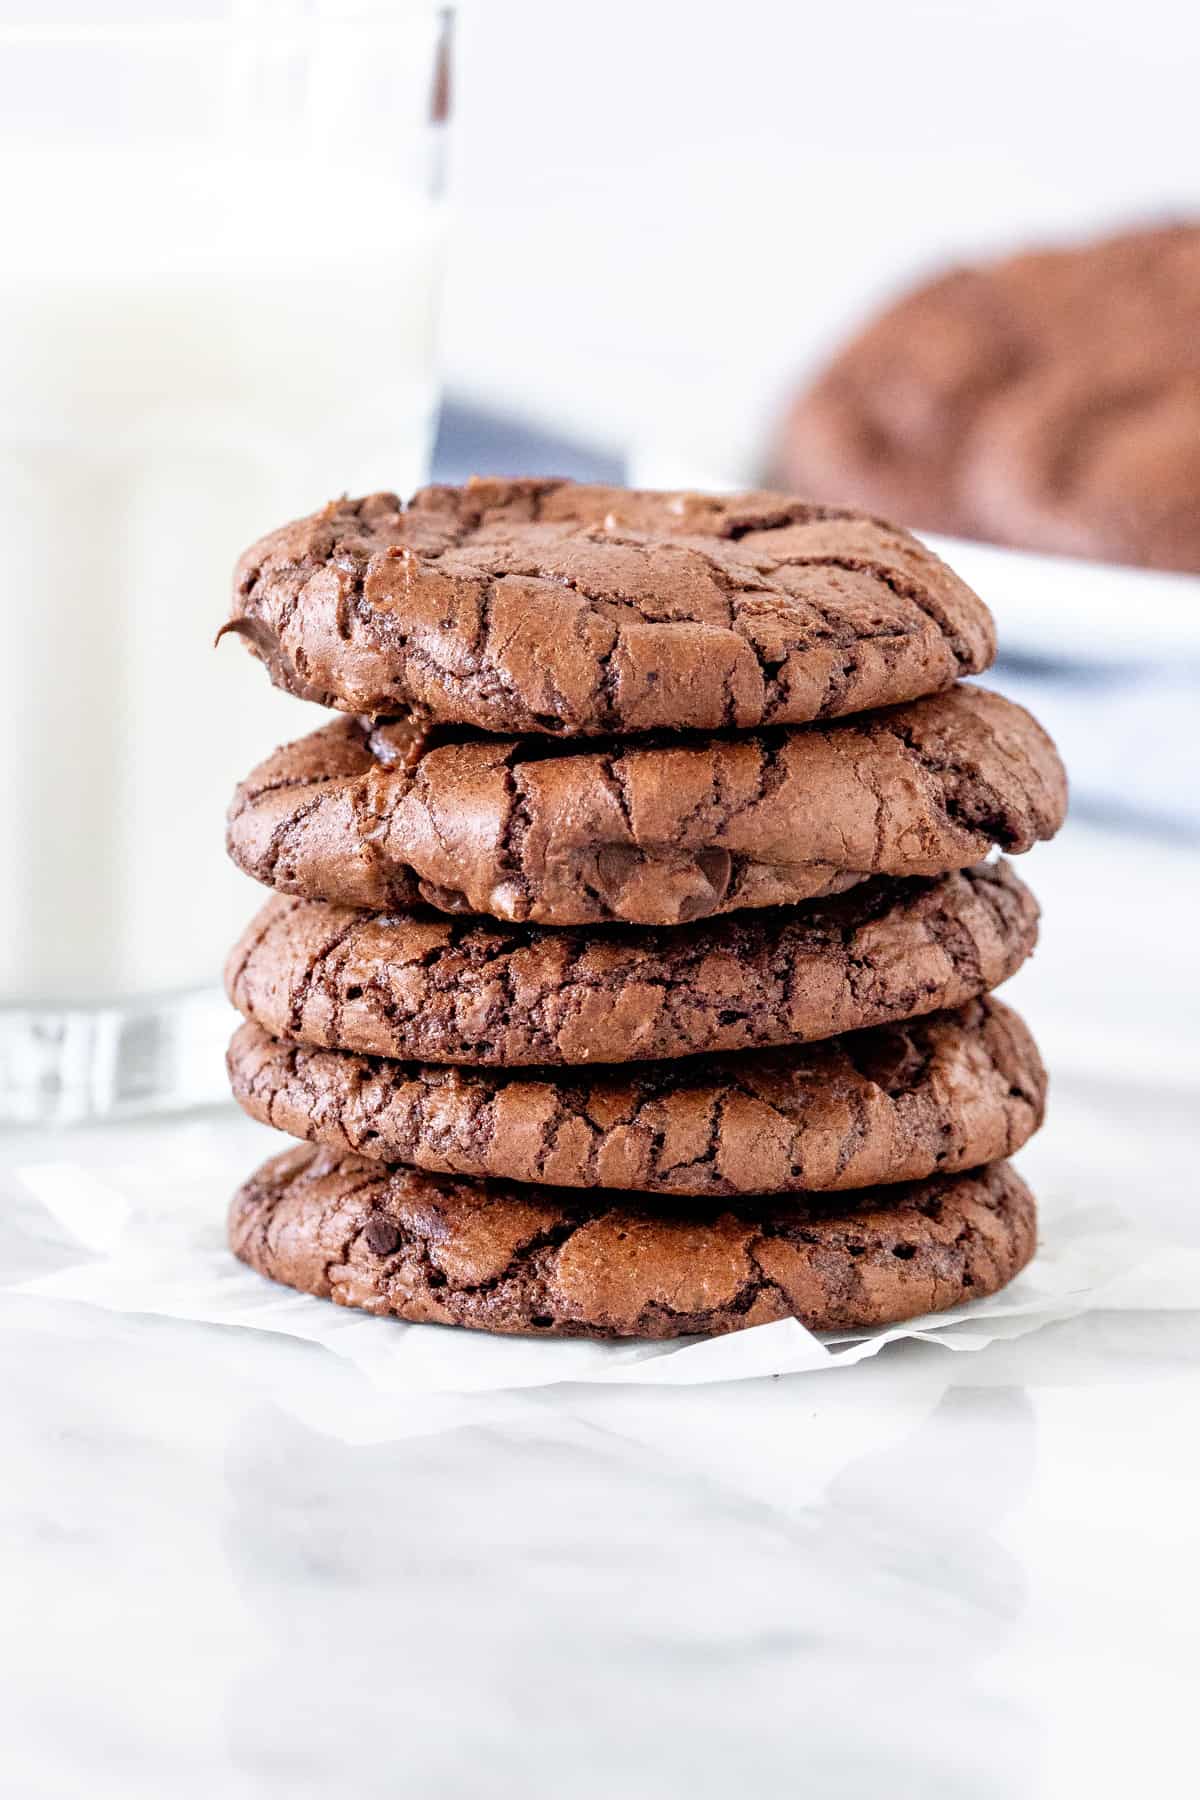
These brownie cookies have crinkly tops, a rich chocolate flavor and fudgy centers. They truly taste like a brownie, but in bite-sized form. 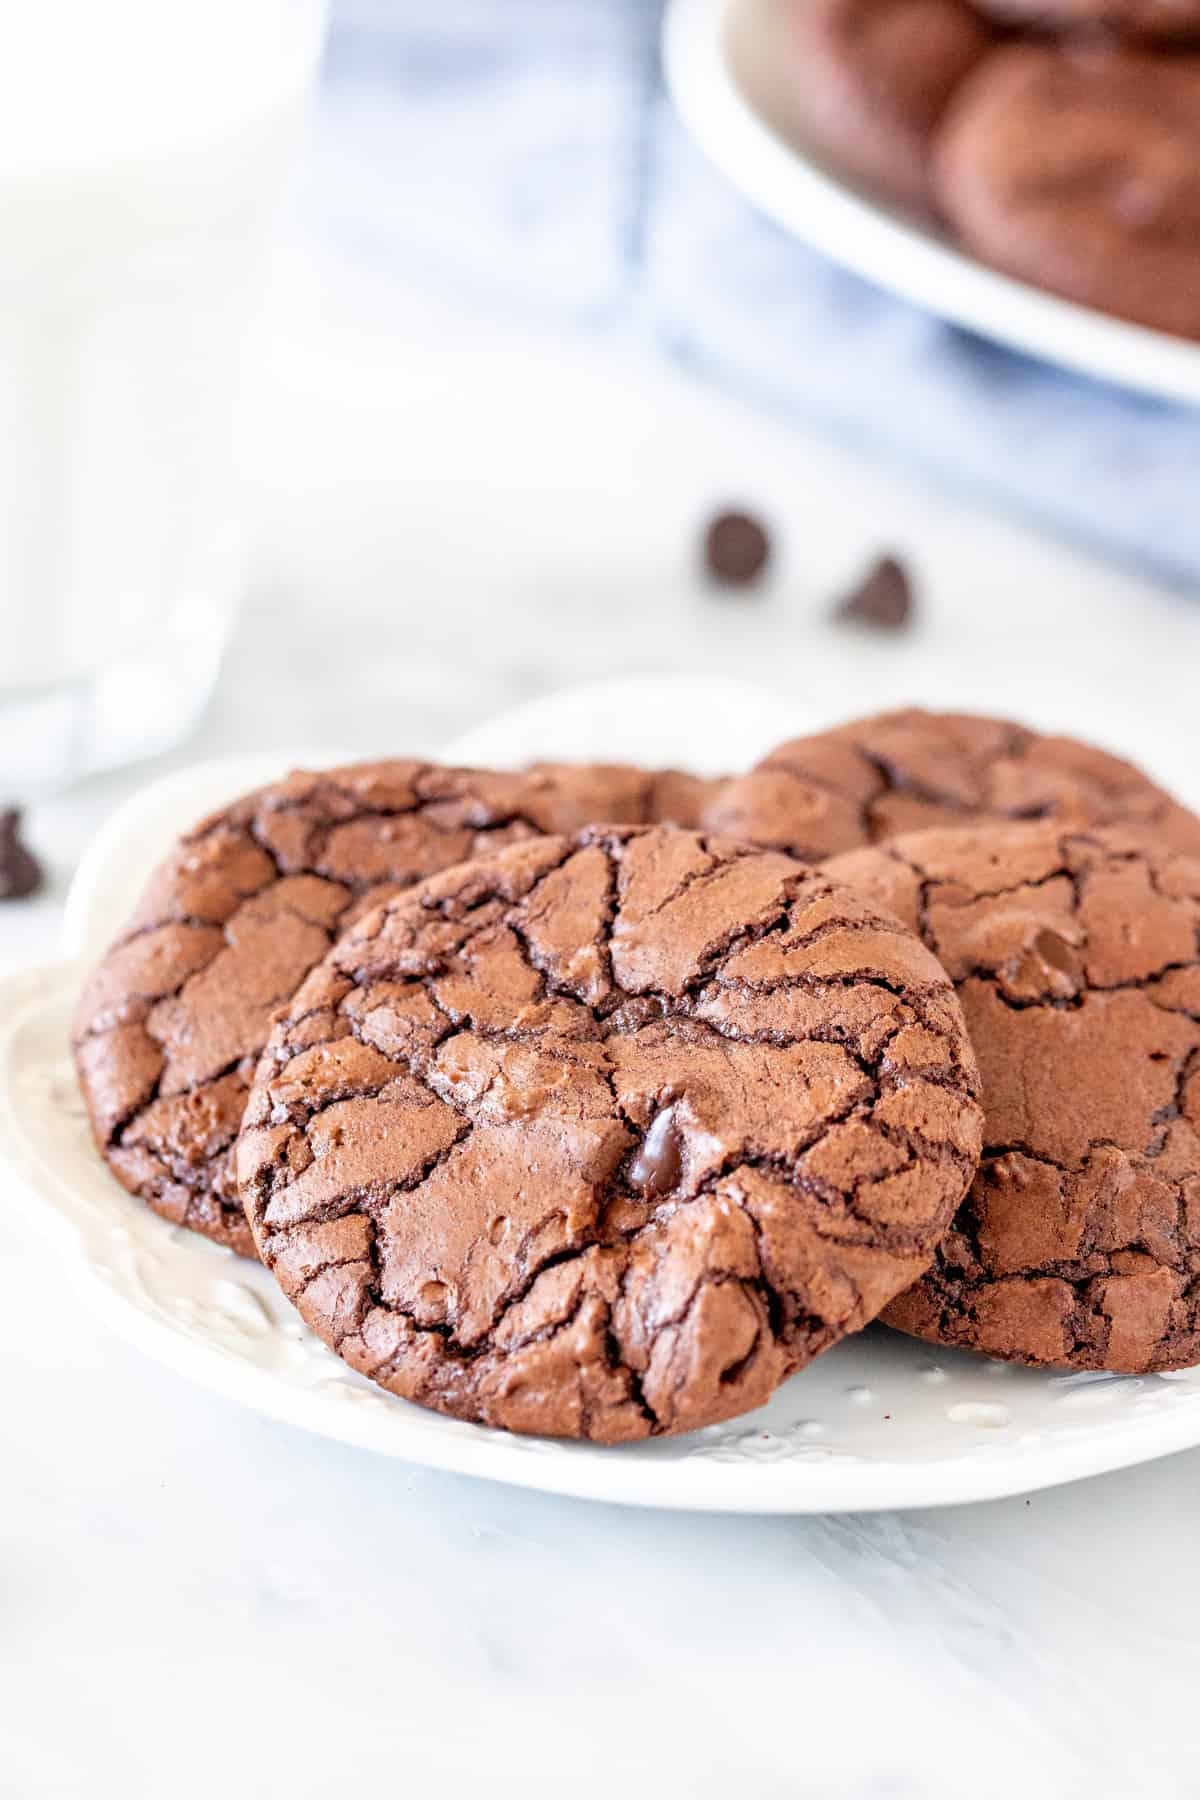
The Best Brownie Cookies
If you love a fudgy, chewy brownie with a decadent chocolate flavor – then why not make these brownie cookies? The rich chocolate flavor comes from using both melted chocolate and cocoa powder in the batter, and the texture is truly reminiscent of a moist and chewy brownie. Better still, they have crinkly tops similar to the paper thin layer you get on top the top of some brownie recipes.
Finding the Perfect Recipe
If you’ve ever made brownies vs chocolate cookies – you’ll know that brownie batter is thinner and glossier. This is because brownie batter has less flour/dry ingredients than a cookie recipe with the same amount of butter. Therefore, to make brownie cookies that truly taste like a brownie, I needed to keep the flour to a minimum. But I also needed them to have something to hold them together – otherwise they’d spread into a giant mess on the cookie sheet instead of keeping their cookie shape.
This is where the melted chocolate in the batter comes in handy. Not only does it add a rich chocolate flavor, but it also keeps the cookies together without adding too much flour.
Making the Cookies: Tips & Cookie Science
If you want to get straight to the recipe feel free to scroll down to the recipe card for a more condensed version. But for an understanding of each step and why it’s important, keep reading.
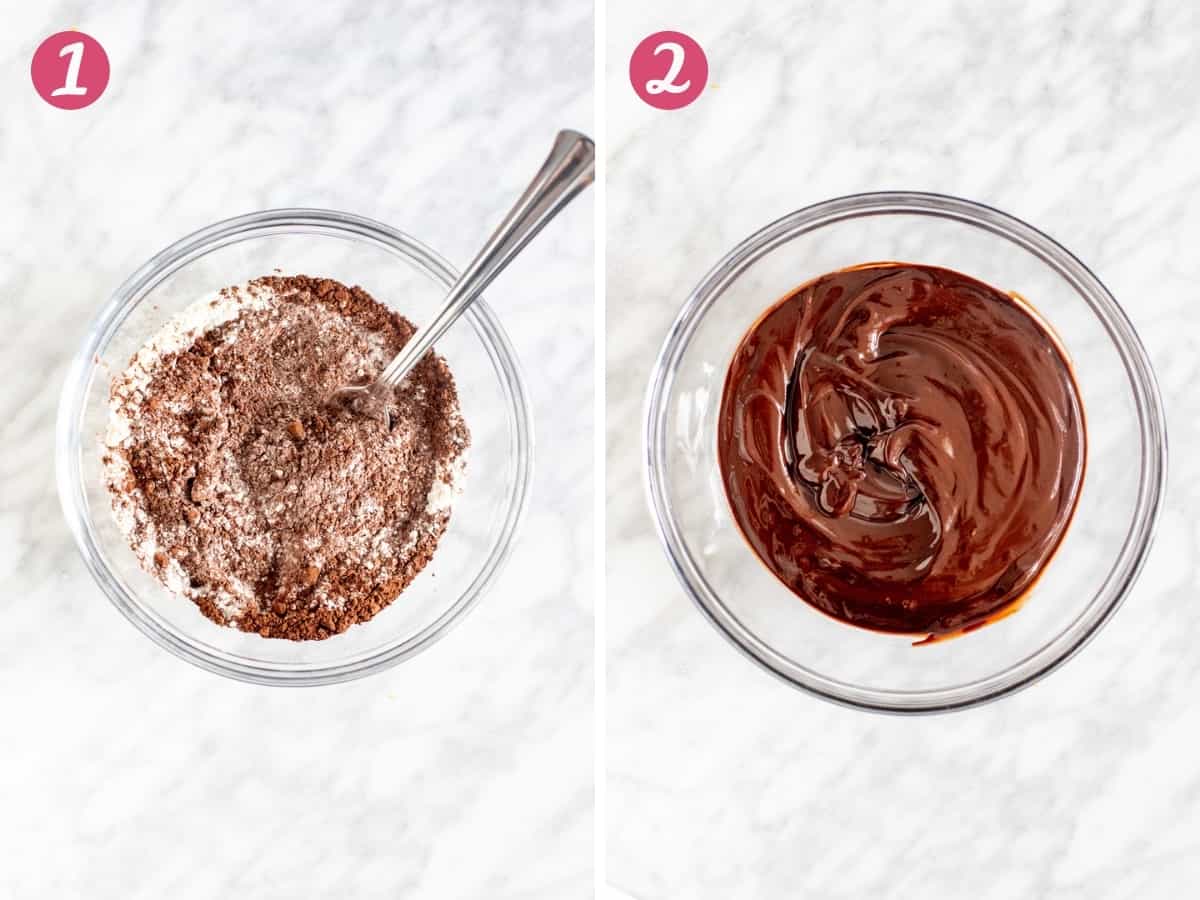
- First, you’ll whisk together the dry ingredients: flour, cocoa, baking powder and a little salt. This helps to remove any lumps.
- Then you’ll melt together the butter and dark chocolate. I like to use 70% dark chocolate in this recipe. You could use semi-sweet chocolate if you don’t like your brownies too rich, or any dark chocolate between 50-70%. Always chop the chocolate into very fine pieces first, and microwave medium power.

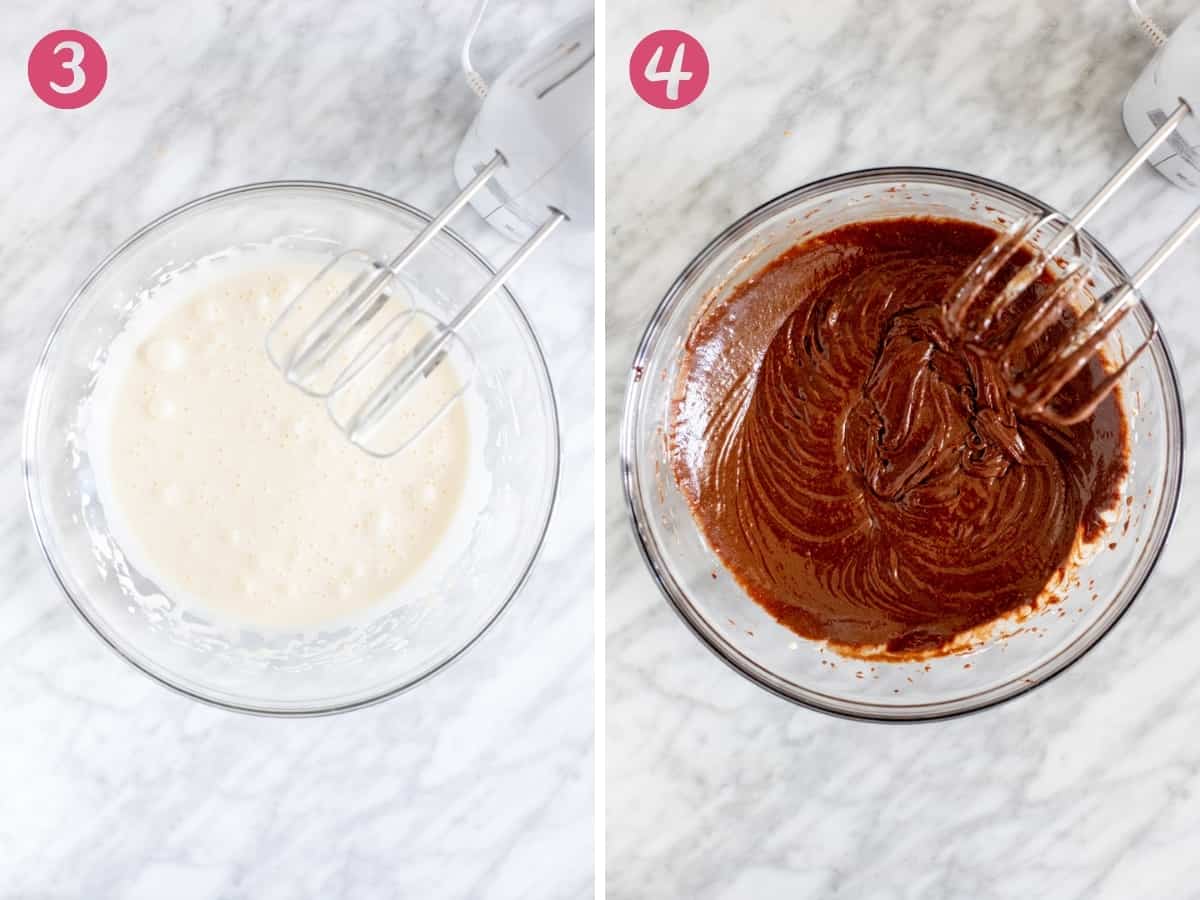
- In a separate bowl, you’ll beat together your eggs and sugar. This step helps to dissolve the sugar and gives the cookies those pretty shiny, crinkly tops that are so brownie-esque. You want to beat the sugar and eggs until they’re a very pale color – about 1-2 minutes with an electric mixer.
- Then the melted chocolate and butter mixture gets mixed into the batter. It will look glossy.
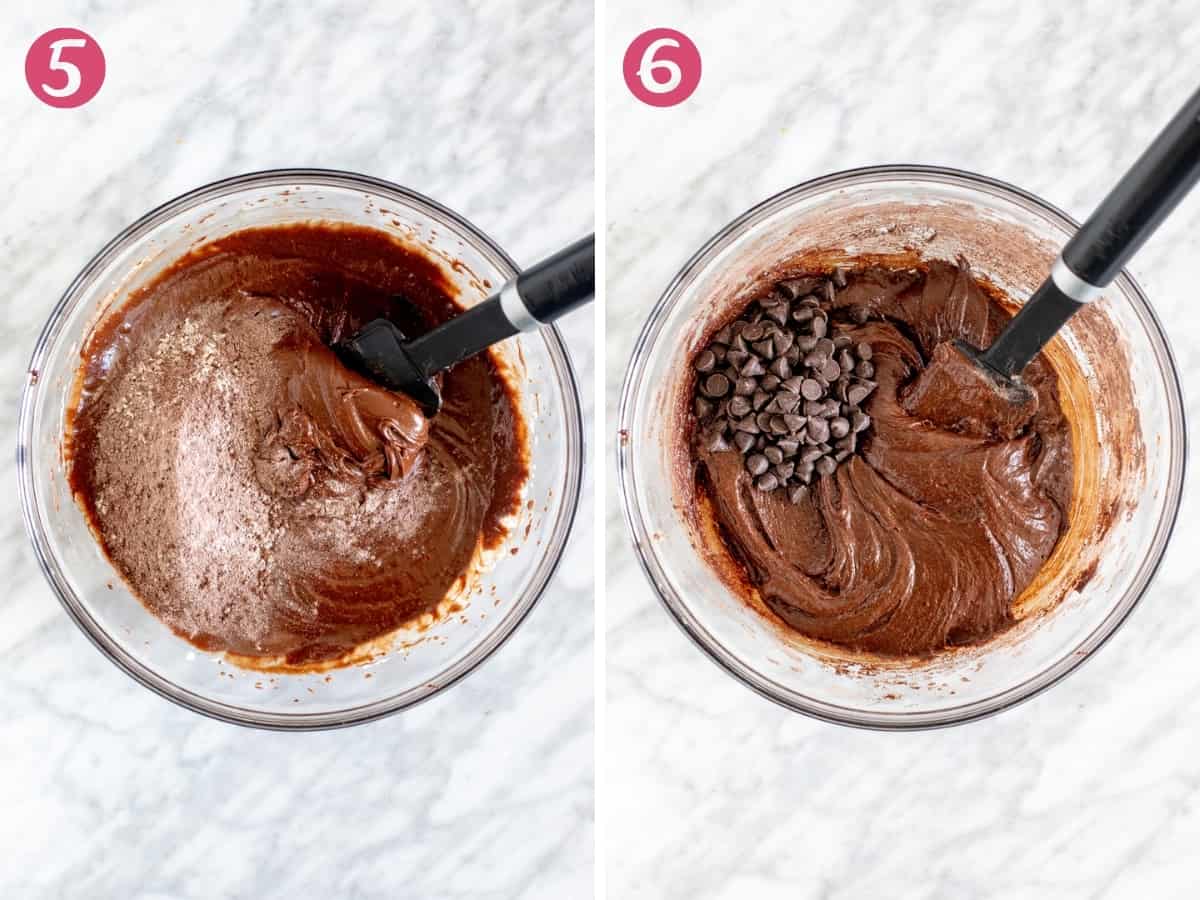
- Gently stir the dry ingredients into the batter. If there’s lumps, you can use an electric mixer as needed. Note that the batter will feel sticky.
- Then in go the chocolate chips.
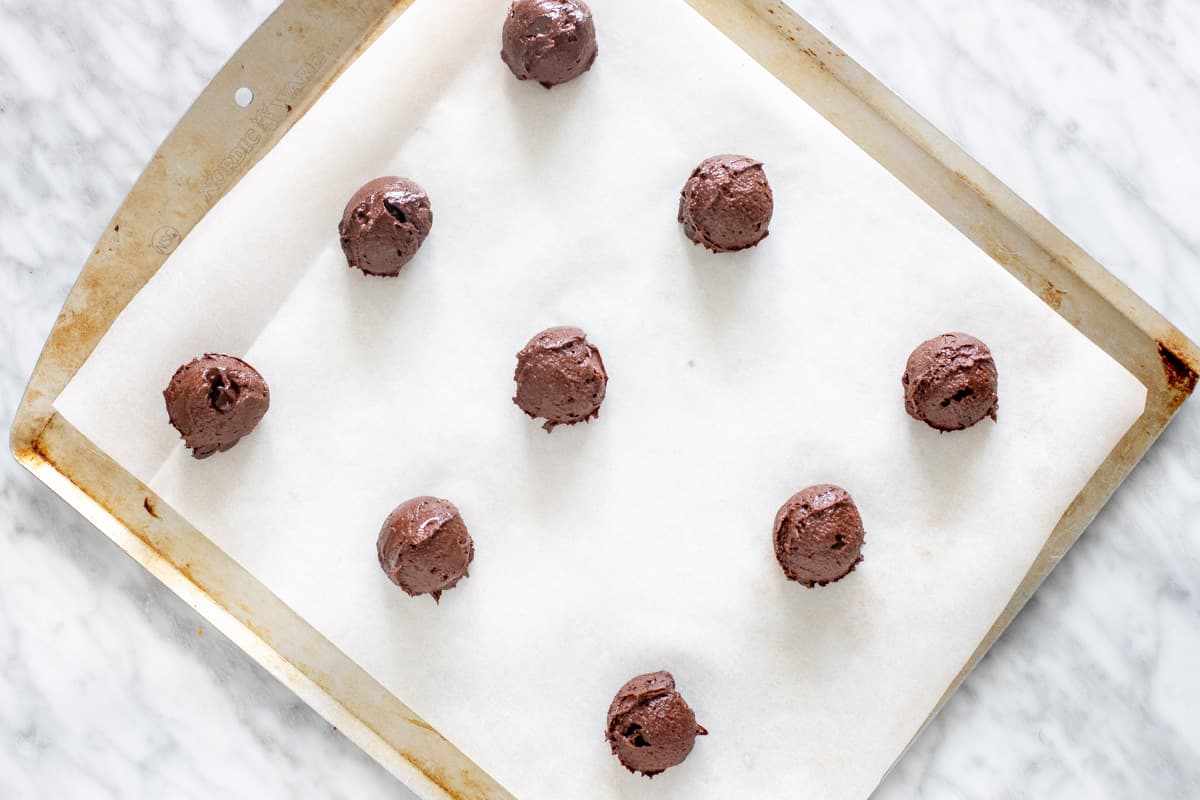
- To form the dough into balls, I highly recommend using a cooking scoop because the dough is very sticky. Lightly grease your cookie scoop or spoon with non-stick cooking spray (to avoid the dough sticking), then drop mounds of dough on your lined cookie sheet. My dough mounds were about 1.5 tablespoons of dough each (a little smaller than a golf ball) and I ended up 32 cookies in total.

- The cookies will bake for about 9-11 minutes at 350F. When they’re done, the tops should look slightly shiny with crinkles. I always recommend baking 1 cookie sheet at a time on the middle rack for even baking.
Freezing Brownie Cookies
Most cookie dough balls can be easily frozen. However, because the consistency of this dough is very different than most drop cookies – I do not recommend freezing the cookie dough. Baked and fully cooled cookies can be frozen for up to 2 months and thawed in the fridge. Make sure to freeze cookies in a single layer or separate cookies with a layer of wax paper.
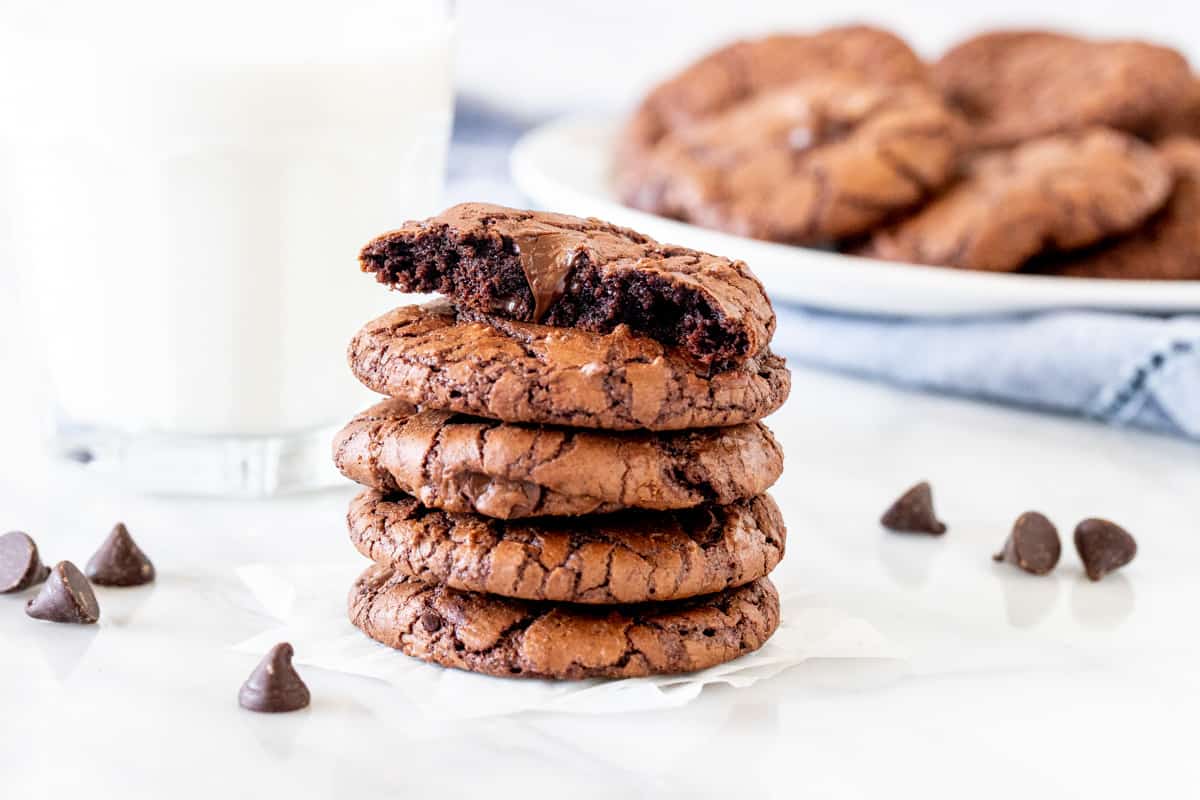
Fudgy, chewy and moist with beautiful crinkly tops – these brownie cookies are simply the best! And for more chocolate brownies and cookies, be sure to try:
- Triple Chocolate Brownies
- Cookie Dough Brownies – these are a super fudgy brownie with a layer of edible chocolate chip cookie dough on top
- Flourless Brownies
- Double Chocolate Chip Cookies

Brownie Cookies
Equipment
- Cookie Sheets
Ingredients
- 1/2 cup all-purpose flour (62.5 grams), spooned & leveled
- 1/4 cup cocoa powder (20 grams)
- 1 teaspoon baking powder
- 1/4 teaspoon salt
- 1/2 cup unsalted butter (112 grams), sliced into 6-8 pieces
- 8 ounces dark chocolate (226 grams), 50-70%
- 2 large eggs
- 1 1/4 cup granulated sugar (250 grams)
- 1/2 cup chocolate chips, I used dark but semi-sweet work too
Instructions
- Preheat the oven to 350F degrees. Line cookie sheets with parchment paper or baking mats.
- In a medium bowl whisk together the flour, cocoa, baking powder and salt until there's no lumps. Set aside.
- Chop the chocolate into very fine pieces and place in a heatproof bowl with the butter. Microwave on medium power for 45-second intervals. Stir in between each interval until smooth. Set aside.
- In a large bowl beat the eggs and sugar until pale in color (about 1-2 minutes).
- Mix the melted chocolate mixture into the egg mixture until its even in color.
- Gently stir the flour mixture into the batter. If there's lumps, use an electric mixer on low speed until it's smooth. The batter will be glossy and sticky.
- Sir in the chocolate chips.
- Lightly spray a cookie scoop (or tablespoon) with non-stick cooking spray. Scoop out about 1 - 1.5 tablespoons of dough and drop onto the lined cookie sheet. Ensure that each dough balls is about 2 inches apart.
- Bake 1 sheet at a time on the middle rack in the preheated oven for 9-11 minutes, or until the tops look set. They should be crinkly and shiny.
- Cool the cookies on the cookie sheet, then transfer to a wire rack using a metal spatula.
Notes
- When measuring flour, whisk it first. Then spoon into a dry measuring cup and level off the top. Scooping the flour using the measuring cup leads to inaccurate measurements. Too much flour makes the cookies dry.
- I use 70% dark chocolate for a rich flavor. 50-70% dark chocolate works well. You could use semi-sweet chocolate for a less rich flavor. Do not use bittersweet chocolate (100% cocoa solids).
- Store cookies in an airtight container at room temperature for up to 5 days. Cool fully before placing in an airtight container. Fully cooled cookies can be frozen for up to 2 months. Thaw in the fridge. Do not freeze cookie dough balls for this recipe, since the dough is very sticky it doesn't freeze well.
- Nutrition information is an estimate only and based on 1 cookie, assuming the recipe yields 32 equal-sized cookies.
Sorry. This recipe did not work. Ended up with a flat mess. The “cookies” flattened out. Structure did not hold at all. What a waste of ingredients.
Hi Charmaine,
I’m sorry these didn’t turn out for you. Thanks for trying the recipe and reporting back. It’s hard to say for certain without being in the kitchen, but my initial thought would be that if the eggs and sugar weren’t beaten together for long enough this would impact the cookie structure.
These cookies are delicious! I followed the recipe to a tee, except adding the additional chocolate chips at end (I didn’t have any on hand) and they looked just like the photos. I did a 9 minute bake and an 11 minute bake and prefer the 11 minute so they are a but crunchier around the edge but still chewy in the middle. My husband and I are way more than we should have, but thats a great sign! Thanks, Will make again for sure!