Homemade Brownies – Chewy, Fudgy & Made with Cocoa
I may receive compensation in the form of payment or products to supplement my posts, but all opinions remain my own. Read our disclosure policy.

These homemade brownies are incredibly fudgy with the perfect chocolate flavor. They’re made from scratch with cocoa powder and other simple pantry ingredients. You’ll love their slightly gooey centers and perfect crinkly brownie tops.

**This post was updated August 29, 2024 with new photos and brownie baking tips**
Brownies should be fudgy, chewy, and have a rich chocolate flavor. This homemade brownie recipe is all of those things. There’s an almost creaminess to the brownie texture, then they have slightly crispy tops. You can easily fill them with chocolate chips, walnuts or even a layer of creamy chocolate frosting.
I like to think of this homemade brownie recipe as the Golidlocks of brownies – not too rich, not too sweet, but just right. They aren’t as rich as my triple chocolate fudge brownie recipe – which was developed for true chocolate lovers. This is my go-to brownie recipe for when I want something that everyone will love that requires no fancy ingredients and makes the perfect chewy, slightly gooey brownie.
Ingredients for Homemade Brownies
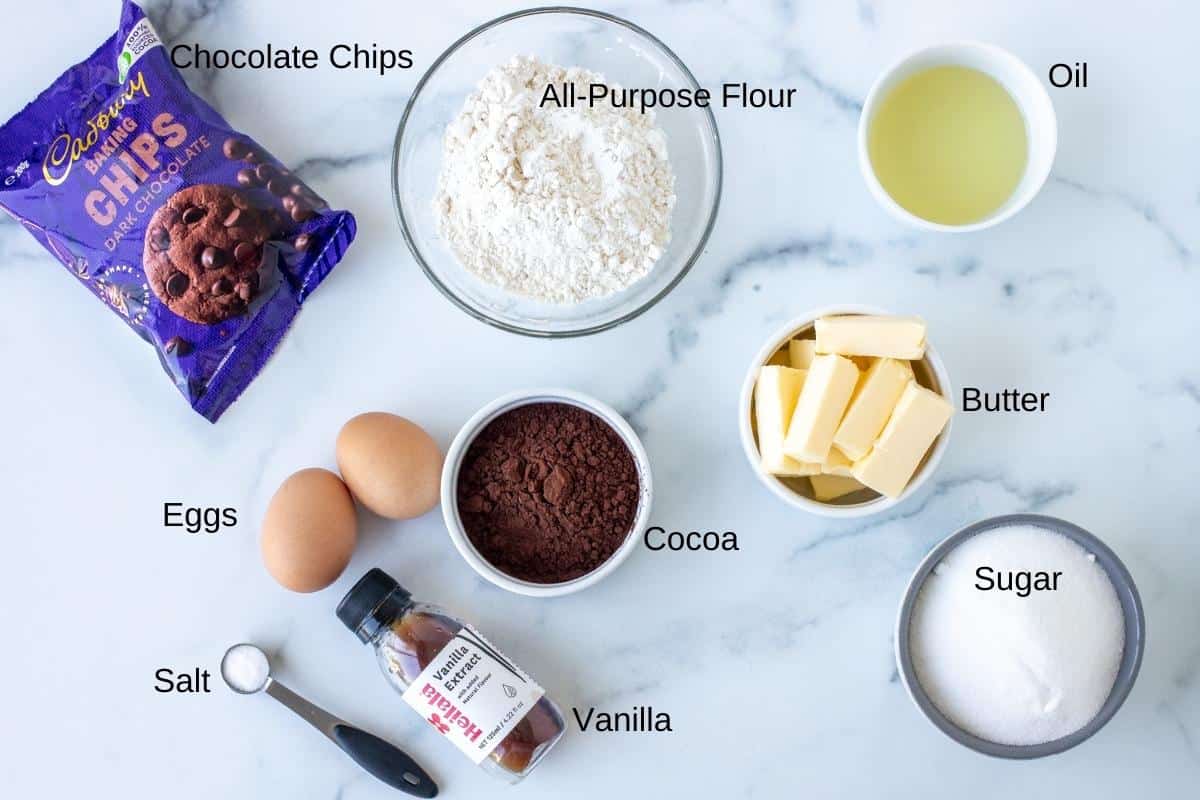
Ok – after a ton of recipe tests, here’s what I found gave the best results.
- 1/2 cup (112 grams) unsalted butter. Some brownie recipes use butter and others use oil. I prefer the flavor with butter.
- 2 tablespoons (30 ml) vegetable oil. Ok – while I prefer the flavor of butter, adding in just a touch of oil helps to keep you brownies moist for longer and helps to combat dryness.
- 2/3 cup (60 grams) cocoa powder for the chocolate flavor. I wanted these homemade brownies to use only cocoa powder because it’s a simple ingredient, and people are more likely to have it in their kitchen than baking chocolate. I also love the flavor of brownies with cocoa powder because it’s rich without being overpowering and reminds me of the brownies we made as children.
- 1 1/4 cups (250 grams) granulated sugar. It sounds like a lot, but trust me on this one.
- 2 large eggs plus 1 extra egg yolk. Eggs help to bind the batter together and also create a chewy texture. The extra egg yolk gives these brownies a little more chewiness.
- 1 teaspoons vanilla extract – always necessary.
- 2/3 cup (83 grams) all-purpose flour. Too much flour and your brownies get dry, not enough and they won’t hold together. Whisk the flour first, then spoon into dry measuring cups and level off the top or a scale will ensure accuracy.
- 1/4 teaspoon salt to balance out the sweetness. I sometimes use up to 1/2 teaspoon.
- 1 cup chocolate chips or 1/2 cup chopped walnuts. Your choice.
Making the Brownies
While having the right ingredients are important, at the end of the day, the process is just as important. You can scroll down to get straight to the recipe, but I recommend reading through the detailed descriptions below for the “why” of each step. I’ve also included photos to show you exactly what I mean.
- Preheat the oven to 350F (180C or 170C on a fan forced oven). I like to line my pan with parchment paper and leave an overhang around the edges. This way I can lift the brownies out of the pan and place on a cutting board to slice them after. You could also line the pan with aluminum foil or simply grease the pan.
- If doubling the recipe and making in a 9×13 inch pan, it can be a bit tough to lift the brownies out of the pan, so in that case I’d simply grease the pan.
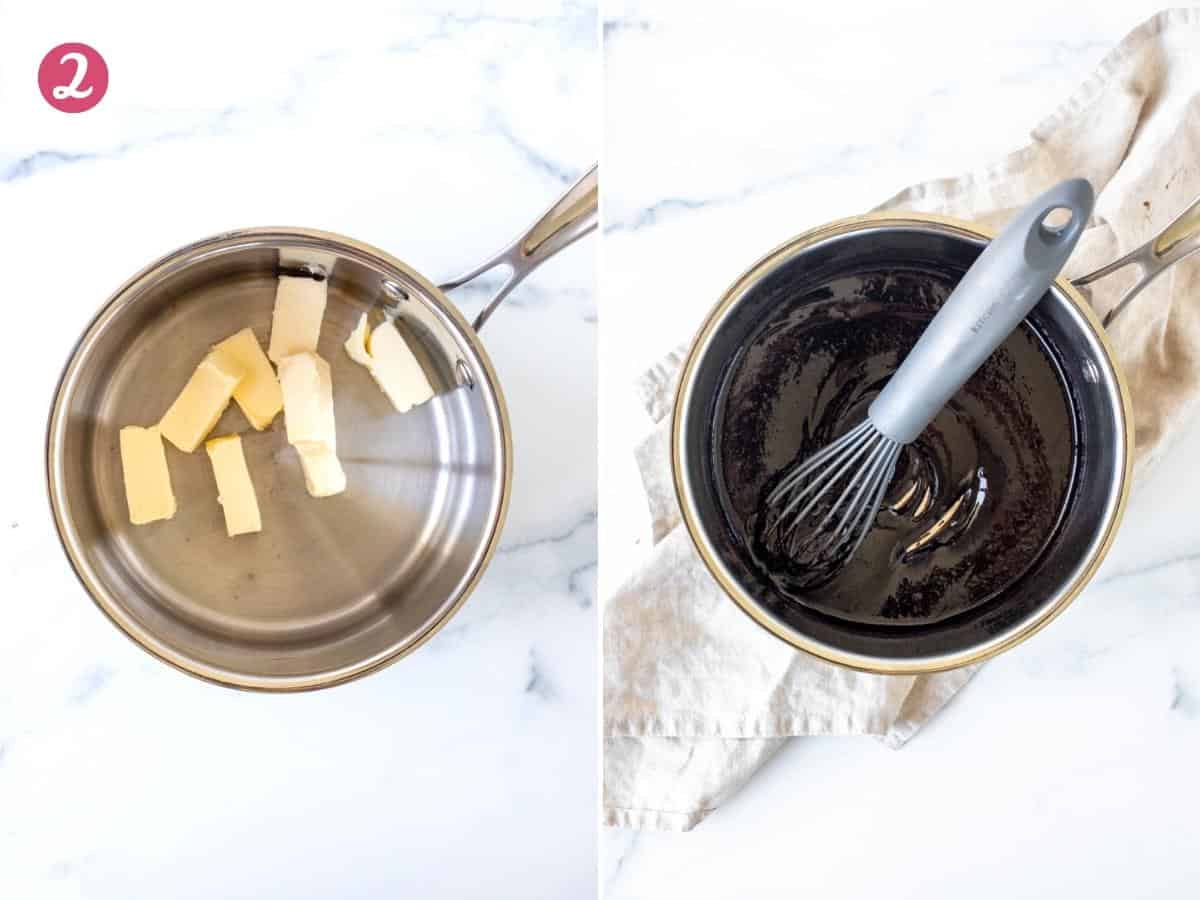
- Add the chopped butter to a saucepan and melt over low heat. When the butter is about 70% melted, add in the cocoa powder. Whisk together until smooth. This process helps the cocoa powder to bloom – which essentially means that it brings out the flavor. **Be careful that the burner is on low. Otherwise the cocoa can burn!

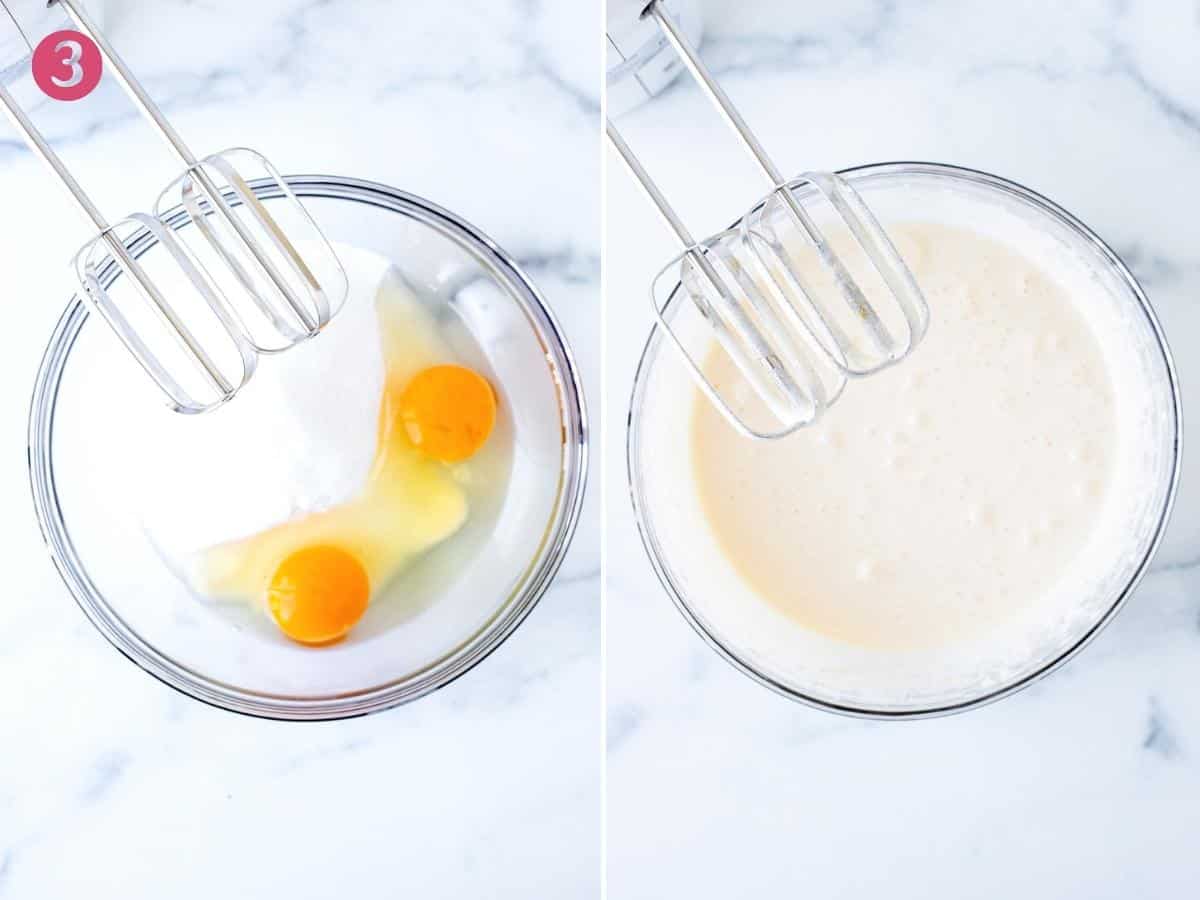
- In a separate bowl, beat the eggs and sugar until pale and frothy. You want the color to lighten significantly. This stage helps to dissolve the sugar to give a glossy, crinkly brownie tops and gooey centers that aren’t too dense. It also adds volume to the batter so that the brownies are taller. There is something about this step that makes the centers almost have a creamy flavor and velvet texture. It truly takes the recipe to the next level.
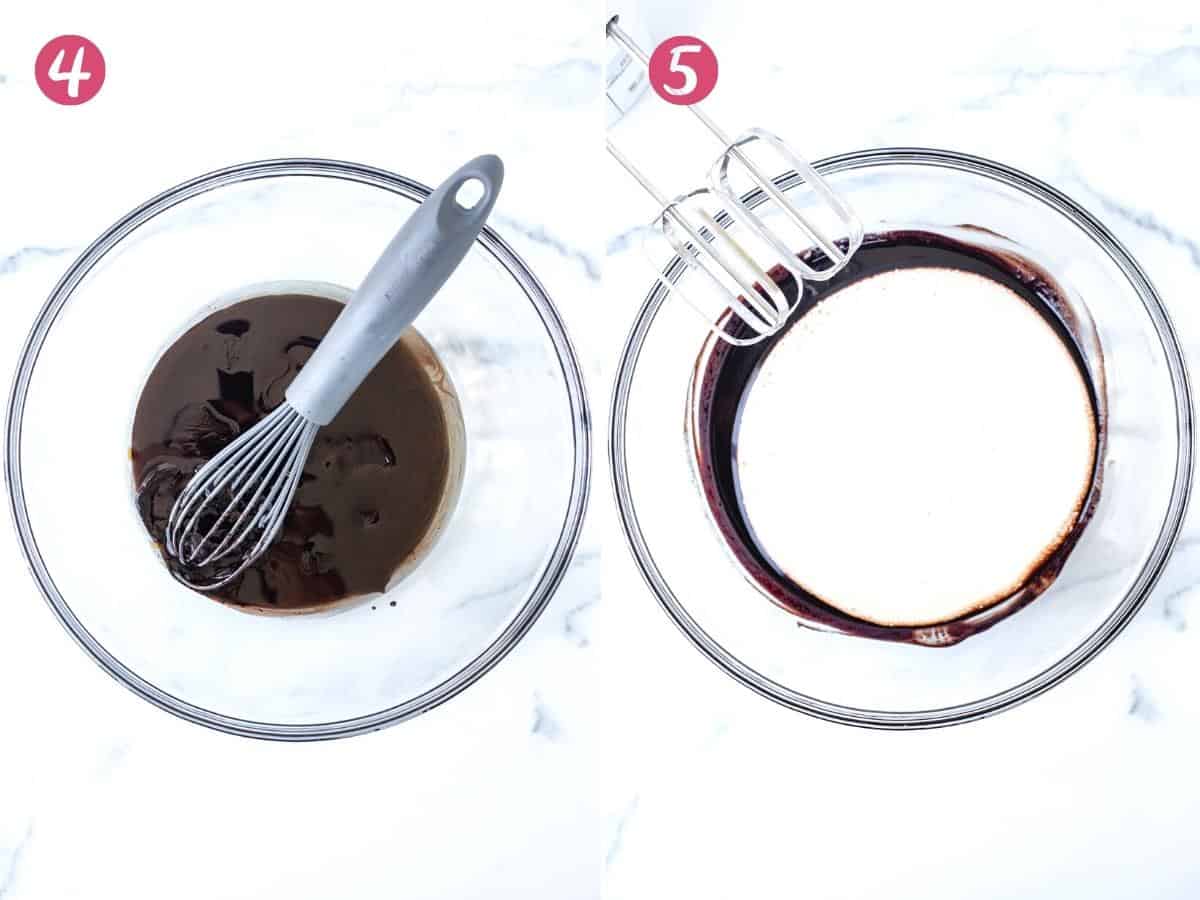
- Now that the butter and cocoa mixture as cooled slightly, whisk the oil and vanilla extract into the chocolate mixture.
- Then beat the egg mixture into the chocolate mixture. Note that if the cocoa mixture is still very hot, you run the risk of cooking the eggs which we don’t want.
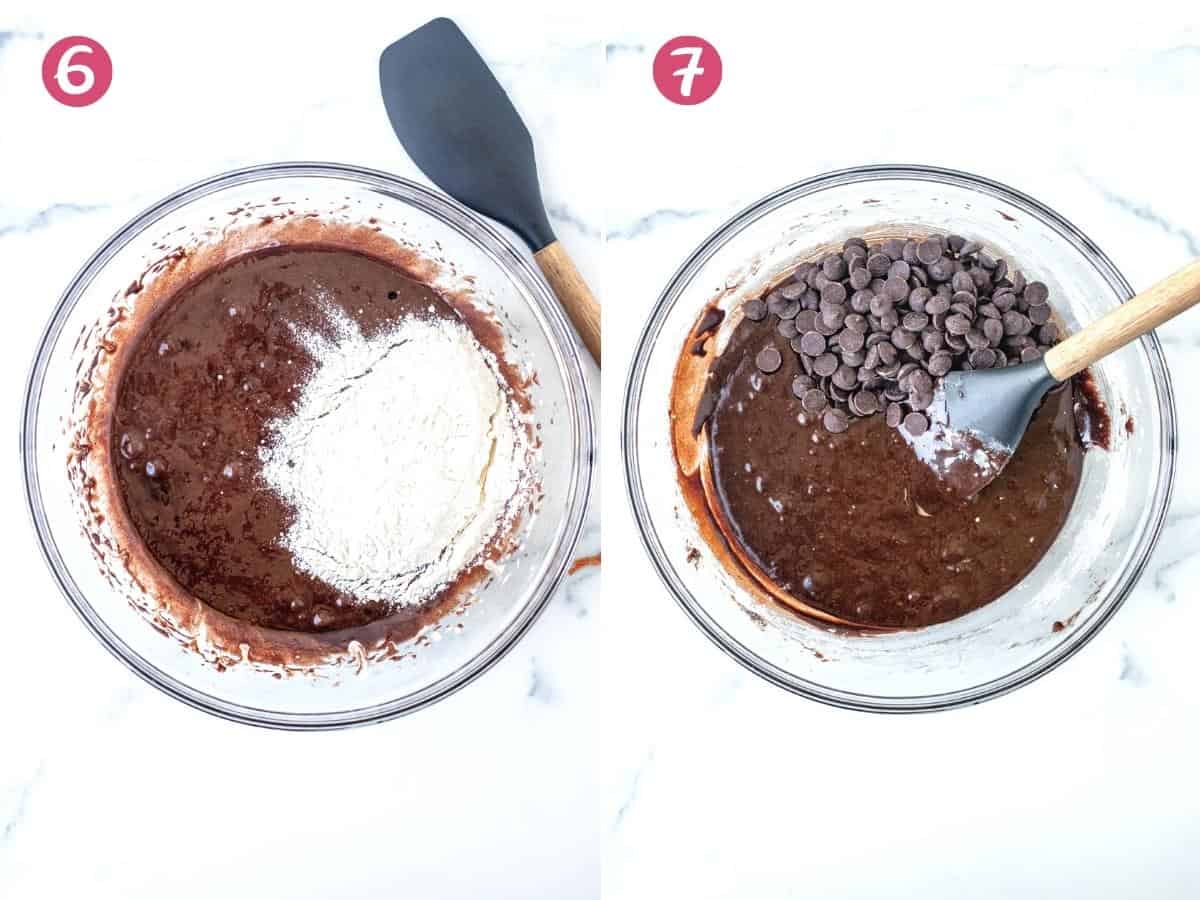
- Very gently fold the flour and salt into the mixture. It’s important to do this gently or the brownies can end up more cakey. You’ll notice that the batter is sticky – this is expected.
- Then fold in the chocolate chips or chopped walnuts. The chocolate chips help to create the crinkly tops with the paper thin layer. So if you leave them out, you may not get quite as perfect brownie tops.
- Spoon the batter into the prepared pan and smooth the top.
- The bake time will vary depending on your oven and how you like your brownies. Mine baked for 30 minutes and I prefer my brownies verging on gooey. When they’re done baking an inserted toothpick should come out with a few damp crumbs. If wet batter is stuck to the toothpick, then they aren’t done yet.
Pro Tip: Always wait for brownies to cool for at least 2 hours before slicing. I cut into my brownies after about 3 hours and the chocolate chips were stilly melty. If you want perfectly clean cuts, cool for at least 4 hours.

Should Brownies Bake in a Metal or Glass Pan?
You can bake brownies in either a glass or metal pan. A metal pan makes brownies have crispier edges and means that the brownies are less likely to fall in the middle. If baking your brownies in a glass pan, they’ll take longer to bake – as much as 5 extra minutes.
How do You Make Cakey Brownies?
If you prefer your brownies lighter in texture and less gooey, you can still use this recipe. Simply use 3/4 cups flour instead of 2/3 cup and add 1 teaspoon of baking powder. The baking powder helps the brownies rise. Along with the extra flour, you’ll get brownies that are a little lighter in texture and more similar to a piece of cake. I’d also recommend baking them a little bit on the longer side so that they’re less gooey.
Frosting for Brownies
I think these brownies are perfect in their simplicity, but they also hold up to frosting because they aren’t as rich, as say, my triple chocolate brownies or Nutella brownies. If you do plan to frost these brownies, I recommend baking for a few extra minutes so that they aren’t too gooey. Here are some of my favorite recipes you could use:
- Brownie Frosting
- Peanut Butter Frosting
- Cream Cheese Frosting – trust me on this one, it helps balance out the sweetness

These homemade brownies are seriously delicious and everything you could ever want in a brownie. Fudgy, gooey, filled with chocolate, not too rich, and completely addictive. I love that it’s a super easy brownie recipe, and whether you have them with ice cream or plain, you’ll be in brownie heaven.
For more brownie recipes, try these other favorites:


Homemade Brownies
Equipment
- 8×8 inch (20×20 cm) pan
Ingredients
- 1/2 cup unsalted butter (112 grams)
- 2/3 cup cocoa powder (60 grams)
- 2 large eggs
- 1 1/4 cups white sugar (250 grams)
- 2 tablespoons vegetable oil (30 ml)
- 1 teaspoons vanilla extract
- 2/3 cup all-purpose flour (83 grams)
- 1/4 teaspoon salt
- 1 cups chocolate chips (180 grams) , optional
- 1/2 cup chopped walnuts (about 75 grams) , I recommend adding nuts or chocolate chips, but not both
Instructions
- Preheat the oven to 350F degrees (180C or 170 on a fan forced oven). Line the bottom and sides of an 8×8 inch (20×20 cm) pan with parchment paper so that there's an overhang around the sides. Alternatively, you can line with aluminum foil leaving an overhang around the sides, or lightly grease.
- Add the butter to a medium saucepan and melt over low heat. When the butter is about 70% melted, add in the cocoa powder and whisk until smooth. Remove from the heat.
- In a separate bowl beat the eggs and sugar for at least 4 minutes, or until they become pale in color and double in volume.
- Now that the chocolate mixture is cooled slightly, whisk the oil and vanilla extract into the butter and cocoa mixture.
- Beat the eggs into the melted butter and cocoa mixture.
- Using a rubber spatula or wooden spoon, gently fold in the flour and salt.
- Optionally stir in the chocolate chips or chopped nuts.
- Pour the batter into the prepared pan and bake for about 28-32 minutes, or until the top looks set and an inserted toothpick comes out with a few damp crumbs.
- Cool the brownies in the pan. Once they're completely cooled and the pan doesn't feel warm, lift them out of the pan using the overhang of the parchment paper or aluminum foil. Then place on a cutting board and slice.
Notes
- Pan Sizes: This recipe can be doubled and made in a 9×13 inch pan. The bake time will be closer to 35-40 minutes. I recommend greasing the pan if using a 9×13 inch because they can be harder to lift out of the pan.
- Cocoa: I use Dutch processed for a richer flavor.
- Nutrition: Details provided are an estimate only and based on 1 very large brownie (made with chocolate chips but not nuts), assuming the pan is sliced into 9 large brownies. You can likely get 12 or 16 smaller brownies from this recipe.
- Storage: Store in an airtight container at room temperature for up to 4 days. Brownies can be frozen for up to 2 months.


We made these brownies as a family 2 nights ago… believe me… they are a deep, dark chocolate, Heavenly Fudgy SURPRISE!!!
Make sure you allow them time to cool! We didn’t have any parchment paper, and I wasn’t confident lifting them out with aluminum foil, either, but we just gave them 20 minutes to cool and they were perfect!
It you don’t like them quite as “deep~dark chocolatey”… I think they’d still be rich enough with even half of the cocoa and to substitute milk chocolate chips… has anyone tried the recipe that way, before?
It was a hit at our house!
This one is going in our recipe book, for sure!
Thanks very much for sharing!
I must say I agree this recipe no comparison to boxed and I may only make this in the future. Thanks for sharing they are delicious!
I must say I agree, I’m not sure any boxed brownie would compare to this recipe. My grandson birthday so because I didn’t have box mix or access today to go to store I searched out this recipe. Delicious!! Parchment paper made clean up a beeeze too. Thanks for sharing!
Made these and they are yummy
Hey I just wanted to let you know that I love your recipes. I love to bake and from scratch. I don’t like box cakes. So I enjoy your recipes. I am glad I found you. I’ve been baking for years and I love different recipes. I will try it at least once.lol I am going to try this brownie recipe and see how it turns out. Thank you so much. Thanks for the tips too. 🤗
Gloria – thank you so much for your kind comment – it made my day! So glad you’ve been enjoying the recipes
These look so yummy! Which cocoa powder do you like for these? And when you say beat the eggs and sugar, do you use a handheld mixer, stand mixer, or whisk by hand? Thanks so much!