Kit Kat Brownies
I may receive compensation in the form of payment or products to supplement my posts, but all opinions remain my own. Read our disclosure policy.
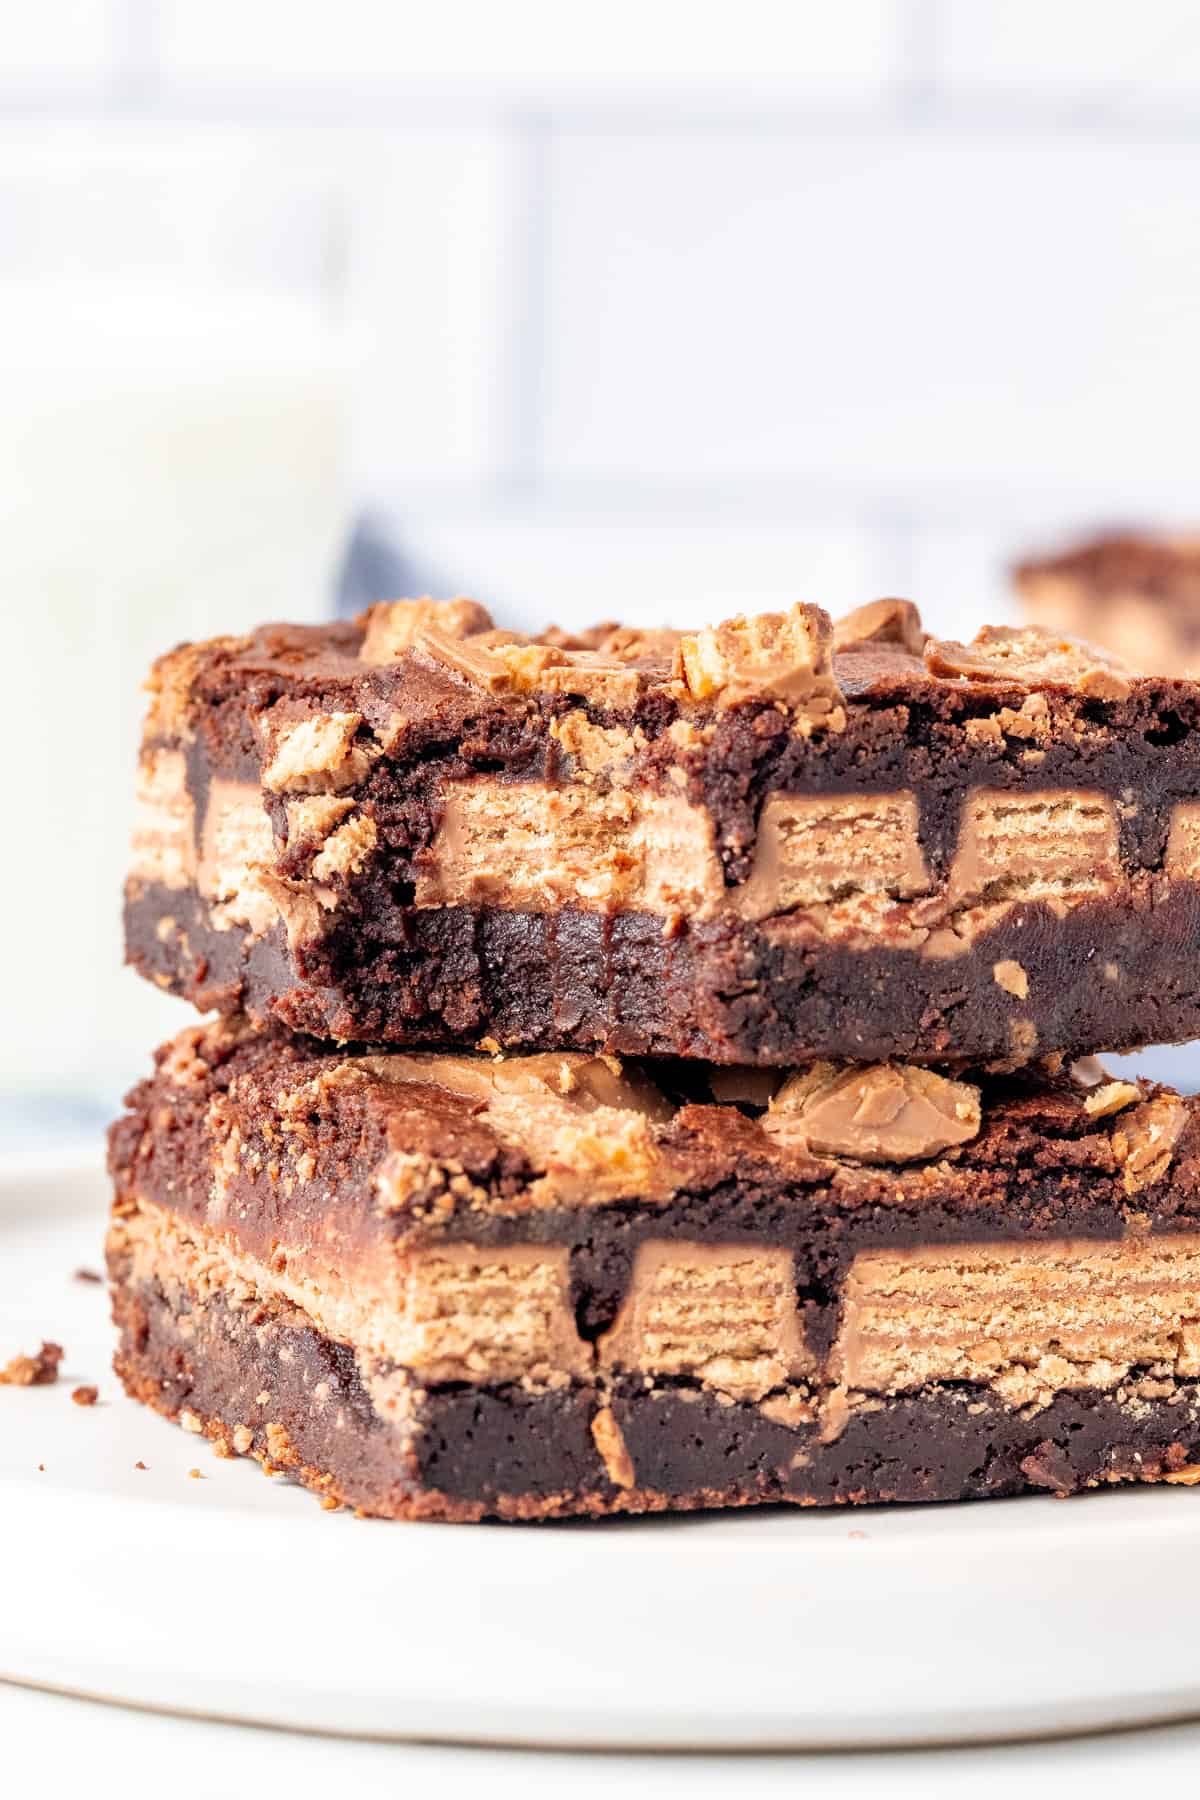
These Kit Kat brownies are thick, fudgy and stuffed with Kit Kats for a delicious crunch in the middle. They’re then topped with even more crushed Kit Kats to really take them over the top! Your favorite chocolate bar + fudgy chocolate brownie leads to a match made in heaven! 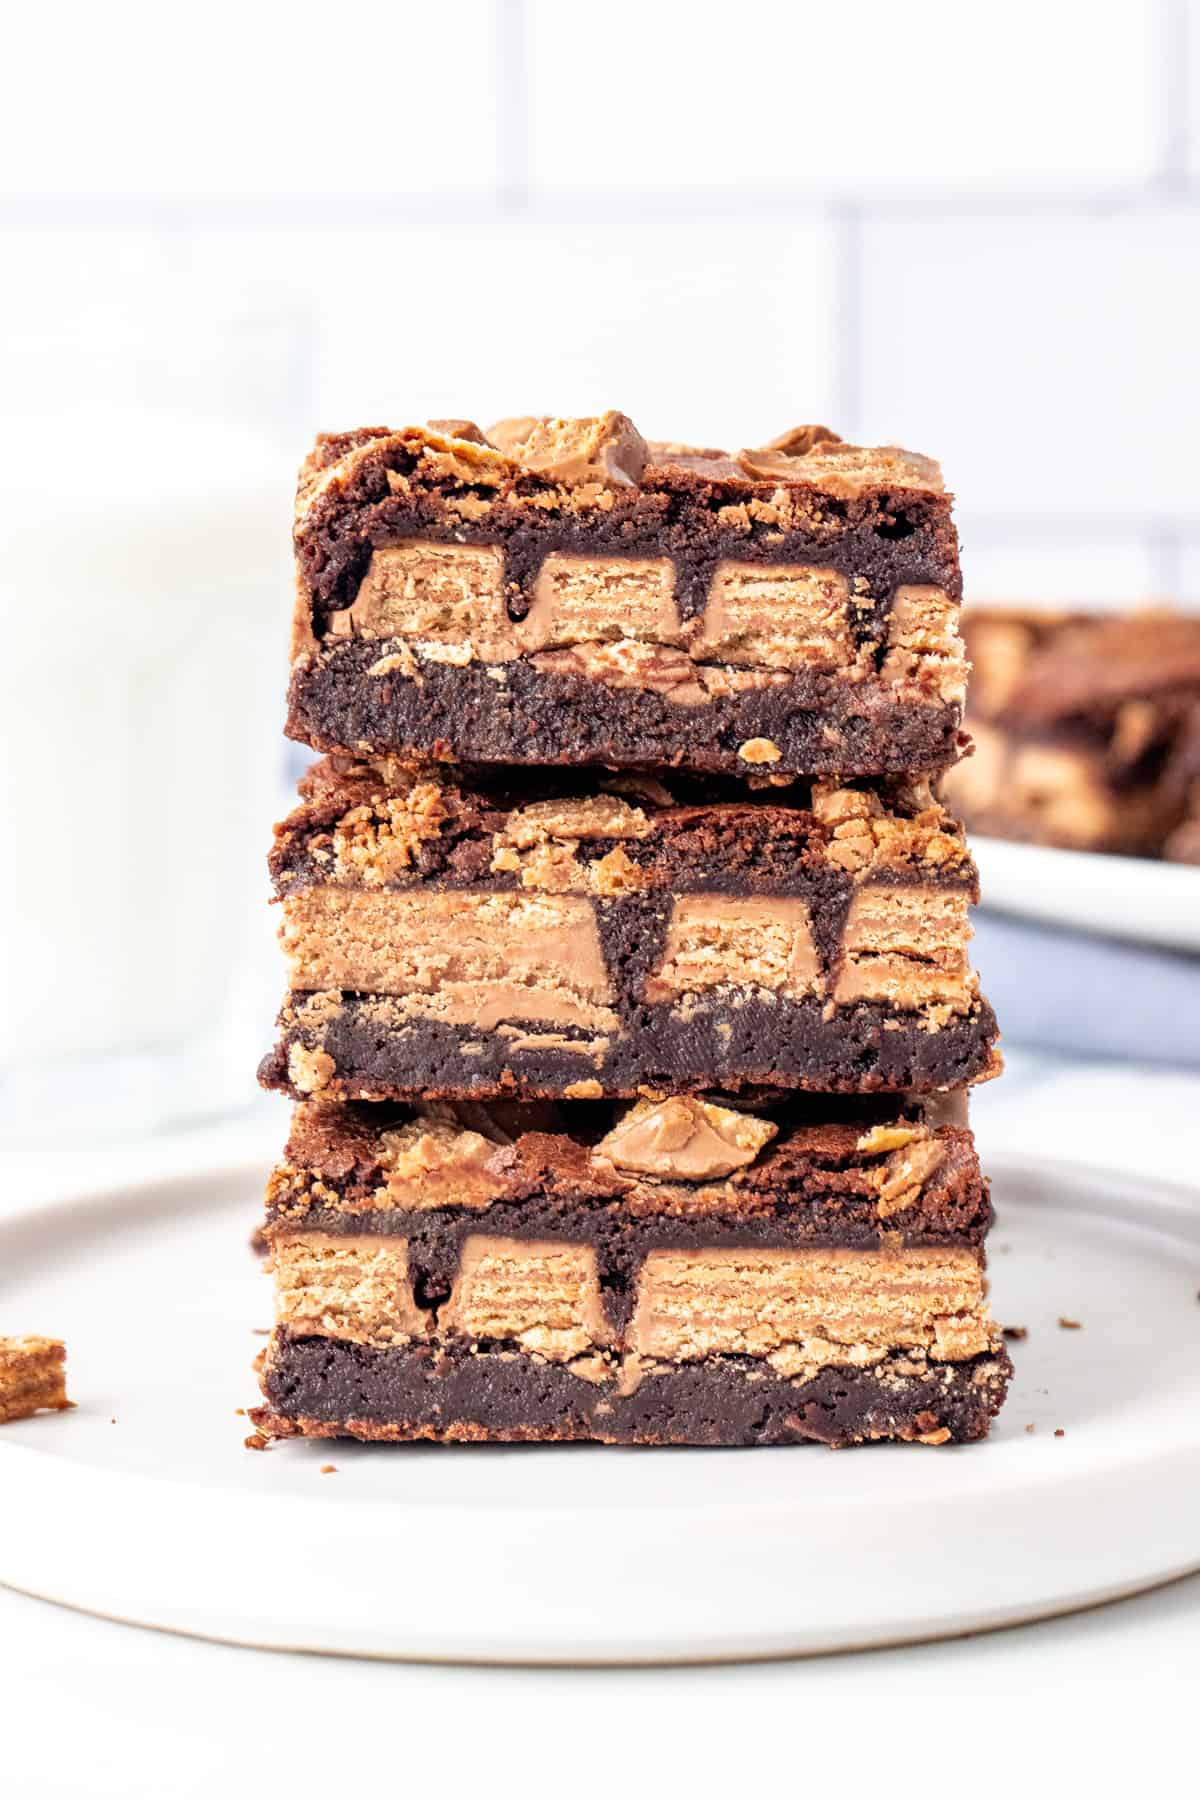
If you love taking your brownies up a notch, or if Kit Kats are your chocolate/candy bar of choice, then I highly recommend trying these Kit Kat brownies. You get a super fudgy, chewy brownie with crunchy Kit Kats in the middle. I love the combination of textures and the chocolate flavor is truly spot on. They’re also great to make if you have leftover Halloween candy.
But seriously, I’ve always bought the Kit Kats myself to make these.
Making the Brownies
For this recipe, we need to make extra thick brownies to ensure that there’s enough batter to fully engulf the Kit Kats.
- Star by preheating the oven to 350F (180C or 170C on a convection oven). I like to line my pan with baking paper or aluminum foil so that there’s an overhang around the edges. This way you can easily lift the brownies out of the pan and place on a cutting board when you’re ready to slice. This makes for much cleaner cuts. But yes, lightly greasing the pan will work too.
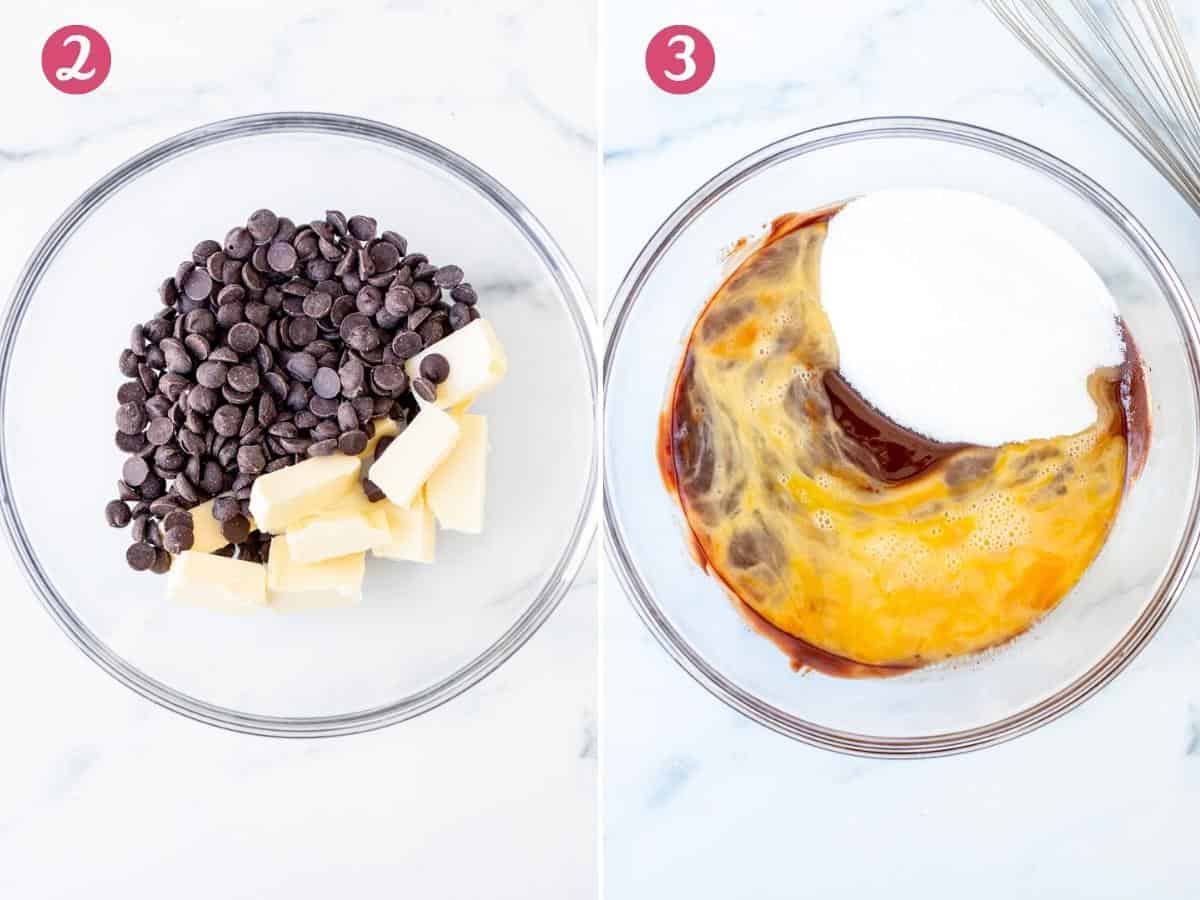
- Then you’ll melt together the butter and chocolate. Be sure to chop the butter into pieces and chop the chocolate very finely. Always melt them together slowly over low heat – either using a double boiler or in the microwave. If using the microwave, do short intervals (30-45 seconds) on medium power and stir in between each interval. After the first couple of intervals it won’t look like the chocolate has melted much. But trust me – trying to use a high power or longer intervals will lead to the mixture becoming grainy.
- Then you’ll whisk the sugar, whisked eggs and vanilla into the batter. It may look a little grainy at this point, but that’s ok.

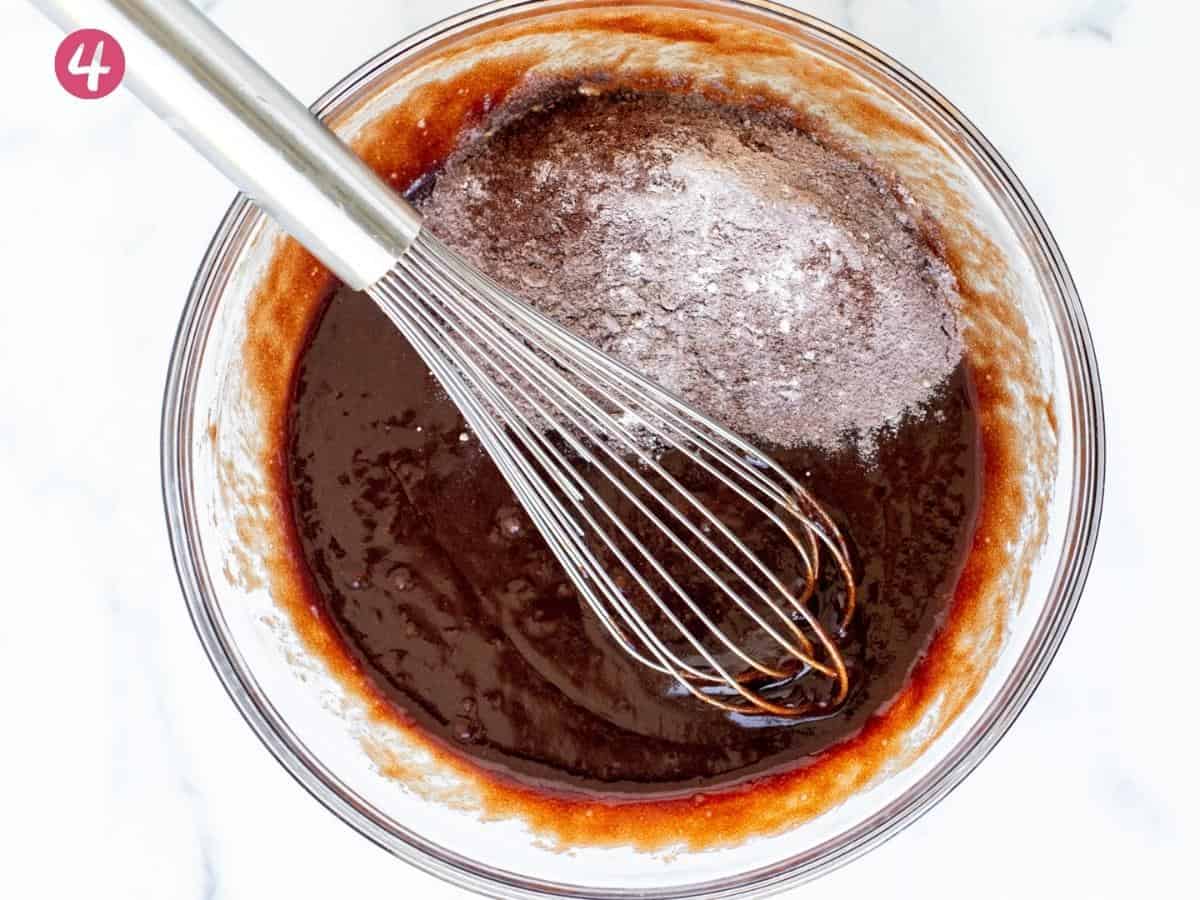
- Gently mix in the flour, cocoa and salt. If your flour or cocoa is lumpy, then I recommend sifting it in first.
- From here, it’s time to assemble the brownies.
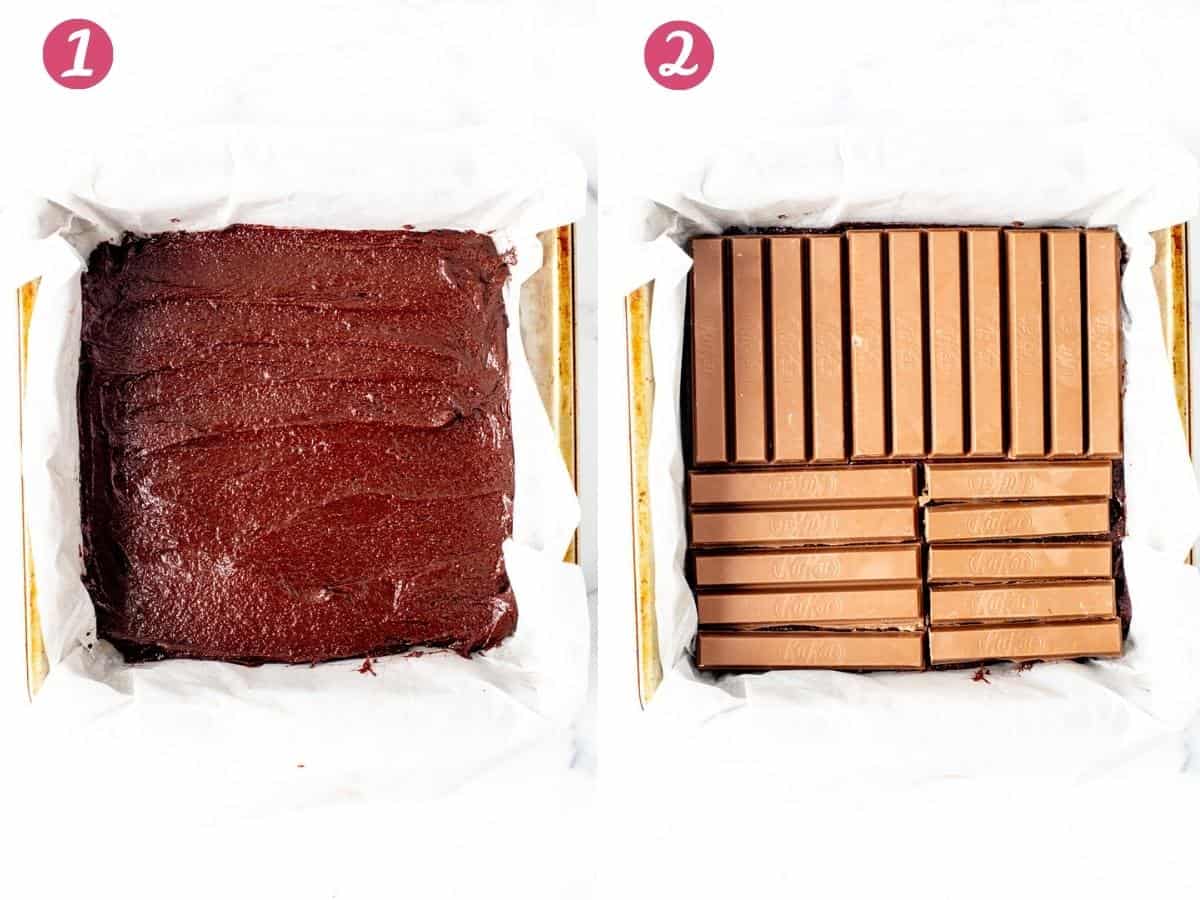
- Pour about 1/2 of the batter into the brownie tin and spread into an even layer.
- Then place a layer of Kit Kats on top. To cover the entire pan, you will need to trim some of the Kit Kats.
- Carefully drop spoonfuls of batter over the Kit Kats. This makes it much easier to cover all the chocolate bars.
- Then spread the batter to evenly cover the Kit Kats. Optionally, sprinkle a few chopped/crushed extra wafers on top.
- The brownies will need to bake for about 25-30 minutes, depending on how gooey you like your brownies.

Note: With this recipe, it’s extremely important to let the brownies cool 100% before slicing. Otherwise, you will not have clean cuts.
Pro Tip: I typically make my brownies with 70% dark chocolate. However, for this recipe I found it was too rich to go with the Kit Kats. Therefore, I recommend using 50% dark chocolate or semi-sweet
And if you need more decadent brownies, then be sure to try:

Kit Kat Brownies
Equipment
- 8x8 inch (20x20 cm) pan
Ingredients
- 1/2 cup unsalted butter (112 grams)
- 6 ounces 50% dark chocolate (170 grams), or semi-sweet, finely chop if using bars
- 1 cup granulated sugar (200 grams)
- 2 large eggs, whisked
- 1 teaspoon vanilla extract
- 1/2 cup all-purpose flour (56 grams)
- 1/4 cup cocoa (20 grams)
- 1/4 teaspoon salt
- 6 Kit Kat bars, I used 6 4-finger Kit Kat bars, including crushed Kit Kats on top
Instructions
- Preheat the oven to 350F (180C or 170C fan forced). Line an 8x8 inch (20x20 cm) baking pan with baking paper, leaving on overhang around the edges. Alternatively, lightly grease the pan.
- Add the butter chopped into cubes and finely chopped chocolate/chocolate chips to a large heatproof bowl. Melt using a double boiler over low heat. Or melt in the microwave in short 45-second intervals on medium power, and stir between each interval. Do not microwave on high power (which is often the default) as the chocolate can become grainy.
- Whisk in the sugar, whisked eggs and vanilla extract.
- Whisk in the flour, cocoa and salt. If the flour or cocoa are lumpy, sift them into the batter first.
- Spoon about 1/2 of the batter into the prepared pan and smooth into an even layer.
- Place a layer of Kit Kat wafers on top and lightly press down. If you want the pan entirely covered, you will need to trim some wafers. I fit 21 wafers, but I had to trim some.
- Carefully drop spoonfuls of the remaining batter over the Kit Kats. Then spread the batter overtop to cover the wafers.
- Chop/crush the remaining wafers and sprinkle over top of the brownie batter.
- Bake in the preheated oven for 25-30 minutes, or until an inserted toothpick comes out clean or with a few damp crumbs. Bake time will vary depending on ovens and how gooey you like your brownies.
- Cool the brownies completely before slicing - this will take about 3-4 hours. If you lined the pan with parchment, lift the cooled brownies out of the pan and place on a cutting board. Always slice brownies with a sharp knife and not a table knife.
Notes
- Chocolate: I recommend using 50% dark chocolate or semi-sweet. 6 ounces is about 1 cup of chocolate chips. I found using 70% dark chocolate made the brownies too rich to pair with the Kit Kats.
- Kit Kats: I purchased 6 4-finger Kit Kats. I used 21 fingers to stuff the middle of the brownies (I had to trim 5) and 1-2 wafers crushed on top. So I had a couple fingers leftover. Depending on if you want to cover the entire brownie layer and sprinkle wafers on top, you could potentially get away with buying 5 4-finger Kit Kats.
- Storage: Store brownies in an airtight container at room temperature for up to 4 days.
- Nutrition: Details provided are an estimate only and based on 1 brownie, assuming the recipe yields 12 equal-sized brownies and all 6 Kit Kats are used in the recipe to stuff the brownies and sprinkle Kit Kat pieces on top.
Nutrition


Followed the recipe exactly and it was perfection. Will use this brownie recipe from now on, with or without KitKats! Thanks!